Introduction

This guide will help you to replace the speakers if you are experiencing audio issues.

  1. dKTaxZjIUAsyAXlI
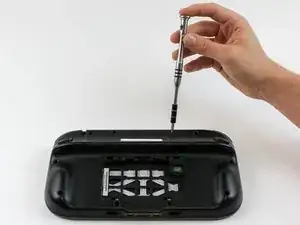
    • Place Gamepad face down and remove the two 4.7 mm screws with a Phillips size #00 screwdriver.

    tried to unscrew the 10 Tri-Wing size Y1 screw with my iFixIt toolkit

    unfortunately the tool is too “fat” and short, it cannot reach 4 screws on the corners of the gamepad.

    having the iFixIt toolkit and needing to purchase an additional slim screwdriver it’s a shame…

    Antonello Iannone -

  2. jQnDZvXRQvPOXfpG
    • Lift and remove the battery plate.

  3. qZN3PgyACtZ5Tw4i
    qZN3PgyACtZ5Tw4i
    nDakTZouVNlkKPKx
    o4RQ44lFuusIk4uU
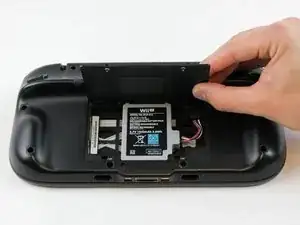
    • With your finger, press down and pull back on the battery connector plug.

    • Remove the battery from the battery case.

    Battery lifts up from the bottom not the top like the photo shows.

    Tyler Schommer -

  4. IlOVIxDuCaqAuWCO
    IlOVIxDuCaqAuWCO
    iNj1oAZjk4bbQA1g
    CfComIPOOBMDkYhT
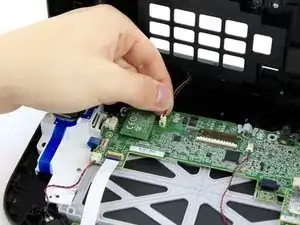
    • Remove 10 9mm screws with Tri-Wing size Y1 screwdriver around the outer case.

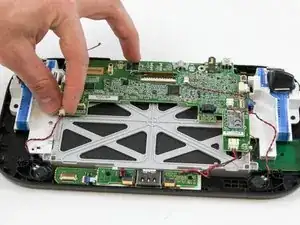
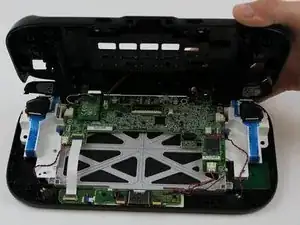
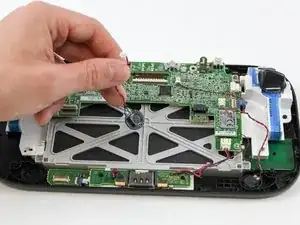
    • Lift up on the back of case.

    • Lift gently because the rumble motor in the back of the case is still connected by a cable to the motherboard.

    I used a small blade tip to life up on the black squares that covered the screw holes. Replacing them after.. I skipped that as it seemed impossible they would even stick back down.

    Chris -

    I am having trouble getting the two screws on the hand grips as the screws are too deep. What should I use to get them?

    [deleted] -

    I ended up having to buy some cheap amazon screwdrivers and are very disappointed

    [deleted] -

  5. MBTkFeprlTH425NV
    • Unplug outer case rumble motor connector from the motherboard with your fingers.

    • Do not pull on the wires as shown in this picture, they will likely break off. Pull directly on the plug (NOT the receptacle)

    Do not pull by the wires! If you do, you better be pretty good at soldering.

    Brandon -

    I agree. A circle over the plug would have been better as the picture looks like you just pull on the wires lol.

    Chris -

    Thanks for the comment. I did get a set of tweezers and the negative cable broke anyway. They really could have done a better job at using a different connector for that.

    Kristen Bartholomew -

    Great. Didn't pull on cord. Whole thing ripped off.

    August -

    Why in the world is this thing so tightly connected?

    Andrew Moore -

    Thanks for the comment. I did get a set of tweezers to try to pull it out but still ended up breaking the negative cable. They really could have used a better set of cables and connectors for this.

    Kristen Bartholomew -

  6. lQpCMiEjbuhZ6I1t
    lQpCMiEjbuhZ6I1t
    FVXXJNUkL6InP1Lb
    • With your fingers, unplug the left speaker cable from the motherboard.

    Speakers are connected with solder so removing them is not possible without requiring soldering later on. I left them both connected and instead of removing the motherboard completely I just "hinged" it carefully down to facilitate the work following step 18.

    dietcokediva -

    Thank you for offering this info because I spent 20 minutes between scratching my head and searching for any alternatives to just the image above, which had a wire nut/housing (and mine certainly did not). As I began to have an anxiety attack (

    Missy Leap-Courtney -

    Mine also did not have connectors for the speaker. But like mentioned above, I was able to do repair WITHOUT the need to unsolder the speaker wires. Thanks!

    Louis Bellanca -

  7. ToqplyUlLtDhitp1
    ToqplyUlLtDhitp1
    nvgg1TfBOOiNpeoE
    • Remove the right speaker cable that's connected to the motherboard with the tweezers.

    Note that on some units (presumably later ones), the speakers are soldered onto the motherboard.

    Ryan Finnie -

Conclusion

To reassemble your device, follow these instructions in reverse order.

Valentina Cerruty

Member since: 10/02/16

3435 Reputation

One comment

Awesome guide, replacement speakers worked flawlessly!!

Christopher Harris -