Introduction
Normal gloves don't fit my hands. They were affected by amniotic banding syndrome. I like my hands - they type quickly, allow me to fix things, and can do almost everything anyone else can do with their hands (there are some musical instruments that just do not work). But in winter I have a choice between bulky mittens that are only half-full, or cold hands.
So I bought a cheap pair of waterproof winter gloves, tore them down to understand how they work, and modified them to fit.
Tools
Parts
-
-
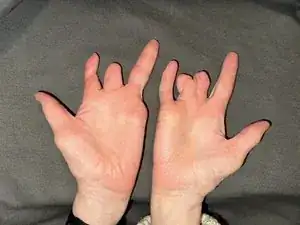
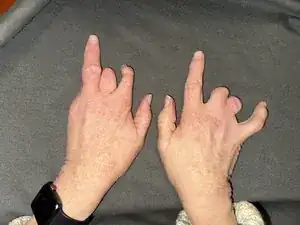
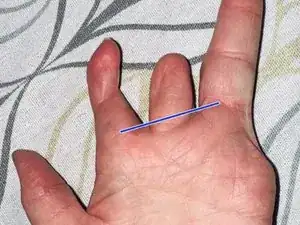
These are my hands. There are four issues:
-
I am missing my left pinky finger
-
The middle two fingers on my left hand are webbed together to the first knuckle
-
Four of my fingers are short (they all have every bone, but they are stunted).
-
On my left hand, the webbing between the index finger and the middle finger was removed so the fingers separation point is lower than normal.
-
In this guide I will modify a pair of cheap waterproof winter gloves to fit comfortably, without compromising waterproofing.
-
-
-
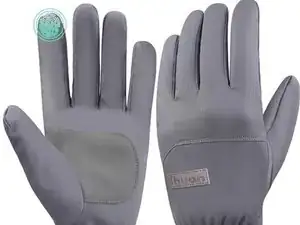
These gloves don't need to be expensive. The first ones you make may be less than perfect. The gloves I selected are shown here (see https://www.amazon.com/dp/B0BDLSWKJL?ref...)
-
Start by measuring the width of your palm (on the widest hand), and the longest finger to wrist length. The gloves you select need to be fit the larger measurement. Glove sizes vary so use the guide for the gloves you are buying.
-
For example, if one palm measurement is 18cm (7"), and the other palm is 20cm (7 3/4"), select gloves that fit 20cm (7 3/4") palm. Similarly for the finger length. It is easy to make gloves smaller but not larger!
-
A note on fabric:
-
I've knitted gloves before - they can be warm, but they get wet and don't block the wind well.
-
Leather gloves are difficult to sew, so I would avoid.
-
Synthetic fabrics like the ones these gloves use will block the wind and can be sewn fairly easily
-
-
-
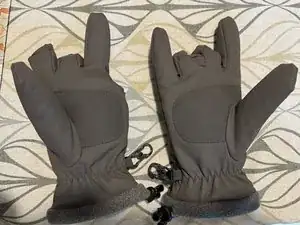
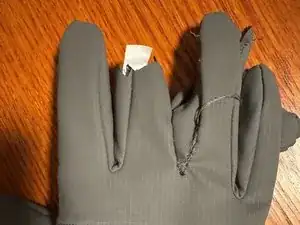
The fabric strips between the fingers are called fourchettes (see https://en.wikipedia.org/wiki/Glove for a description). So the gloves have a front, back and the fourchettes. Some gloves use a single fourchette running between all the fingers and the tips of fingers, like the equestrian gloves I modified to fit, shown here.
-
Winter gloves often have a separate lining, which could be fleece or knitted fabric. Effectively this means there are two gloves, one inside the other.
-
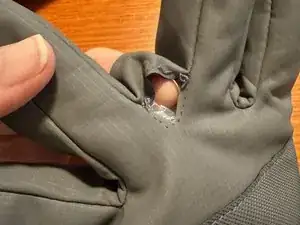
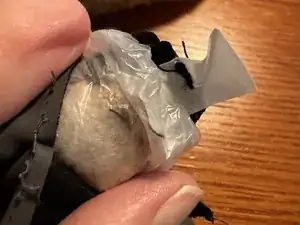
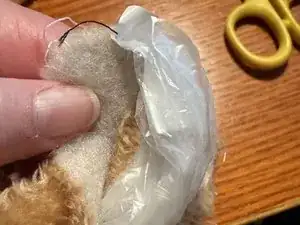
The surprising fact about the winter gloves I am modifying here is that they also have a plastic bag between the two layers. At the end of each finger, there's a plastic tab that goes through the plastic bag to connect the finger tip of the inner glove to the finger tip of the outer glove.
-
-
-
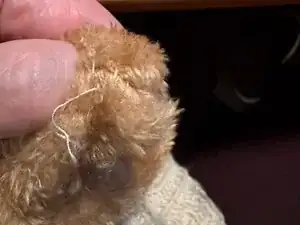
Start by carefully unpicking the side seam of a finger you need to shorten. Use your seam ripper, and be careful not to cut anything other than the thread.
-
Unpick the fourchette between webbed fingers.
-
Unpick most of the stitches for the missing left pinky finger. We will use the fourchette that ran between the pinky and ring fingers to cover the gap.
-
Unpick the plastic tab that connects the plastic bag to the outer glove finger tips
-
DON'T cut off any fabric yet!
-
-
-
The inner glove of these gloves is made of soft knit fake fur, which stretches more than the outer glove. It doesn't use fourchettes because the fabric has more give.
-
Carefully turn each glove inside-out. and repeat the steps for the outer glove:
-
Unpick the fingers that need to be shortened.
-
Unpick the stitches between the webbed fingers.
-
Unpick the plastic tab that connected the plastic bag to the inner glove.
-
DON'T cut any fabric yet!
-
-
-
It's critically important not to cut the plastic bag that is between the inner and outer layers of the glove! If it is cut, or pierced by the needle, or torn, the glove will no longer be waterproof.
-
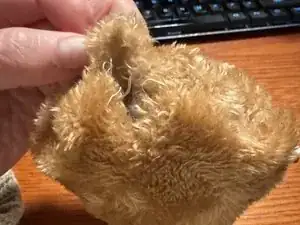
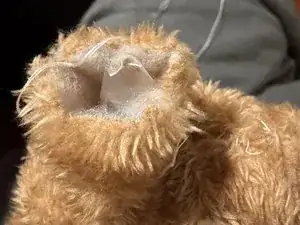
Start by carefully trimming the inner glove around the pinky finger. Allow a 3mm (1/8") seam allowance, and also consider that the inner glove needs to cover the end of the joint where the finger would be. Leave more fabric than you think you will need.
-
Push the plastic bag into the glove. Don't worry about the plastic tab for this finger.
-
Whip-stitch the inner glove closed to cover the gap where you trimmed the pinky finger fabric.
-
-
-
We opened up the inner glove to accommodate the webbing between the fingers on the right hand, but there isn't enough fabric to close the inner glove without making some changes.
-
With the glove inside-out, use some of the lining fabric from the left pinky to fill the gap. As before, use whip-stitch with a 3mm (1/8") seam allowance, and web those fingers.
-
-
-
Since there is no fourchette for the inner glove, this part is relatively easy.
-
Start by trimming the inner glove fabric to the right length for the finger. A little longer is fine. You will need seam allowance, and the lining adds bulk. It is easier to undo your work and trim a bit if needed than to make a finger longer.
-
Tack the end of the plastic tab to the tip of the finger - it won't be visible once you have sewn the glove together.
-
Use whip-stitch, with a 3mm (1/8") seam allowance to close the ends of the fingers. If you trimmed them with a curve, the inner glove should look reasonably good.
-
-
-
Now you can turn the glove the right way out again!
-
We use the fourchette that had been on the inside of the left pinky to cover the gap.
-
Trim the front and back of the pinky outer fabric.
-
Push the lining and plastic bag into the glove to make it easier to avoid sewing them - no need to keep track of the fingertip tab.
-
Whip-stitch the gap closed as before.
-
-
-
Use a small scrap of fabric from the missing pinky to fill in the gap between the webbed fingers. I also used a small plastic card to avoid putting the sewing needle through the plastic bag.
-
Use whip-stitch (or backstitch if you can manage it) with a 3mm (1/8") seam allowance.
-
Repeat front and back.
-
-
-
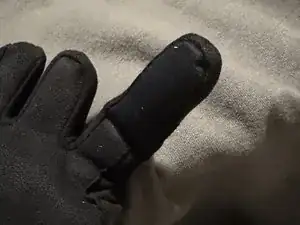
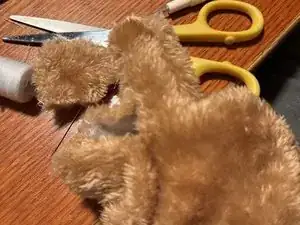
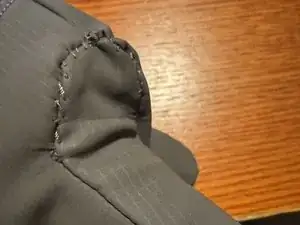
Carefully trim the fingers to the right length, allowing seam allowance. Again, too long is better than too short; you can always unpick and redo if needed.
-
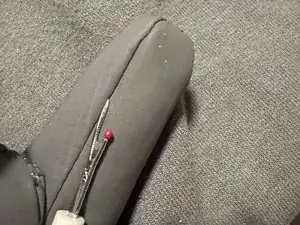
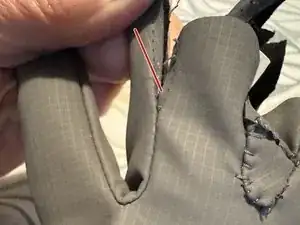
The fourchettes will need to be trimmed to form triangle shapes. The front and back of the gloves are slightly rounded and will meet in at the tip. The red line in the second image shows where to cut the fourchette (fold it in half vertically then cut).
-
If the gloves you are modifying have a fourchette that runs in one long strip between all the fingers, you may want to use this approach anyway to avoid unpicking the whole length or creating a seam at the tip of the fingers.
-
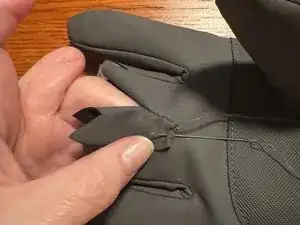
Sew the plastic tab to the tip of finger (front or back), and push the plastic bag into the glove a bit so it's less likely to get in the way.
-
Carefully sew the fourchettes to the front and back of the glove, and sew the tips together. I used whip-stitch with a 3mm (1/8") seam allowance.
-
-
-
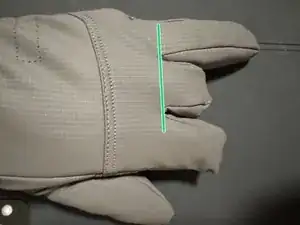
The issue I didn't fix was that my left index finger has been surgically separated from its neighbor, removing about 2.5cm of tether. While this has been really helpful with typing, it does mean that the gloves feel webbed on that hand - the index finger has less freedom of movement.
-
If I was to do it again I would lower the fourchette between those fingers to enable the left index finger to move more freely.
-
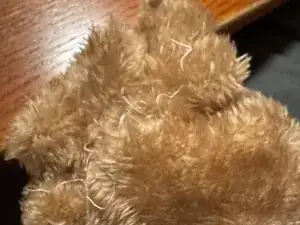

And now you have a pair of gloves that fit perfectly!