Introduction

Follow this guide to replace the head strap on a Valve Index VR headset.

Power off and unplug your Index before you begin your repair.

  1. HS44Zki51H2VDFW2
    • Twist the eye tube relief knob clockwise to fully extend it.

  2. LEW1ePi5WDSU3KZX
    LEW1ePi5WDSU3KZX
    sWNtVUJKWTwAhFZR
    qCn4is6HbviRxBxb
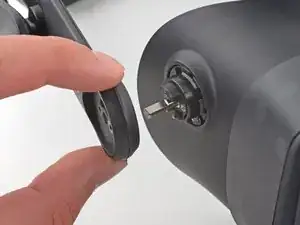
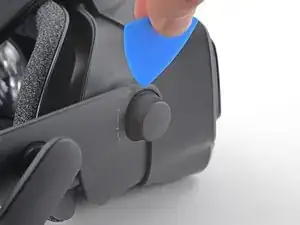
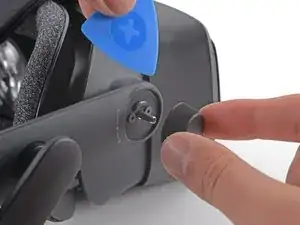
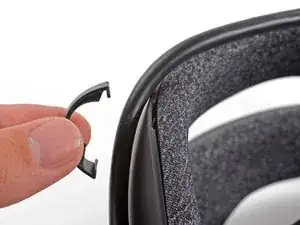
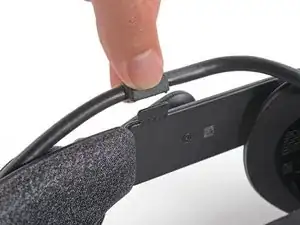
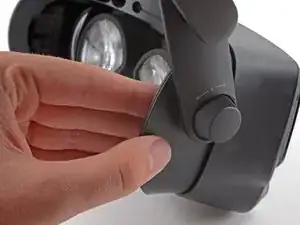
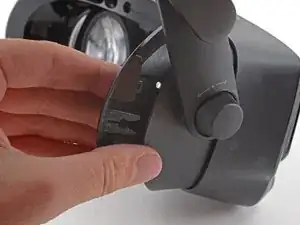
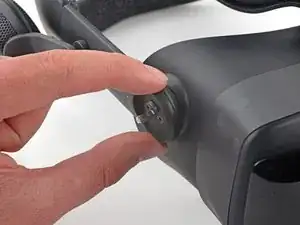
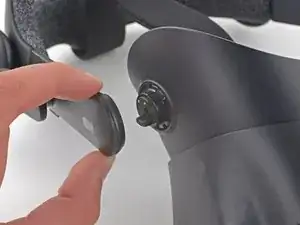
    • Insert an opening pick between the eye relief knob and the head strap.

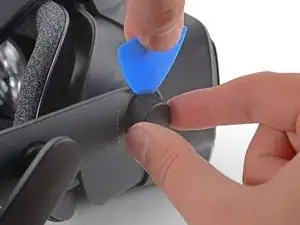
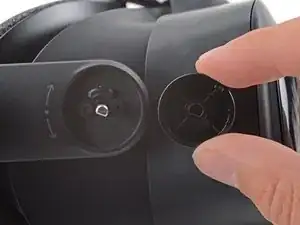
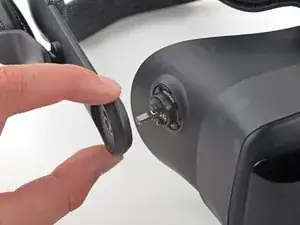
    • Gently pry with the opening pick while pulling the eye relief knob off until it is removed.

  3. n4qMqOcov5SyWqkH
    • During reassembly, ensure the eye relief knob is aligned with the shaft before pressing it on.

  4. 1v6MrVGCDlfnwSvr
    1v6MrVGCDlfnwSvr
    MXEwSPXLipDlNVW3
    JJT5GCa1x3DyNCGT
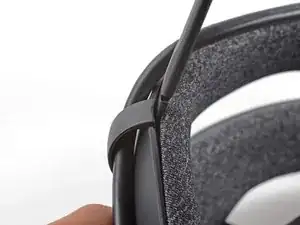
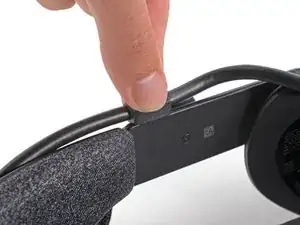
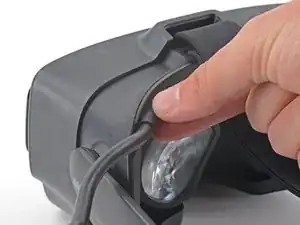
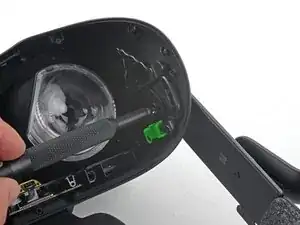
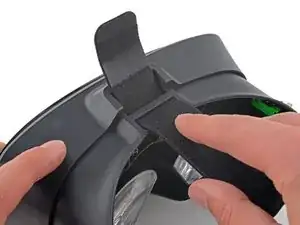
    • Insert the flat end of a spudger in between the bottom of the head strap clip and the head strap padding.

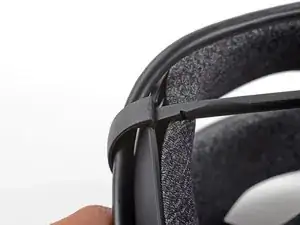
    • Pry up on the head strap clip until it is unclipped from the head strap.

    • To reinstall, first locate the recesses on the head strap for mounting the clip. Next, align the clip with the recesses, verify the tether cable is threaded through the clip, then simply press the clip back into place.

    Do you sell replacement clips?

    TomCatT -

  5. tOH1gFNEuMpQDJKT
    tOH1gFNEuMpQDJKT
    VByiidwDNcbUPiNY
    • Use your hand to gently pull the face gasket straight off of the headset.

    • The face gasket is held in place by four magnets that secure to screws in the face bezel.

    • Before installing a face gasket, ensure the four screws securing the face gasket bezel are installed. Otherwise, the face gasket will not stay in place.

  6. 3aROd5KcPVsfPHKy
    3aROd5KcPVsfPHKy
    Cf2N1rWE4wenPNiQ
    • Use your fingers to pull the tether cable straight up off of the head strap cable guide.

  7. JJTEad1WoMc4RpTY
    JJTEad1WoMc4RpTY
    DdAuAjCk1RrBQRIH
    • Pull the tether cable straight back out of the headset.

  8. ZMeSOOQsWQfbOIwH
    ZMeSOOQsWQfbOIwH
    djVqNMD4tOXDkemg
    • The head strap can be removed without removing the face gasket bezel if you have the correct length driver. If you are using your iFixit T6 driver, skip this step and proceed with removing the face gasket bezel.

    • Your T6 driver must have a shaft longer than 18 mm (0.7 in) and an overall length less than 140 mm (5.5 in).

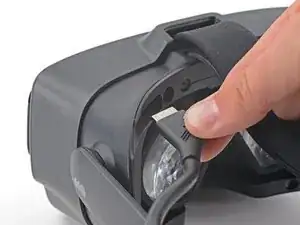
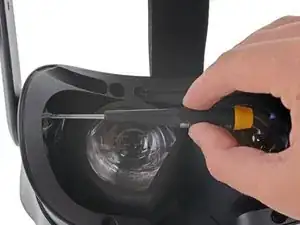
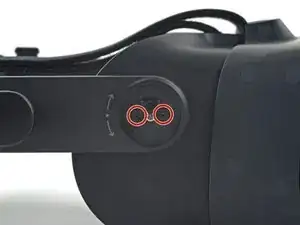
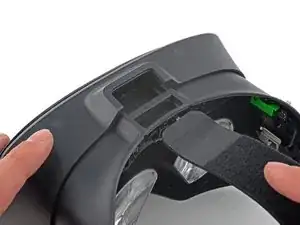
    • Insert your T6 Torx screwdriver into the hole on the face gasket bezel to remove the captive screw securing the left side of the head strap.

    • Skip to step 12.

    Use a T6 driver on the screw securing the left side of the headband to the device. Usage of a T5 bit will damage this screw and make it impossible to remove.

    Arc7ic Kenai -

    Where may I find a replacement screw for the left side?

    TomCatT -

    I need a replacement screw for the left side as well. :(

    beaudamion -

    ifixit kit did not come with t6 torx screwdriver so had to buy it separately.

    FIXITWILLY -

    What kind of screw is located where the red circle shows? I know its supposed to be a captive screw but it is missing on my right side. I just need to know the specs so i can order a replacement.

    Josh Gordash -

  9. Q6vnPQLACExUJPAm
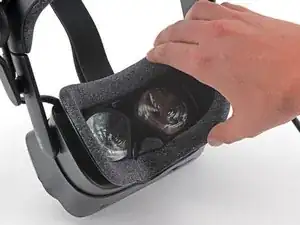
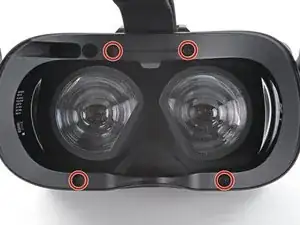
    • Use a T5 Torx screwdriver to remove the four 6.0 mm screws securing the face gasket bezel to the headset.

  10. iwWfpKIFsvfVkEtO
    iwWfpKIFsvfVkEtO
    bVgrOVqS1rQCfvuh
    • Do not try and pry the face gasket bezel off, or you will damage the headset.

    • Grab the left edge of the face gasket bezel with your hand and slide it off of the headset.

    • During reassembly, visually verify the clips on the face gasket bezel are aligned with the headset before sliding it into place.

    This was a little tricky. There's a latching mechanism inside the bezel that requires squeezing the sides a bit to unlatch. In exactly the same hand position as the photo, you need to squeeze. Absolutely don't pry it off or it will snap.

    Scyntrian -

  11. sEjc5DiZuDrNKQvm
    sEjc5DiZuDrNKQvm
    ge3npSLPOFEHemeC
    AJyBuvsEFM4GKU44
    • Repeat the previous step for the right side of the face gasket bezel.

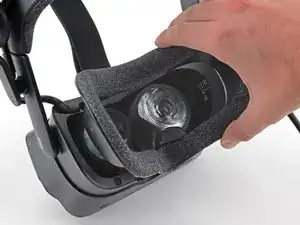
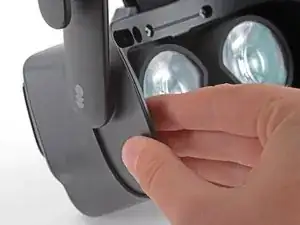
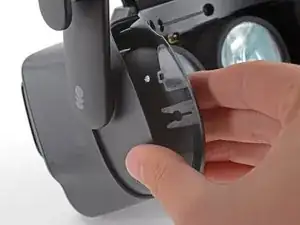
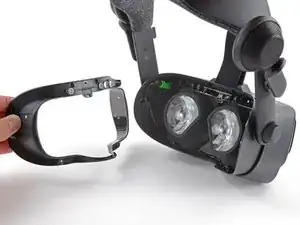
    • Remove the face gasket bezel.

  12. 3KnWsOCx6l6kBskd
    • Use a T6 Torx screwdriver to remove the two 6.6 mm screws underneath the eye relief knob.

    these are T6 screws, not T5. a T5 will drive them, but it's not ideal.

    Choccy -

    Theeeeese are the two screws that i found "after 3 years today" that comes loose over time of taking the headset on and off. And it is this that causes the sound glitching problem in the earphones. tried to thighten the earphones and cleaned them 100s of times. And today i saw this. So if you have problems with sound. thigten the screws on strap (left one is harder) But result is night and day.

    jonthe1982 -

  13. qSeHVOOMSn3AsWyA
    qSeHVOOMSn3AsWyA
    Pkw1mbonNFQGtUmO
    • Pull the right end of the head strap straight off of the headset.

    • During reassembly, ensure the head strap is correctly positioned on the alignment post.

  14. JVYqGHrsIEdVljHj
    JVYqGHrsIEdVljHj
    FLLiIPYfis6kMAni
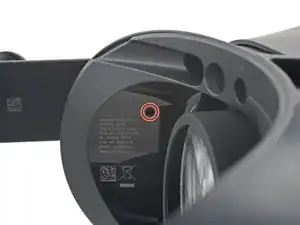
    • Use a T6 Torx screwdriver to loosen the screw securing the left side of the head strap to the headset.

    • Don't let this screw fall inside the headset. It is not a captive screw and is difficult to retrieve.

    • If the black plastic cap surrounding the cap limits access, use an opening pick to remove the cap.

    It looks like a step is missing for removing the inner lining of the headset

    Nirvash -

    Thanks for noticing this! I am correcting it now.

    Sam Omiotek -

    this is also a T6 screw, not T5.

    Choccy -

    This is a T6 screw and there is a plastic cap/ring that needs to be removed in order to loose the screw.

    https://imgur.com/kJN2rj7

    JimMcBubbles -

    Yes had to find a T6 bit that was not included in the kit

    chad harding -

    in trying to attach the new strap this screw won't tighten all the way back in, it also won't back back out

    kentaro wingren -

    use the t6 with the hole in it

    Tanther Panther -

    the proper bit was included in the kit, but its the t6 torx with the hole in it idk what that's called, but my screw was slightly stripped and wasn't screwing back in all the way and I was wondering why it wasn't tightening, luckily even after applying pressure and twisting the wrong bit in there for about 30 turns the bit with the hole worked for securing the screw. there is also a small plastic cap/ring that you can spudge off to make it easier

    Tanther Panther -

    If the screw is lost how do I replace it? I lost the screw.

    jbonomi -

    I edited the guide to add the missing step for removing the plastic cap here. The screw cannot be removed until you pry it off.

    Firon -

    if having a too short/ to thick t6 driver is an issue the small collar that limits ability to get to the t6 screw is only held by friction fit so can be removed with tweezers to allow a fatter t6 driver in to remove the screw as hole is wider ~

    Elair -

    Does the T6 Screwdriver need to be a certain length to get to the screw inside that hole? I think mine is too short and is bumping the outside of the plastic circle, not reaching the screw inside. Idk what else I could be doing wrong here

    Joseph Stardust -

    Does anyone know the size of the screw I lost mine

    Alexander Sluss -

  15. SJPM2YeBjMyxPFiX
    SJPM2YeBjMyxPFiX
    YRotpnrJpHyGjX3B
    • Pull the left end of the head strap straight off the headset.

    • During reassembly, be careful not to let the screw fall into the headset. Use your driver to hold it in place from behind if necessary.

  16. WEctAAiAFAbaZCSQ
    WEctAAiAFAbaZCSQ
    2lavQt3xGIWrnmLC
    • Slide the head strap band out from the headset.

    • The head strap is now fully removed.

    reassembly tip, put your spudger in the front part and gently wiggle the STRAP it as you push it in, this will gently angle it up and around. https://prnt.sc/XnReN20WAKcV

    Tanther Panther -

Conclusion

Compare your new replacement part to the original part—you may need to transfer remaining components or remove adhesive backings from the new part before installing.

To reassemble your device, follow the above steps in reverse order.

Take your e-waste to an R2 or e-Stewards certified recycler.

Repair didn’t go as planned? Try some basic troubleshooting, or ask our Valve Index Answers community for help.

Sam Omiotek

Member since: 25/02/19

81109 Reputation

7 comments

I'm having troubles with my left speaker, I just got done replacing it, is this the next step I wanna try in troubleshooting it? The last thing I want to do is buy a whole new headset? It cuts out when the strap moves. I've already replaced the cable as well.

Who? -

Try to tighten left part of the strap (step 14)

Анатолий Прилуцкий -

When will they be in stock again

lightning gaming -

Any word on restocking for this part?

Charles Allen -

No stock for 2 Years now. Great...

Ricky Bobby -

You can get a refurbished one on tundra labs

Alicia Johnson -

If you go to tundra labs website. They have refurbished head straps and stock. I just got one and it's basically like new. Hope this helps..

tunergy takedown -