Introduction
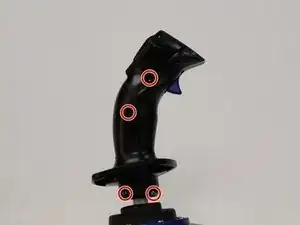
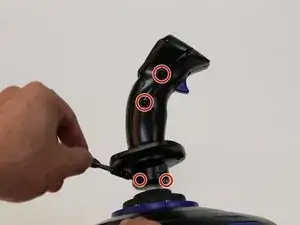
The goal of this guide is to show how to remove the J1 screws from the joystick exterior.
Tools
To reassemble your device, follow these instructions in reverse order.
4 comments
there are small plastic pieces in mine, when i took it off now my joystick wont work or turn properly and I havent found any guide to where these pieces go??
beardy1 -
I'm wondering the same thing right now. That round spring with the arms on it and the black lC shaped plastic piece.
On the bottom of the stick assembly you will see a small slot head screw like indent. That is a built in manual stop, rotate 45 to 90 degrees in the loosening direction, it will un lock
Edit: I was trying to include 3 pictures of the assembly and install but no luck sorry
I found this link which shows where that black plastic piece goes: https://channellfd.com/t-flight-hotas-x-...
You know how there are three holes on the bottom of the stick, but only two screws? It goes in the third hole.
the bottom 2 screws are slightly longer
skyfish -