Introduction
T.E.'s PO-33 (and other Pocket Operators) have a fragile battery compartment that can break easily. They also don't always contact the batteries well and you can lose power.
Mine, due to neglect, had battery corrosion that broke the terminal tabs. So I opted to remove the existing "compartment" and add a solid one with an optional retainer clip.
Hope this helps someone extend the life of theirs. These PO's keep getting more expensive.
Tools
Parts
-
-
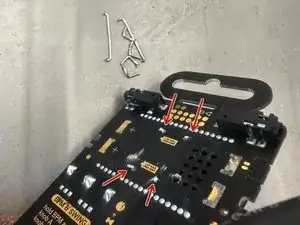
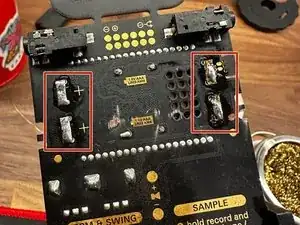
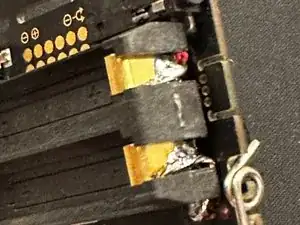
Break off the battery contacts by wiggling gently. A stiff breeze might take them off too.
-
Using a cutting wheel on a rotary tool (e.g. Dremel), cut the brackets off in multiple steps.
-
First cut off the long horizontal bar (furthest from the PO). This gives your cutting wheel access closer to the board.
-
Then cut as close as you can to the surface. Take care not to grind the board itself. You can see I accidentally took a bunch of the enamel off near the bottom left post in the image.
-
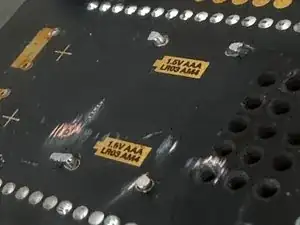
If you're using foam tape, it just needs to be low enough to fit the tape. The gap from foam tape is good because the built in speaker holes are behind the battery. (Seen on the right side)
-
-
-
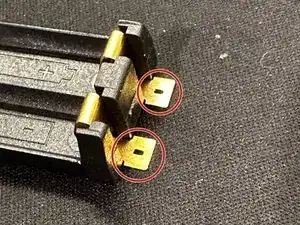
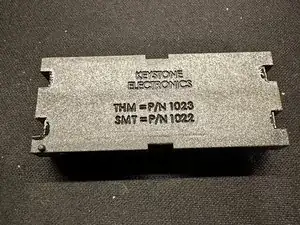
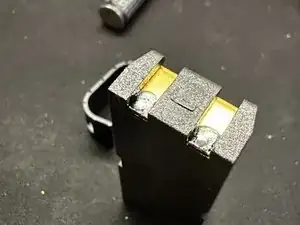
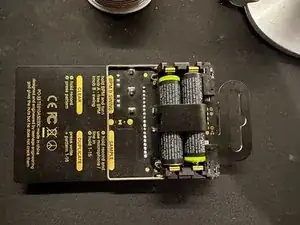
The battery holder I used is meant for surface mounting. Bend and break off the four (4) flat parts. Cutting might work too.
-
Tin each of the four (4) terminals
-
-
-
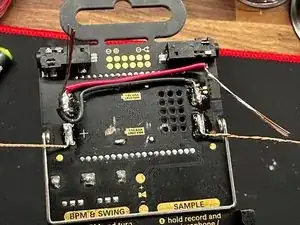
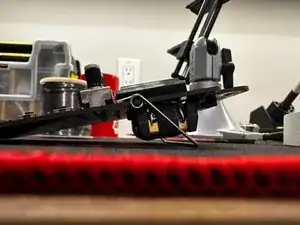
Measure out some length of wire routing it as pictured.
-
The PO expects both batteries to face the same way! Like most battery compartments, this one alternates which side the negative goes on.
-
I had the bottom ones fully stripped because they didn't need to cross.
-
Tin the battery pads.
-
Tin your wires
-
Solder the wires as pictured
-
Add a piece of foam tape
-
-
-
When you're happy with the fit and the wires, remove the backing of the foam tape.
-
Stick the battery holder on. If you're not confident with your soldering, solder on side before sticking the holder onto the board.
-
The tinned wires and pads will make it really easy to get a good solder joint and quickly attach them. Needle nose pliers or tweezers can help push the wires into the somewhat narrow contact recess.
-
After all four (4) wires are connected, trim the wires
-


Insert batteries and make some beats!