Introduction

This guide will show you how to replace the auxiliary port, also known as an audio jack or headphone jack, in a Microsoft Surface Laptop Studio. This guide is very simple and doesn't require many tools. You may need to replace the auxiliary port if you hear static in your audio device or if it just isn't working. This repair should only take around 15-20 min.

  1. disBkJLYKsWyOnFC
    • Remove the rubber cosmetic strip along the outside edge of the back plate with tweezers.

    Is this strip tape or it metal? Is there replacements for it? I habe been trying to find it but I can only find tape as an alternative to this part.

    Luis Ruiz -

    It appears to be thin plastic with an aluminum coating on the outside. It's easy to remove by poking into the corner by the hinge with a set of tweezers-- the tweezers will pass right through.

    Michael Montalban -

    Ok and how do you reattach it when you're done? I mean is it glued on or how does that work?

    Rika -

  2. DymSIV2GPBF4IXwp
    DymSIV2GPBF4IXwp
    lkFYS5RPvf51M4NF
    • Remove the two rubber feet on the lower case with an opening tool.

  3. BQeCc2EHYUb4frIq
    • Remove the two screws with a T3 Torx screwdriver.

  4. c3A3HPFhTiu26TnT
    • Remove the seven screws securing the lower case with a T3 Torx screwdriver.

  5. kRIiVor6o5EqdNoD
    kRIiVor6o5EqdNoD
    diJVsnGVIsMcPrlE
    • Lift the lower case gently and set it above the device.

    • Take care not to strain the battery cable as you move the lower case.

  6. Gvn6r4ECNvqRSHDf
    Gvn6r4ECNvqRSHDf
    5bYNswAE1yRwwxwR
    • Disconnect the battery cable by lifting the pull tab until it "clicks."

  7. YSCH6MJcTIBRjSOM
    YSCH6MJcTIBRjSOM
    H6yyO3amJ6Hi4SYx
    YgAcvPytwNjFMhsJ
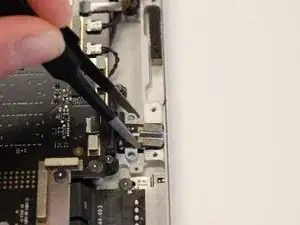
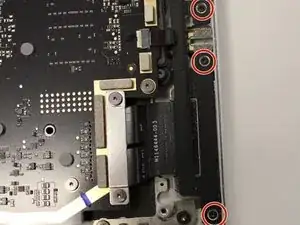
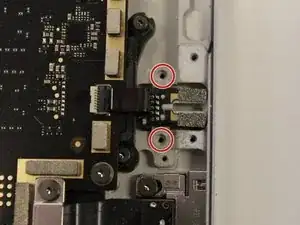
    • Remove the left I/O bracket by unscrewing the the 3 M1109237 Screws with your T3 Torx screwdriver.

  8. BJxQcnJrqU6RQjE3
    • Remove the two M1168360 screws on the headphone jack with your T3 Torx screwdriver.

  9. kfBO1ev6p2ZopMcM
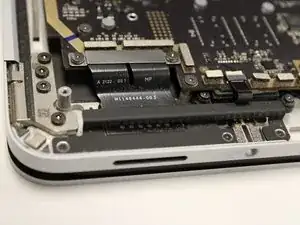
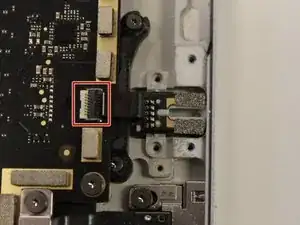
    • Flip up the headphone jack's ZIF connector locking flap.

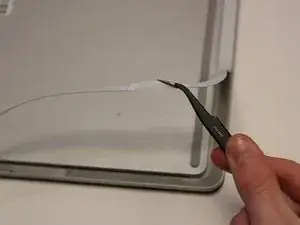
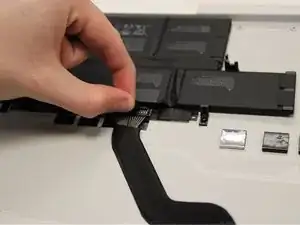
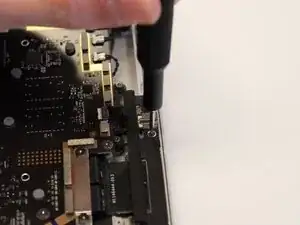
    • Remove the ribbon cable from the port.

  10. JsOuEZqxlGFI4s2u
    • Lift the headphone jack up and out with your tweezers.

Conclusion

To reassemble your device, follow these instructions in reverse order.
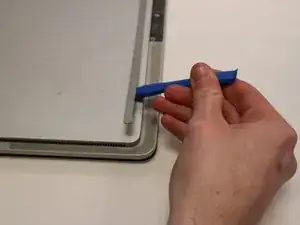
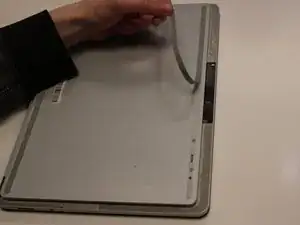
Nate Ball

Member since: 14/02/23

690 Reputation

0 comments