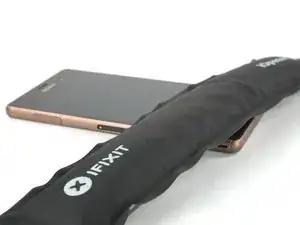
Introduction

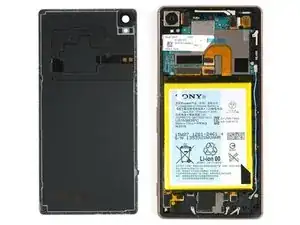
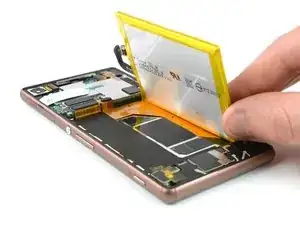
Use this guide to replace the LCD & Digitizer of your Sony Xperia Z3.

To reassemble the device, follow this guide in reverse order and apply new adhesive where needed.

  1. IBVhVNAcgUXkELdR
    IBVhVNAcgUXkELdR
    6JK4olH1QPKLLwOa
    HUQ2FtAZb6BU55OX
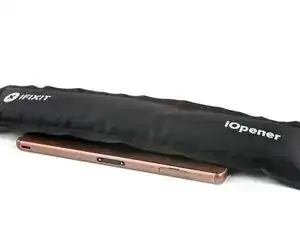
    • Heat the back cover of your Xperia Z3 to loosen the adhesive underneath.

    • If you use an iOpener, follow these instructions for use.

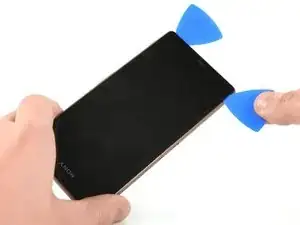
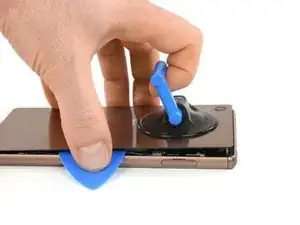
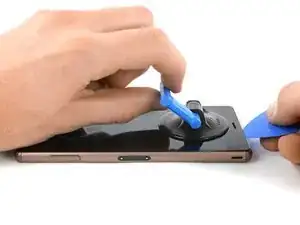
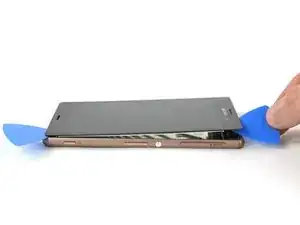
    • Lift up the back cover with a suction handle and put an opening pick in the gap.

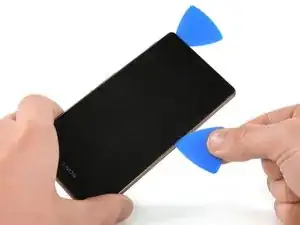
    • Move the pick carefully around the edges to loosen the adhesive on every side of the phone.

    • Don't put the pick in too deep under the back cover to not damage any parts inside the phone.

    How hot (how many C) should the iOpener be? I think it would be safer / more accurate to heat the iOpener in an oven with accurate temperature control.

    Magnus Myklebost -

    Careful here. The back cover cracked in two places. Once when I exerted pressure with the suction handle, and in the corner when moving the pick around the edges- even though I was very gentle. The battery was adhered firmly to the back cover.

    Joseph Doyle -

    I cracked the back cover instantly. Make sure to buy a spare one before opening!

    raffaelecaroppo -

  2. gAPs2OKNE2jFrYEo
    gAPs2OKNE2jFrYEo
    ZWXMfEZUoFXZNtsY
    • There are two adhesive strips in the center of the phone connecting the rear case to the battery, you'll need to remove them to open the phone.

    • When the edges of the cover are free from adhesive, tilt it to allow access to the battery tabs.

    • Use tweezers to pull the two black adhesive strips out of the phone but don't pull just yet.

    Careful during this bit. My old Z3 back cover couldn’t take it and split into lots of pieces (probably weakened over the years!). Just order a replacement for £3 off ebay before doing it ;-)

    Bruce Wiggins -

    Merci pour ce tuto. Excellente procédure. Travaux réalisés en 20 minutes sans aucun problème. Attention: au remontage, il n'y a plus d'adhésif sur la batterie, la coque arrière peut éventuellement tomber. Je ne l'ai pas fait mais il faut peut-être mettre un petit double face sur la batterie.

    Patrick Prel -

  3. InbaMOV3DWrHJVIa
    InbaMOV3DWrHJVIa
    meP2FFCEEUXJ2oL1
    • Gently pull out both of the adhesive tabs out of the phone, parallel to the rear cover.

    • If the adhesive tabs break, try to use a thin flat plastic tool such as a plastic card to remove the last of the adhesive. If the adhesive is stubborn, heat it with an iOpener or hair dryer and pry again.

  4. RaESkTApChpTNMDs
    RaESkTApChpTNMDs
    Fut6DNQrqXXALvsP
    • After pulling out the adhesive tabs, you can lift the back cover and remove it.

  5. oDgQiiMN4YTyHo2E
    oDgQiiMN4YTyHo2E
    jgVRsCU2JSMV5Ufd
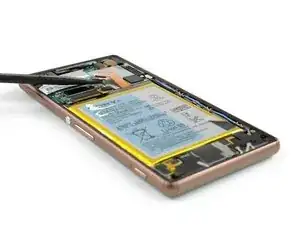
    • Unplug the battery flex connector.

    • Use a tweezer to gently pull off the adhesive strip on the bottom part of the battery.

  6. RKmlYKT6k54PTcuC
    RKmlYKT6k54PTcuC
    XUTjqjATMmWYD61p
    • Use a spudger on the left side of the frame to lever out the battery.

    • Be careful with the spudger - there are cables beneath the battery!

    • Remove the battery.

  7. JtgRW6HGhYjucRKH
    • Unscrew the two Phillips #00 screws.

  8. B3xtXod3O1wkWGKI
    B3xtXod3O1wkWGKI
    BsNQZYUMXXeRFC4p
    4WLACPcXBxg4Tmx1
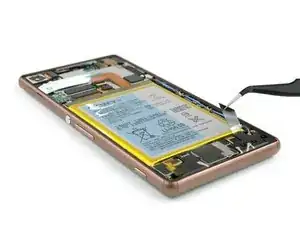
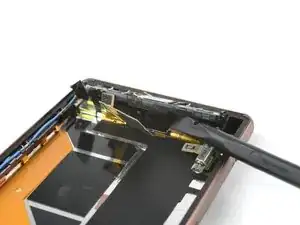
    • Unplug the antenna cable with a tweezer.

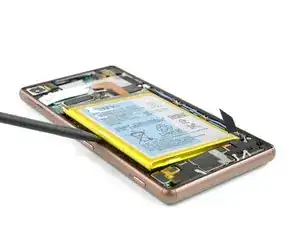
    • Use a Spudger to unplug the main flex connector and the flex connector of the vibration motor.

  9. 5RcrlIV5wjBnvOCA
    5RcrlIV5wjBnvOCA
    SOVCemy1kcQ4KvDS
    tHMgLiIrcwwrlFxb
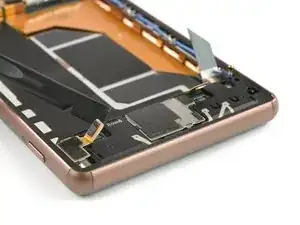
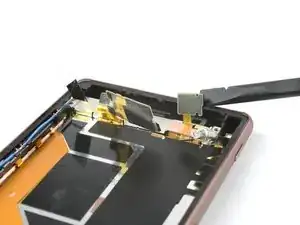
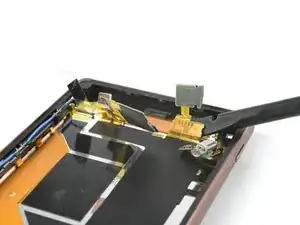
    • Remove the cover on top of the loudspeaker assembly.

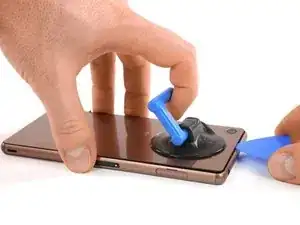
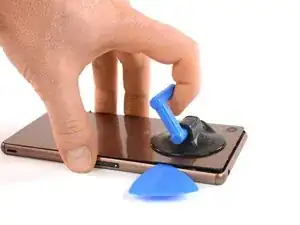
    • Use a spudger to pull out the vibration motor and remove its rubber gasket with a tweezer.

  10. gEtwbMsKUpetuYJM
    gEtwbMsKUpetuYJM
    1o1MLsmUG3SMETRO
    K3XjSc1HVsxVtiap
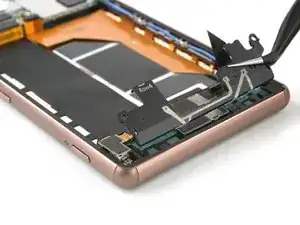
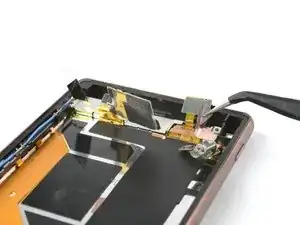
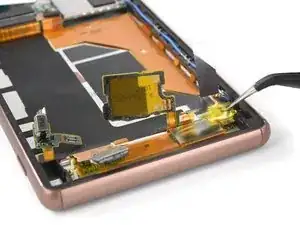
    • Use a tweezer to remove the adhesive strip of the loudspeaker assembly.

    • Pull up the metal clamp at the upper end of the loudspeaker assembly by using a tweezer and remove it.

  11. LXNSMThsh4HKCGka
    LXNSMThsh4HKCGka
    KKkmwWndZduQhWTH
    Uel35C2BmAapCJlq
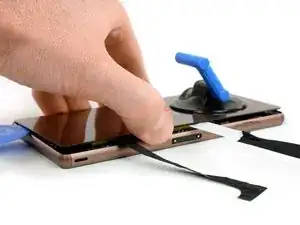
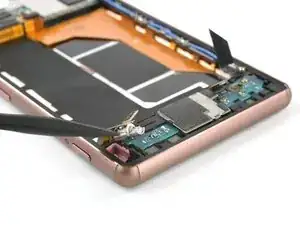
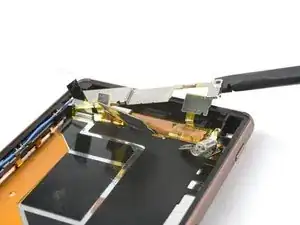
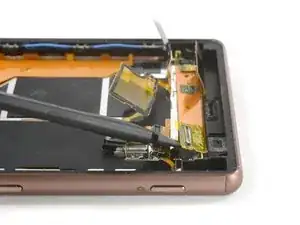
    • Lift up the main flex cable covering the loudspeaker assembly with a Spudger

    • Take care to not damage the loudspeaker. The flex cable is attached to the assembly with adhesive and is a little bit sticky.

    • Lift up the whole loudspeaker assembly with a spudger and remove it.

  12. O6XQcTvQBg3EFyJc
    O6XQcTvQBg3EFyJc
    hITZdWTEJGeI2nPS
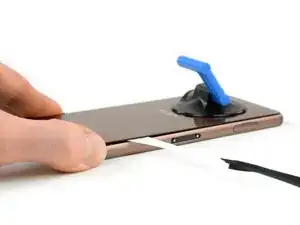
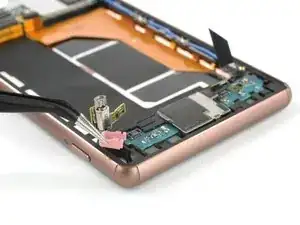
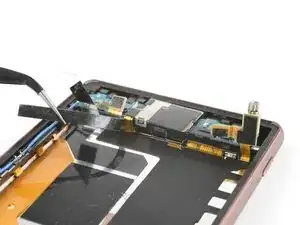
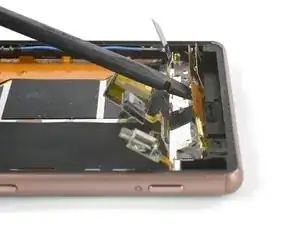
    • Use a spudger to lift up the end of the main flex.

    • Remove the bronze foil covering the connector of the main flex with a tweezer.

  13. BYels2DChGIAxYvS
    BYels2DChGIAxYvS
    jdWCDvpcHFhrBqGq
    URvdWUBI1MliePYg
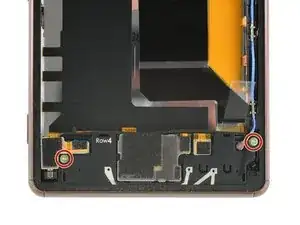
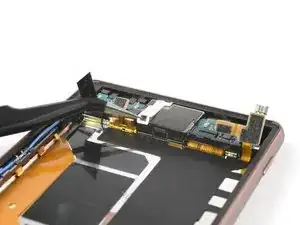
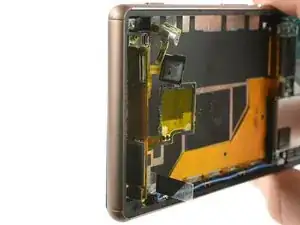
    • Lift up the metal plate which is placed beneath the loudspeaker assembly and remove it.

    • Unplug the main flex cable.

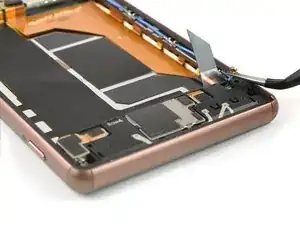
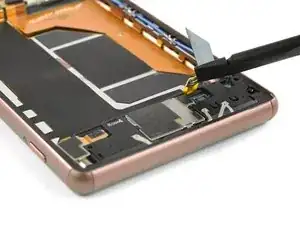
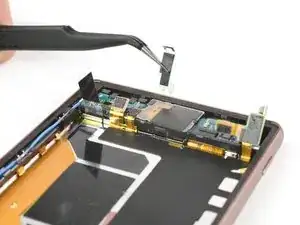
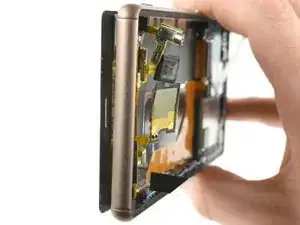
    • Use a tweezer to remove the yellow adhesive foil covering the display flex cable.

  14. npXmIHyrIAtS5aMC
    npXmIHyrIAtS5aMC
    yh1bLkJM1OXkb5SS
    Ibv22hpxDTiNQ2EU
    • Use a spudger to gently slide beneath the display flex cable and lift it up.

  15. Ri3gUCU2UIgZNCbv
    Ri3gUCU2UIgZNCbv
    LBOsFmQn5UN1H3Fx
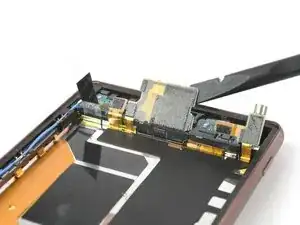
    • Use an iOpener to loosen the adhesive underneath the display of your phone.

    • The stickiest areas are in the upper and lower area of your display. After cooling down, the adhesive will stick to the mid frame again. If needed reheat it.

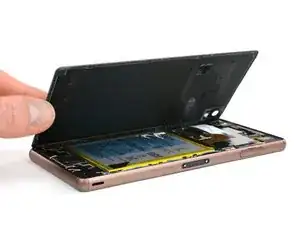
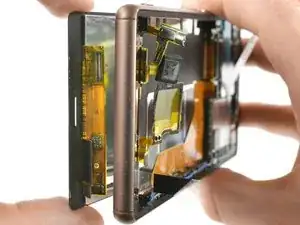
    • After the adhesive at the lower end of your phone is loosened, pull up the display with your suction handle and insert an opening pick.

  16. O4X6PTOyfIsTPFTh
    O4X6PTOyfIsTPFTh
    pkLnrmThA2BcoSeJ
    aRBCVMRxRlDtQQny
    • After loosening the adhesive in the lower area of your phone with an opening pick, insert an other opening pick approximately 1/16 of an inch and slide it along both sides of the phone to sparate the display from the frame.

    • Take care! While you're loosening the adhesive beneath the upper part of your phone, do not insert the opening pick too deep between the display and the mid frame. The earpiece is placed right beneath the "Sony" Logo and you don't want to damage it.

    • After loosening all the adhesive beneath the display twist the opening pick in the lower end of your phone a little bit to lift up the display.

  17. m2elAXhwrTjuKcyX
    m2elAXhwrTjuKcyX
    TGyBu2WeHJNFmEFQ
    feBMmAS3oNCBHClJ
    • To fully remove the display off your phone, you need to thread the display flex cable through the gap of the mid frame in the bottom end of your phone.

    • Take care of all the connectors of the main flex cable hanging around and of course the display flex cable itself.

  18. EQcWgSkNX5btwSc2
    EQcWgSkNX5btwSc2
    ROPKaqAYqvNEW2Wh
    • If you didn't manage to keep the earpiece in its place while removing the display you have to remove it now.

    • The earpiece is extremely sticky and might be damaged while removing it.

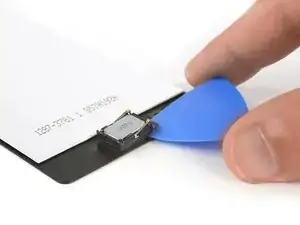
    • Use an iOpener to soften the glue, then use an opening pick to slide between the the earpiece and the display and carefully take off the earpiece speaker.

    • When reassembling put the earpiece speaker back on the frontside of your phone.

    The picture is misleading. If you try to remove the speaker with tweezers just how the picture depicts it, you will most likely rip it in two peaces like I did. Warming it up is absolutely necessary, but then just use a pick to loosen the adhesive underneath the speaker and remove it afterwards. For reassembly you will then need some new adhesive sticker for the speaker, but those are pretty cheap.

    Michael Fuhrmann -

Conclusion

To reassemble your device, follow these instructions in reverse order.

Dominik Schnabelrauch

Member since: 23/11/16

224647 Reputation

7 comments

What website is best to obtain a genuine screen and back from?

Stephen Stanley -

Do I need a new adhesive sticker to put the backcover back on?

Josua -

The back cover won’t fall off Josua but I would definitely recommend new adhesive!

Dominik Schnabelrauch -

But only for the phone to be waterproof? Because mine is definitely not waterproof anymore.. So I think this wouldn’t make any difference.

Josua -

In our case the back cover just held semi tight to the phone assembly without new adhesive. It could happen that the back cover falls off, when you pull the phone out of your pocket or you drop it. New adhesive also protects your phone from dust which can cause overheating.

Dominik Schnabelrauch -

Should adhesive also be used on the new front display? or will the old adhesive be enough by reheating it and letting it cool with the new display on the phone?

Jonny Duran -

My Z3’s screen was “glitching,” as in the phone’s screen showed static noise from time to time. It was hard for me to do anything on the device, and the problem would be fixed for a really short amount of time by knocking on the phone (I know, that’s a very bad solution). Do you suppose that the cause of this weird “glitch” is an inconsistency of the LCD’s connector? Or can it be some other internal issue? How should I properly handle this problem?

Thomas Hara -