Introduction
Follow this guide to replace the L1 and R1 trigger buttons on a Sony PlayStation 5 DualSense controller.
Disconnect and power down your controller before starting your repair.
-
-
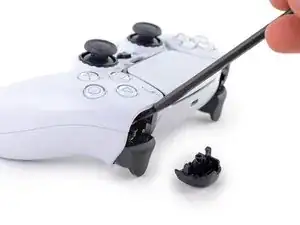
Insert the flat end of a spudger into the gap above the L1 button.
-
Pry upward to remove the L1 button.
-
-
-
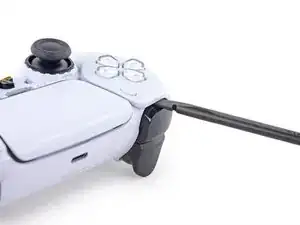
Insert the flat end of a spudger into the gap above the R1 button.
-
Pry upward to remove the R1 button.
-


To reassemble your device, follow the above steps in reverse order.
Take your e-waste to an R2 or e-Stewards certified recycler.
Repair didn’t go as planned? Try some basic troubleshooting, or ask our Answers community for help.

3 comments
It is easier to remove L1/R1 by going from below than by from above- without any damages.
Does the spudger dent or mark the button when doing this?
My replacement R1 button is different enough to not fit. Fins around center sleeve are wider. So there must have been a design change at some point.
Tried prying from the front of the buttons as pictured and my spudger broke off in the gap. A video I watched showed them being pried off from the back (between the R1/R2 and L1/L2 buttons) which seemed much easier.
Lora Singleton -
Agree with Lora's comment above. I was able to use an old credit card to take L1/R1 out this way. I pressed down the L2/R2 button to create space to work in, then came in from between L1/L2 and R1/R2. It's easy to pop one of the outer corners first then you can work the credit card around the top and the rest falls out.
darkstar448 -
Man, if I'd just read the thumb part...
caldugen -