
Introduction
-
-
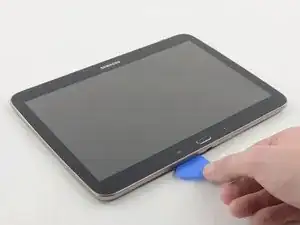
Insert an opening pick between the rear case and the plastic rim.
-
Slide the pick along the edge of the rear case until you release the plastic clips attaching the rear case to the display.
-
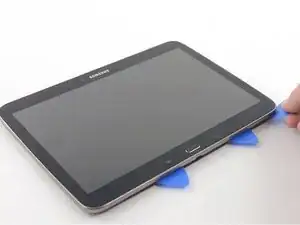
Continue to slide the pick around the edge of the rear case until all clips are released.
-
-
-
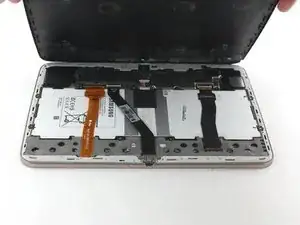
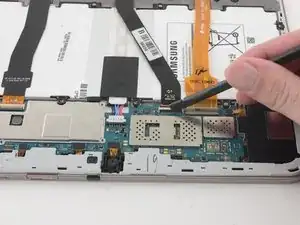
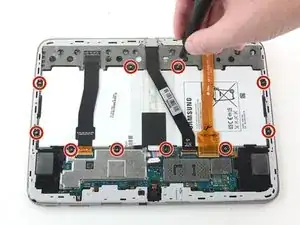
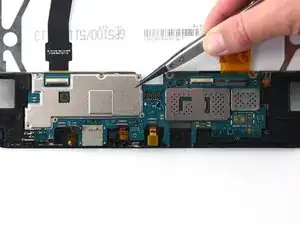
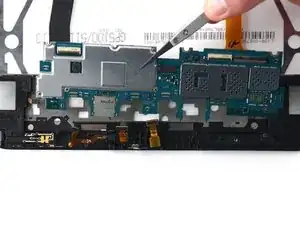
Use the flat end of a nlyon spudger to pry up the black plastic tabs securing the two ZIF connectors.
-
-
-
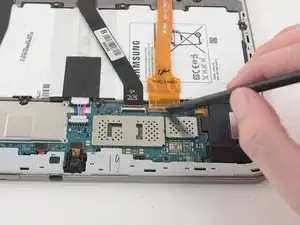
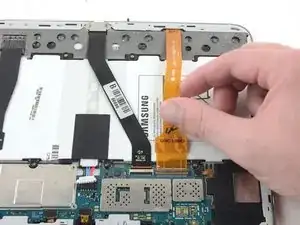
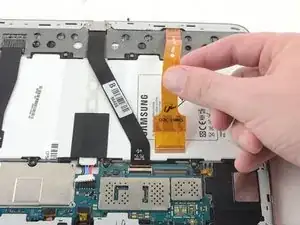
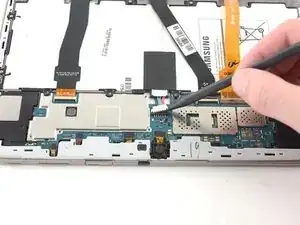
Use the flat end of a nylon spudger to pry up the brown plastic tab securing the orange ribbon cable.
-
-
-
Use a Phillips #000 screwdriver to remove the ten 3mm screws securing the battery to the chassis.
-
-
-
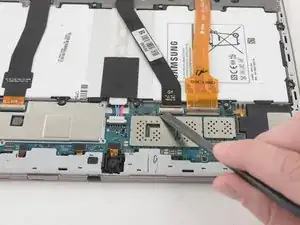
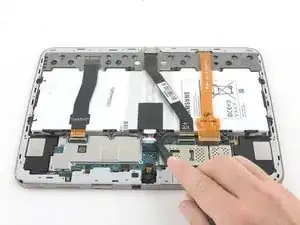
Use the pointed end of a nylon spudger to pry the two battery connections away from the motherboard.
-
-
-
Insert an opening pick between the plastic frame and the screen.
-
Slide the opening pick around the perimeter of the screen.
-
-
-
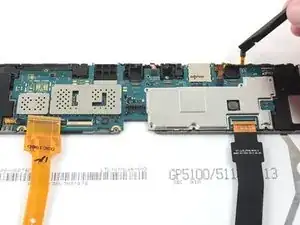
Use a Phillips #000 screwdriver to remove the 3mm screw attaching the motherboard to the display chassis.
-


To reassemble your device, follow these instructions in reverse order.

3 comments
Great guide, project completed.
Simplemente GENIAL!!!!
Muy claro.
Felicitaciones.
Cuenten con mis aportes al foro
Ahora que pude retirar placa base voy a ver esquemático, porque WIFI se desactiva . No funciona.
Saludos
very easy to destroy the Galaxy. finicky to the max!
I would not remove the back of the case. There are around 14 tabs inside that are melted down to secure the frame. Those melted tabs will break off and the back won't be as secure and the edge of the back will have have a visible gap showing. I would remove the case from the screen side as in step 5 of this tear down and use a iFixit opening tool. Use the tool with handle towards the screen to pry the frame away. Start on one long edge and slide the tool along the gap and at same time slightly pry the case away. Then separate a short edge. The corner between the 2 open gaps should just pop away with some prying. Do the same with other 2 edges and corner.
Gary L. Turner -
Kommentar von Gary L. Turner bestätigt. Es geht eindeutig besser das Opening Tool in den Spalt an der Oberseite einzuführen, zwischen dem umlaufenden silberfarbenen Rahmen und dem Display Glas. Die im Foto oben unter Schrott 1 gezeigte Methode ist NICHT zerstörungsfrei. Das (weisse) Back cover und der umlaufende silberfarbene Rahmen sind zwei separate Kunststoff-Bauteile, die an ca. einem Dutzend Punkten miteinander verschweisst sind, und zwar so eng dass kein Fingernagel dazwischen passt. Diese Schweisspunkte zerbrechen bei der im Bild oben gezeigten Methode.
Ralf Hanisch -
sry, “Schritt 1” muss es natürlich heissen, nicht “Schrott 1” ;-)
Ralf Hanisch -
Use the iFixIt Opener. You’ll have to find a large opening, seems like near a piece of tech is easier. Once you get a firm and deep opening, keep working it down.
Shane -
Bitte aufpassen: Dies ist NICHT die Anleitung, um den Akku beim TAB S3 zu ersetzen, dies wird an anderer Stelle beschrieben, leider auf Englisch.
Aber beim S-3 ist es viel schwieriger, da beim S-3 auch das Frontglas entfernt werden muß…..
klement, herbert -
Hier auf Deutsch: https://de.ifixit.com/Anleitung/Samsung+...
VauWeh -