Introduction
If you have a defective charging port or microphone, use this guide to remove the component and replace it. The charging port is connected to a ribbon cable that is also connected to the microphone. You'll need to replace the whole assembly if either component is damaged.
-
-
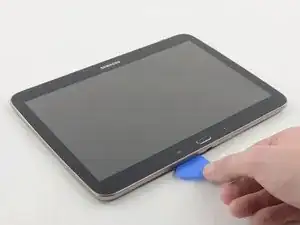
Insert an opening pick between the rear case and the plastic rim.
-
Slide the pick along the edge of the rear case until you release the plastic clips attaching the rear case to the display.
-
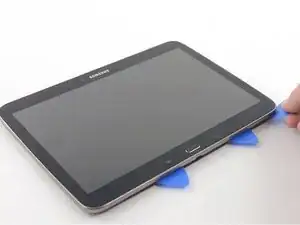
Continue to slide the pick around the edge of the rear case until all clips are released.
-
-
-
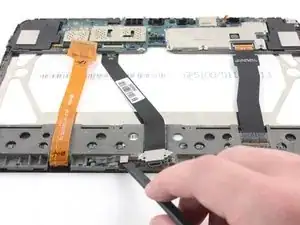
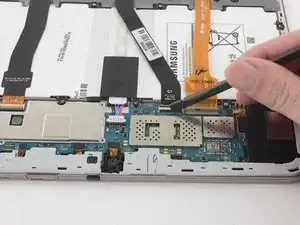
Use the flat end of a nylon spudger to flip up the black plastic tab of the ZIF connector securing the charging port ribbon cable.
-
Gently remove the cable by pulling back, away from the ZIF connector.
-
-
-
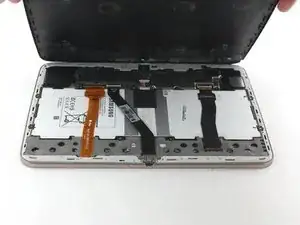
Use a Phillips #000 screwdriver to remove the two 3mm screws in the metal plate connecting the charging port to the display assembly.
-
-
-
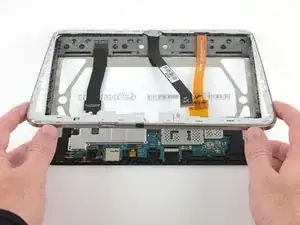
Insert an opening pick between the plastic frame and the screen.
-
Slide the opening pick around the perimeter of the screen.
-
-
-
Use the flat end of a nylon spudger to pry the microphone away from its black rubber housing.
-
-
-
Use the flat end of a plastic spudger to gently pry the press-fit connector from the microphone's ribbon cable.
-
-
-
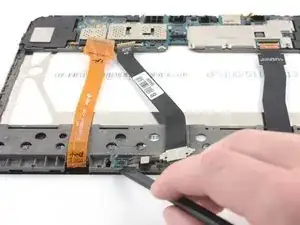
Use the flat end of a plastic spudger to pry the connection board from the display chassis.
-
Remove the charging port cable.
-


To reassemble your device, follow these instructions in reverse order.

9 comments
I'm currently working on this tablet. My friends' kids screwed up the USB port and has part of the connector inside the port missing. Somebody had pried the back of the case open breaking off all of the tabs that are melted down to secure the frame of the case better. There are tabs left that snap the frame to the back but there are places along the edge that show a gap and will now have to be glued to eliminate the gaps. So only pry the case/frame off along the edge of the screen using an iFixit opening tool.
I just received the new replacement USB port today 3/22/17. I bought it on eBay for $3.29 including shipping and took a week to get it. Everything worked out fine. The tablet receives power and charges now. I ended up using hot glue to secure the case frame to the rear of the case. When snapping the screen back on to case frame you may have to squeeze the case and the screen very hard and at the same time force the frame to snap into place.
I completely agree with opening at step 5, went back together beautifully and much easier!! :-)
I would not remove the back of the case. There are around 14 tabs inside that are melted down to secure the frame. Those melted tabs will break off and the back won't be as secure and the edge of the back will have have a visible gap showing. I would remove the case from the screen side as in step 5 of this tear down and use a iFixit opening tool. Use the tool with handle towards the screen to pry the frame away. Start on one long edge and slide the tool along the gap and at same time slightly pry the case away. Then separate a short edge. The corner between the 2 open gaps should just pop away with some prying. Do the same with other 2 edges and corner.
Gary L. Turner -
Kommentar von Gary L. Turner bestätigt. Es geht eindeutig besser das Opening Tool in den Spalt an der Oberseite einzuführen, zwischen dem umlaufenden silberfarbenen Rahmen und dem Display Glas. Die im Foto oben unter Schrott 1 gezeigte Methode ist NICHT zerstörungsfrei. Das (weisse) Back cover und der umlaufende silberfarbene Rahmen sind zwei separate Kunststoff-Bauteile, die an ca. einem Dutzend Punkten miteinander verschweisst sind, und zwar so eng dass kein Fingernagel dazwischen passt. Diese Schweisspunkte zerbrechen bei der im Bild oben gezeigten Methode.
Ralf Hanisch -
sry, “Schritt 1” muss es natürlich heissen, nicht “Schrott 1” ;-)
Ralf Hanisch -
Use the iFixIt Opener. You’ll have to find a large opening, seems like near a piece of tech is easier. Once you get a firm and deep opening, keep working it down.
Shane -
Bitte aufpassen: Dies ist NICHT die Anleitung, um den Akku beim TAB S3 zu ersetzen, dies wird an anderer Stelle beschrieben, leider auf Englisch.
Aber beim S-3 ist es viel schwieriger, da beim S-3 auch das Frontglas entfernt werden muß…..
klement, herbert -
Hier auf Deutsch: https://de.ifixit.com/Anleitung/Samsung+...
VauWeh -