Introduction

For the updated iFixit guide, click here. This guide is archived for historical purposes.

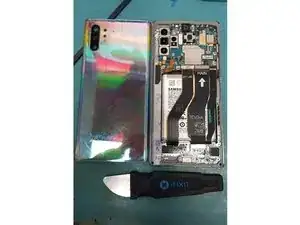
How to Replace Screen on Samsung Note10 Successfully without breaking backglass!

Making it easy to understand is my goal for my viewers that will scroll through the pictures to get the job done or details for 1st-time repairs.

  1. IkIJHCJacjbkDWZH
    IkIJHCJacjbkDWZH
    MS2WYZy6WK4KR3NP
    • Test to see if phone is functional

    • Force Shut Down Device

    • Hold power button and volume down button for 7 seconds! Any longer it will restart.

    • Apply Heat to Back Glass

    • Should be to hot to touch

  2. iK5CBNOqYmjEZcXN
    iK5CBNOqYmjEZcXN
    EbuMBemtijpUvwTl
    xgXQByo2VIfAVPyN
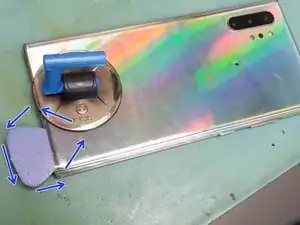
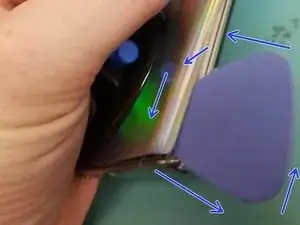
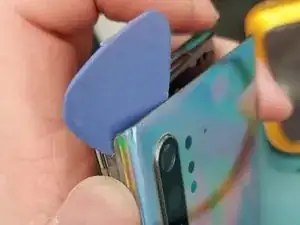
    • Use suction cup on bottom 1st use metal pry tool to make enough room for guitar pick.

    • Rotate guitar pick around edges.

    • Wiggle back glass with suction cup. Use your hand to lift one edge.

    • Note10 Edges are more curved than previous note models and also curve around volume/side buttons

    • Do not recommend using metal pry tool you will most likely break it the backglass

  3. 5YMKqNYLqcIeCQCD
    • Remove PH000 14 Screws

    • Start From the top removing wireless charger pad.

  4. UDLcZqpK2xjXxNIu
    UDLcZqpK2xjXxNIu
    BuonyIYLTjSPRhgF
    • Pry from the top and slide upward to remove plastic protector

    • Remove from the top down!

  5. 2eVdWnLP66KSxNxF
    2eVdWnLP66KSxNxF
    KJu2udZ4cDRyq44S
    SxWFFXBdYG6xqoiI
    • Fold down metal bracket of wireless charging pad

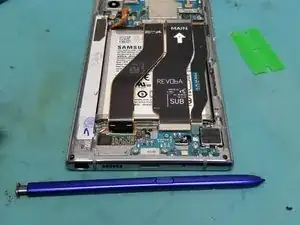
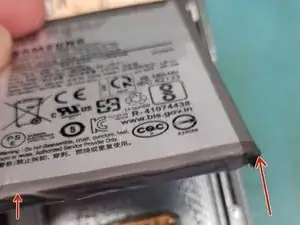
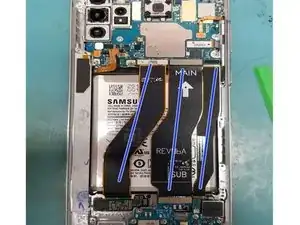
    • Disconnect Battery Connector

    • Remove Wireless charging Pad connection. (BLACK FLEX)

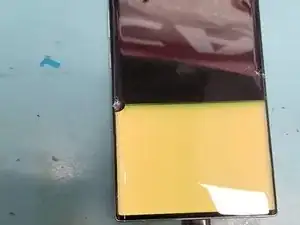
    • Lift upward wiggling off the side adhesive and you will pull up the bottom plastic protector
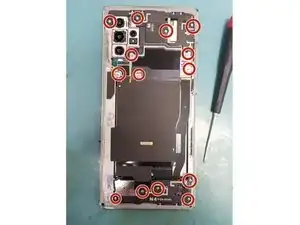
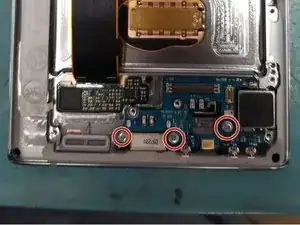
  6. cQHOC2vSWGUFkRHx
    cQHOC2vSWGUFkRHx
    2VkIOAKOIkLwVmg1
    BaGRNLZlG3JofRCI
    • 3 PH000 Screws

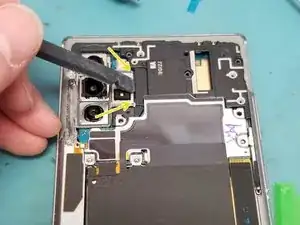
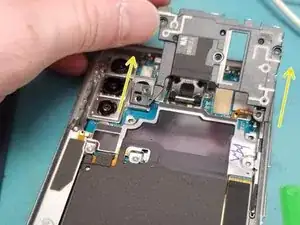
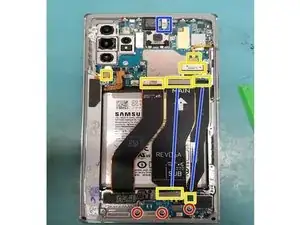
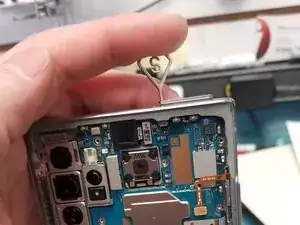
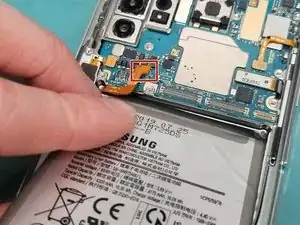
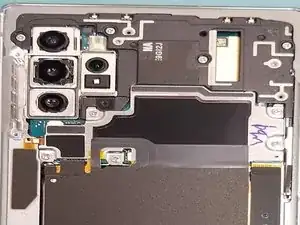
    • Disconnect front camera, and 2 flexs cables marked in blue put off to the side.

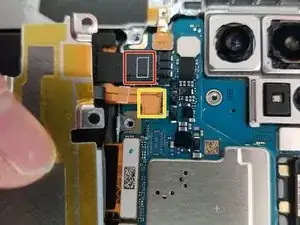
    • Disconnect everything marked in Yellow or Blue

    • Sim Card Tray and Stylus should be removed as well before moving boards!

  7. X2355N5TpMSuetZw
    X2355N5TpMSuetZw
    2S4E5N4DxoTeWx6O
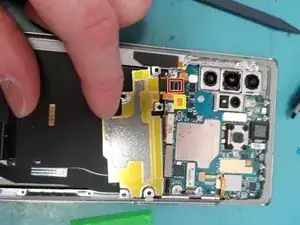
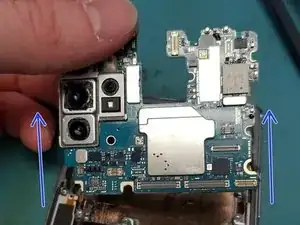
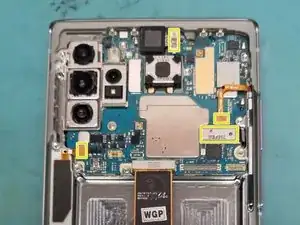
    • Pry with spudger Main Board from the top down gently lift board.

    • At an angle lift board upward with your free hand

  8. RGvPeGXM2L6RjvsH
    RGvPeGXM2L6RjvsH
    xS6NIEIqJWUL3rUS
    uuLe5uiGYCZGMBH4
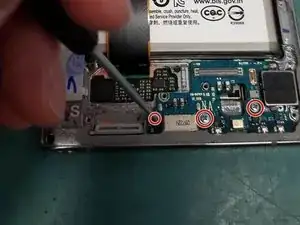
    • Unscrew 3 PH000 Screws

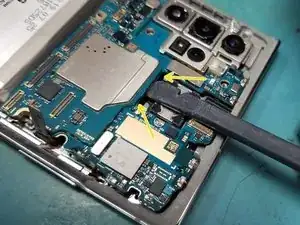
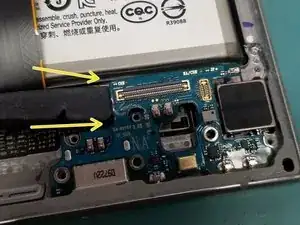
    • With spudger lift top of charging port

    • Lift from the top of charging port moving towards the left

  9. MjQV3TWGmdMhWGxV
    MjQV3TWGmdMhWGxV
    TvZIhtQvqI1pMQNC
    • Use heat gun warm up battery adhesive pry from the bottom up with plastic spudger
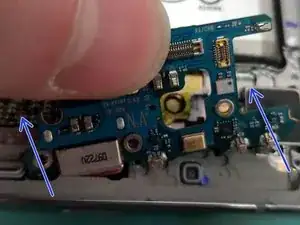
    • Lift from bottom up

    • Do not rip battery out you will deform it

  10. mGI12H3BZEdYCNgU
    mGI12H3BZEdYCNgU
    BUcj63hrk6LOIRvJ
    BBUN1pSGvKlEKPPV
    • Place charging port daughter board in new screen assembly

    • Screw Down PH000 Screws

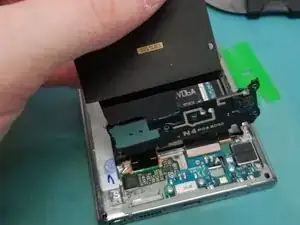
    • Then place the Main board

    • Connect all flex cables

    • Connect battery with adhesive and place battery to ensure it connects and seats correctly

  11. i2FvNIajtXEBITMI
    i2FvNIajtXEBITMI
    4pETYpvL2qwvdf6T
    xmNRlv5Pcy1o22Hc
    • Connect all the flex cables

    • Place Charging pad and plastic protectors

    • Don't screw everything down complete until after you test the screen

  12. Check your work place back glass with new adhesive
    • Check your work place back glass with new adhesive

Conclusion

To reassemble your device, follow these instructions in reverse order.

Mark D Schlossman

Member since: 25/09/19

6269 Reputation

0 comments