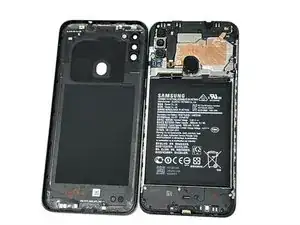
Introduction

  1. qyTIqPvIRgjJar2a
    qyTIqPvIRgjJar2a
    txBHSNYHmouVxZvY
    cpOZykCQyDqEMSIL
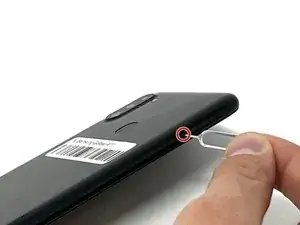
    • Place the SIM eject tool in the hole of the sim tray.

    • Push until part of the SIM tray is pushed out.

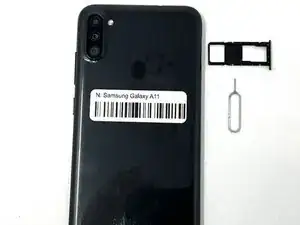
    • Pull out the rest of the SIM tray.

  2. i5UvqSyHDqgR5KlY
    i5UvqSyHDqgR5KlY
    Xbxr1JbrLChjHRVm
    WOBlBkRNgKac3qxl
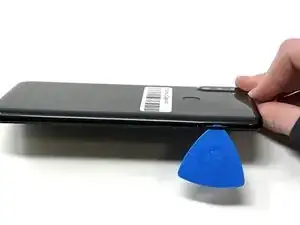
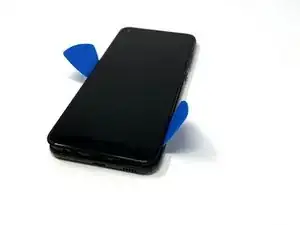
    • Gently pry open the area of the back cover near the SIM tray using an iFixit opening pick.

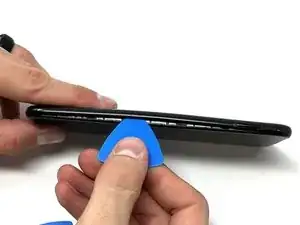
    • Gently move the pick along the gap and pry open the clips holding it together.

    • If possible, use multiple picks to prevent the back cover from closing.

  3. dqh6dEQIwW4dph5E
    dqh6dEQIwW4dph5E
    Pe33CirXPObROWmV
    pEGwCoC6qIPGoGnR
    • Using a hair dryer on low heat, heat the fingerprint sensor in increments of 30 seconds to loosen the surrounding adhesive.

    • Gently push the fingerprint sensor until it detaches from the back cover.

    • If needed, remove the button by prying it from the bottom of the device.

  4. 2CUutT51cAKkQmmI
    2CUutT51cAKkQmmI
    VIST2QAXGbwRyMO1
    otEV1IxOy4RJVghE
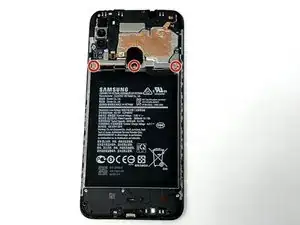
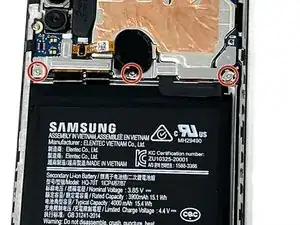
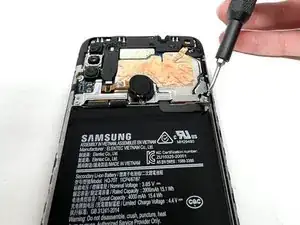
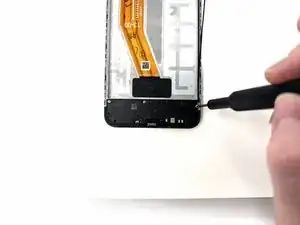
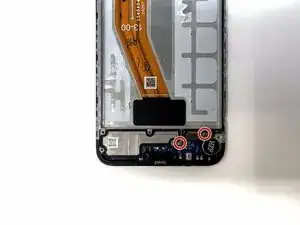
    • Remove the three 3 mm screws from the shield using a Phillips #000 screwdriver.

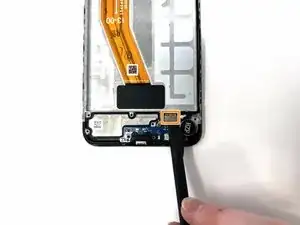
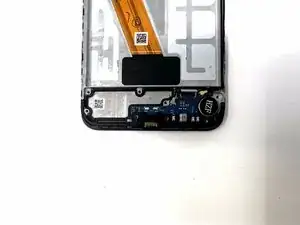
    • Remove the shield from the phone.

  5. w2IMPUUeQkBMeEEb
    w2IMPUUeQkBMeEEb
    tTuKfwwTwjfslbHL
    mtCdpeKD2tbGpZ6j
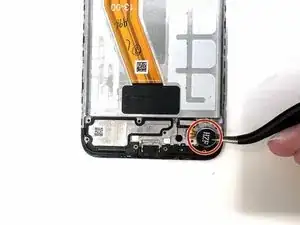
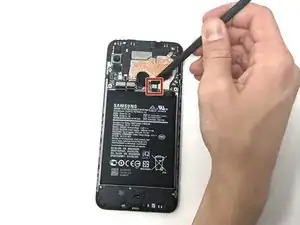
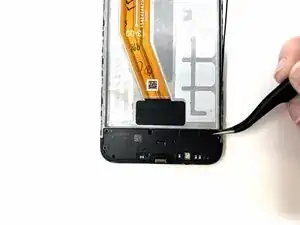
    • Using tweezers, a spudger, or your fingers, disconnect the battery press connector from the phone.

  6. Uk6pCWVeBcDRmtbv
    Uk6pCWVeBcDRmtbv
    RTkmfOJGWGM5bL3R
    BBJULnVHtQegiM5M
    • If needed, use a hairdryer on low heat to soften the adhesive under the battery.

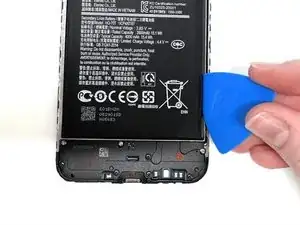
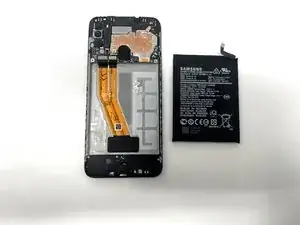
    • Use an iFixit pry tool to dig under the battery edge.

    • If needed, use multiple pry tools to hold the battery in place.

    • Continue to cut the adhesive under the battery until you are able to pry the battery away from the phone.

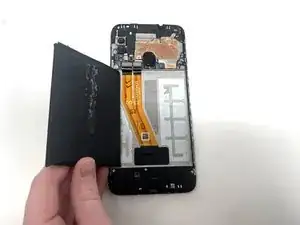
    • Remove the battery from the phone.

  7. jipl5ur3rcTxeXjL
    jipl5ur3rcTxeXjL
    bpRZa3Z2RWocnxYb
    jChueCbGUGB36XId
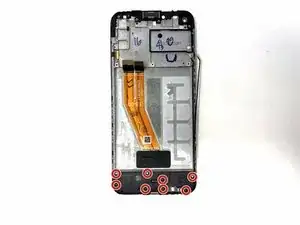
    • Remove the eight silver and black 3 mm screws from the speaker cover using a Phillips #000 screwdriver.

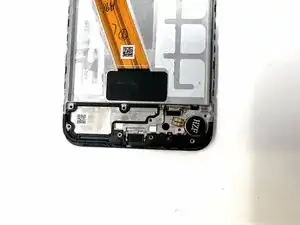
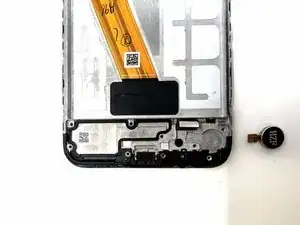
    • Remove the speaker cover from the device.

  8. WXdariEjDjBHOiP2
    WXdariEjDjBHOiP2
    iHSji2qIstHHfS5H
    Dwuttxy3MLbmC1RY
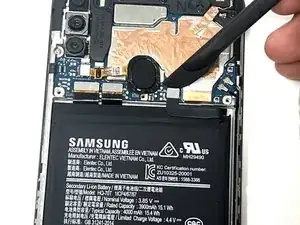
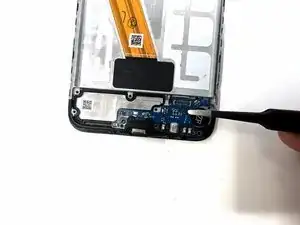
    • Using a spudger, disconnect the antenna heads from the daughterboard.

    • Disconnect the ribbon cable from the daughterboard.

  9. naSmjleOIPHUpYqf
    naSmjleOIPHUpYqf
    6FecPauX3ZqcLdu3
    FEuIrIprHb4KKNK5
    • Using tweezers, gently pry the daughterboard from the device.

    • When using metal tools, it is important to be gentle in order to not damage the device.

  10. EMqVFHsIYhNL1rbU
    EMqVFHsIYhNL1rbU
    NJJdv53JotEMNGhE
    • Using tweezers, remove the vibrator motor from the device.

    • If needed, you can apply heat to loosen the adhesive from the motor.

Conclusion

To reassemble your device, follow these instructions in reverse order.

Kristen Gismondi

Member since: 12/11/14

88929 Reputation

0 comments