Introduction

Use this guide to replace a worn-out or dead battery in your Galaxy A10.

If your battery is swollen, take appropriate precautions. For your safety, discharge your battery below 25% before disassembling your phone. This reduces the risk of a dangerous thermal event if the battery is accidentally damaged during the repair.
You’ll need replacement adhesive to reattach components when reassembling the device.

  1. DMFJWgCWY6EHY1RX
    DMFJWgCWY6EHY1RX
    DJTAsYKkHSjA2Arl
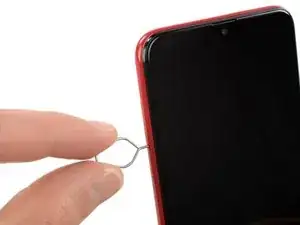
    • Insert a SIM card eject tool, a SIM eject bit or a straightened paper clip into the hole on the SIM tray located at the left side of the phone.

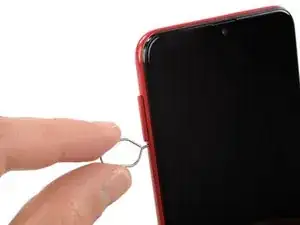
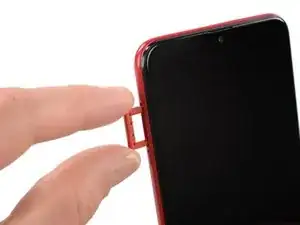
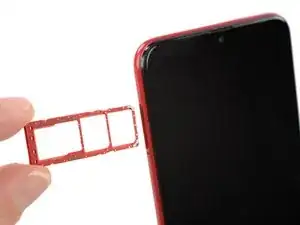
    • Press firmly to eject the tray.

    Habe nur das Frontglas mit Werkzeug gekauft. Kann ich nur dieses von vorn ersetzen, ohne das Gerät komplett zerlegen zu müssen? Sprich defektes Glas erhitzen und nach vorn abheben etc

    Hans Weschta -

    Hallo Hans, leider musst du dein A10 zerlegen um den Screen zu wechseln. Hier ist der Guide für deine Reparatur: Samsung Galaxy A10 Screen Replacement. Viel Erfolg beim Reparieren!

    Adriana Zwink -

  2. bJElOchHNPHPhoeE
    bJElOchHNPHPhoeE
    gEfr5ZF3AsBqlACm
    • Remove the SIM card tray.

    • When reinserting the cards, make sure to properly orient them in the tray.

  3. m3WqmcClWjmDXxLI
    m3WqmcClWjmDXxLI
    xHAHdBfwWeDldcrE
    • The back cover is held in place by plastic clips.

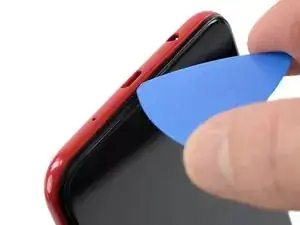
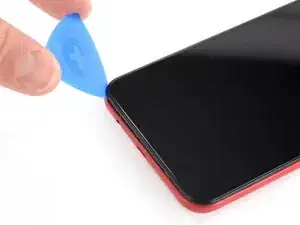
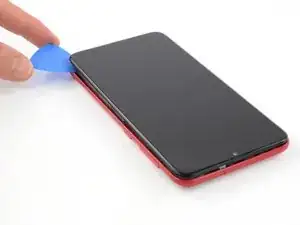
    • Insert an opening pick between the screen and the back cover on the bottom of the phone where the charging port is located.

    High located in charging pot only?

    AK FRIENDS -

  4. xud2yTYr4pLcDnSs
    xud2yTYr4pLcDnSs
    Cb5XNFcwDgQwUO2Z
    pIwbKEpiSpmogFsi
    • Slide the opening pick to the bottom left corner to release the clips.

  5. l2HDftUtCpsDFaYr
    l2HDftUtCpsDFaYr
    ZX1U1KMWmykNMJUp
    Yw5YfV3F5AtgPgRS
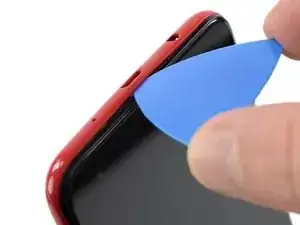
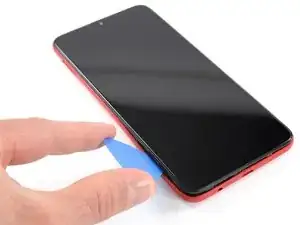
    • Slide the opening pick along the left edge to the top left corner of the phone, to release the clips.

  6. 1GSKt6KwTS1n6YhG
    1GSKt6KwTS1n6YhG
    YCqtI3LyccLEkuwF
    21ZhKbM6yTW1gRAC
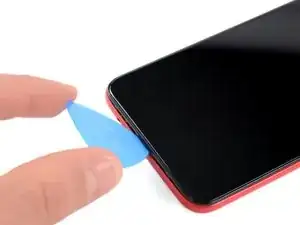
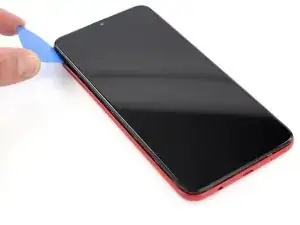
    • Slide the opening pick from the top left corner to the top right corner to release the plastic clips.

  7. gjHWFQwrIZiUqVF6
    gjHWFQwrIZiUqVF6
    NRJvqIBy3i4QhuXb
    JsTBw1XcSGyPywqQ
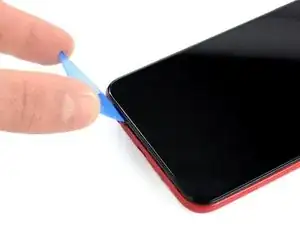
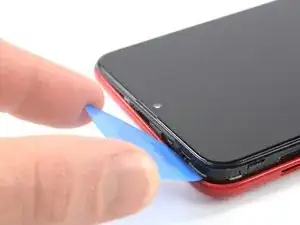
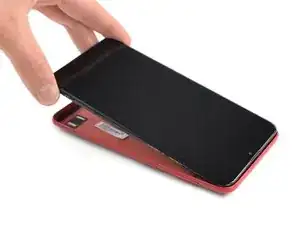
    • Slide the opening pick from the top left corner to the bottom right corner to release the remaining clips.

  8. yZYwMYobXe2aIQRI
    yZYwMYobXe2aIQRI
    XMTkKMd1cS2XvJjC
    • Remove the back cover.

    What if screen separates from back cover and MB assy?

    h2opro -

  9. IocSILPudUDHGOKb
    • Remove the three Phillips #00 screws (3 mm length).

    On my A10E the second screw from the right on the top line of 4 screws had to be removed also

    Dora-Lynn Greene -

    It’s easier if you remove all 4 screws across the small top panel.

    Chris Halliwell -

  10. eC2agbvikKo6KnKy
    eC2agbvikKo6KnKy
    Hf1SZdiwWVPOLcMV
    ep13rD1eRboaboye
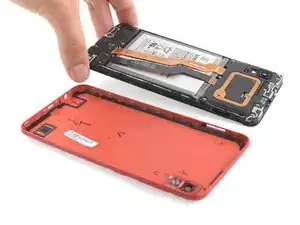
    • Use the flat end of a spudger to pry up the motherboard cover to release the plastic clips which hold the cover in its place.

    • The clips can be a bit resistive. If you're having trouble prying up the motherboard cover, twist the spudger to make the process easier.

    • Remove the motherboard cover.

    • The remaining plastic clips should release during this process or can be unhinged easily by hand.

  11. yMoqBSEN4f5VrrZI
    yMoqBSEN4f5VrrZI
    CLEc11N6Fodxb6Cx
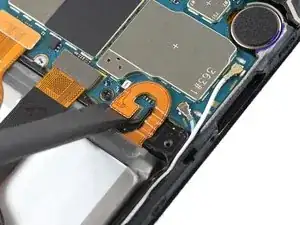
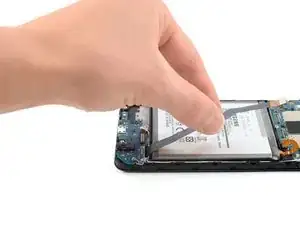
    • Use a spudger to disconnect the battery by prying the connector straight up from its socket.

  12. vJYu3qudbs1ZPNJ6
    vJYu3qudbs1ZPNJ6
    yIHHvtoZZgMRO2Xf
    2tOCKQsSBrIr5iQ1
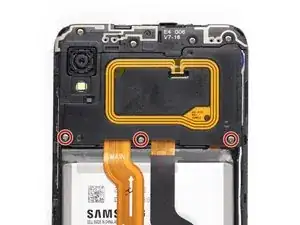
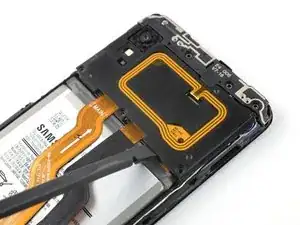
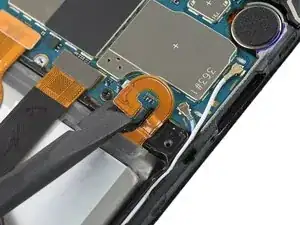
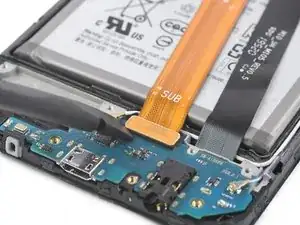
    • Use the flat end of a spudger to pry up and disconnect the interconnect and display flex cables from the motherboard.

  13. VMYVpMPXaDkWmSAb
    • Remove the eight Phillips #00 screws from the bottom (3 mm length).

  14. YKqZHDUvPcw5AWJM
    • Remove the daughterboard cover.

  15. w2CQOYdIGuDqIyWQ
    w2CQOYdIGuDqIyWQ
    QEVH3MRmHDBHOOAh
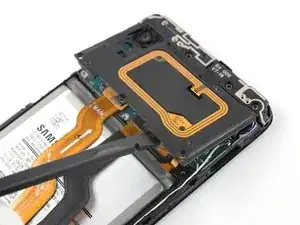
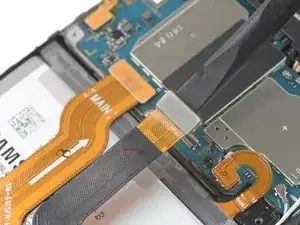
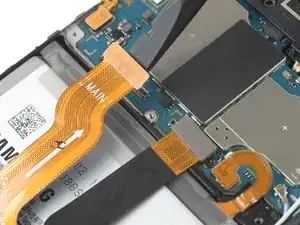
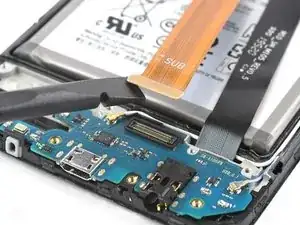
    • Use a spudger to disconnect the interconnect cable by prying the connector straight up from its socket.

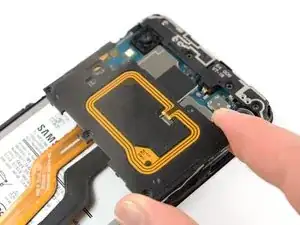
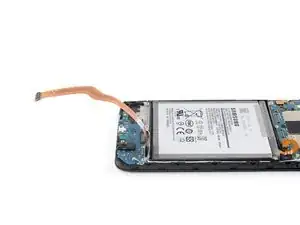
    • Remove the interconnect cable.

  16. sANXnGbCQpCKWOIK
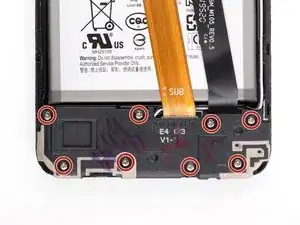
    • Apply a heated iOpener to the screen to loosen the adhesive beneath the battery. Apply the iOpener for at least two minutes. You might need to repeat this procedure several times during the battery replacement.

  17. V55MJst5XEPNKG2Q
    V55MJst5XEPNKG2Q
    BLudR2OKeJBEfcwk
    GfoYgteDYAJ2lipI
    • Carefully bend the display cable away from the battery to make room for removal.

    • Take care to bend the cable only slightly.

  18. ddguDTTXWPSBCW1P
    ddguDTTXWPSBCW1P
    DeGiqcUeDCZPvDZM
    CamaIGljhYwxbZID
    • Try your best not to deform the battery during this process. Soft-shell lithium-ion batteries can leak dangerous chemicals, catch fire, or even explode if damaged. Do not use excessive force or pry at the battery with metal tools.

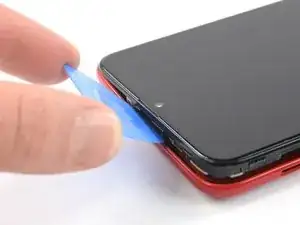
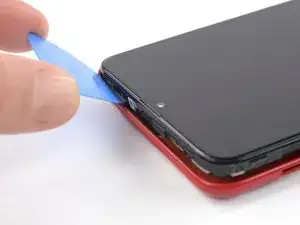
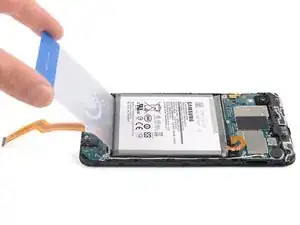
    • Insert a plastic card underneath the bottom edge of the battery.

    • Carefully slide it underneath the battery to loosen the adhesive.

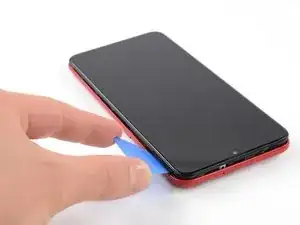
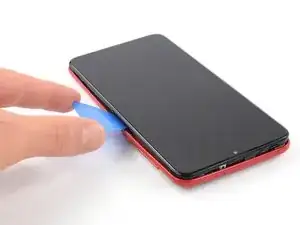
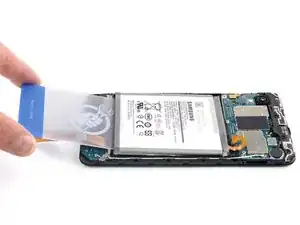
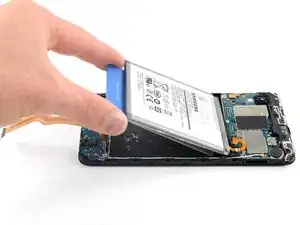
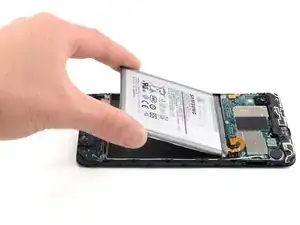
    • Continue sliding the plastic card underneath to pry up the battery from the bottom.

  19. Xk1YR5B2ULOXSSEO
    • Remove the battery.

    • Do not reinstall a damaged or deformed battery, as doing so is a potential safety hazard. Replace it with a new battery.

    • Secure the new battery with pre-cut adhesive or double-sided adhesive tape. In order to position it correctly, apply the new adhesive into the device at the places where the old adhesive was located, not directly onto the battery. Press the new battery firmly into place.

Conclusion

If possible, turn on your device and test your repair before installing new adhesive and resealing.

To reassemble your device, follow these instructions in reverse order. Apply new adhesive where necessary after cleaning the relevant areas with isopropyl alcohol (>90%).

For optimal performance, calibrate your newly installed battery: Charge it to 100% and keep charging it for at least 2 more hours. Then use your device until it shuts off due to low battery. Finally, charge it uninterrupted to 100%.


Take your e-waste to an R2 or e-Stewards certified recycler.

Repair didn’t go as planned? Try some basic troubleshooting, or ask our Answers community for help.

Adriana Zwink

Member since: 18/12/19

54794 Reputation

0 comments