Introduction

This guide outlines how to change the touchpad in the Razer Blade Stealth 2017. The touchpad breaking may be a result of a missing or out-of-date driver. Updating or reinstalling your touchpad drivers in Device Manager may help solve the problem. Some tools are required for this replacement.

  1. LxXeUEUX1QsYMuo2
    LxXeUEUX1QsYMuo2
    qnJFsCybk6ZWj3fs
    • Before you begin, be sure to turn off your laptop and discharge the battery down to 25%.

    • Use a Torx T5 screwdriver to remove the eight, 3mm screws on the bottom cover of the laptop.

    • Whenever you remove screws from the device, remember to save and label them.

  2. qk4H6BDjtIosjQR5
    • Remove the bottom cover of the laptop by sliding it away from the hinge.

    • Do not force the cover up!

  3. QIvH3Auj5t3CqgN5
    QIvH3Auj5t3CqgN5
    SbmLLqpMocvpYq1W
    • Use your fingernail to pry up and disconnect the battery from the motherboard.

  4. F2jGBNOC4tpmVq16
    • Use a Phillips #00 screwdriver to remove the six, 5mm screws securing the battery.

    Do you have to remove the battery before swapping the wifi card? Is disconnecting the power not enough?

    Charles Tsai -

    Hi Charles,

    If you’re swapping the Wi-Fi card, you don’t need to remove the battery. Disconnecting it will suffice.

    Arthur Shi -

    Are two of these screws shorter than the other four? And if so, where do the two shorter screws go?

    James Spinella -

    Looks like the two shorter screws go where the trackpad is!

    James Spinella -

  5. yvhnafCZb3yMYkjF
    yvhnafCZb3yMYkjF
    QrZNXNVFLGHaBM5M
    • Remove any tape attached to the battery.

    • Use the plastic spudger to pry out the battery.

    After removing the 6 screws securing the battery, mine does not come out easily. There is resistance, and I don't wanna forcefully pull it out. Is it supposed to be easy to pick up and take out or is there some sort of tape holding it down from the bottom?

    kairos -

  6. verOsdPIyiKNhmUA
    verOsdPIyiKNhmUA
    cUtRbLc3NcyWhive
    QQIwJBjiSOJM5AyO
    • Use a plastic spudger to gently undo the connections to the motherboard.

  7. K2C1DCHZCvU2Bru6
    K2C1DCHZCvU2Bru6
    uWZD4RILVihqNyOf
    HVM3StOYRxludPQk
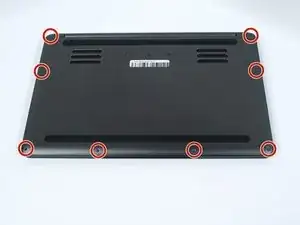
    • Use a Phillips #00 screwdriver to remove the six 4 mm screws holding the display hinges on both side.

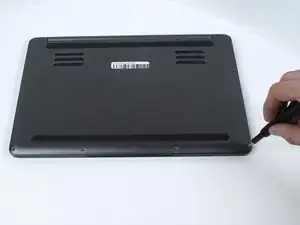
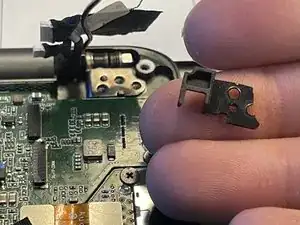
    • Remove the small plastic brackets holding the display hinges.

  8. aBqpBFK1WeFQrJIs
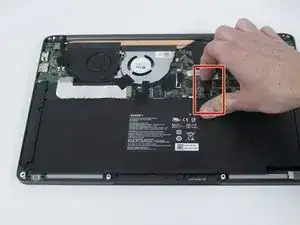
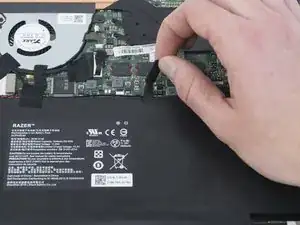
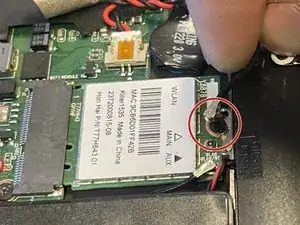
    • Remove the 2.6 mm screw holding the Wi-Fi card down with a Phillips #00 screwdriver.

    • Remove the motherboard from the laptop.

  9. sPmw1beEpJWDMi1e
    sPmw1beEpJWDMi1e
    HAQQsjuQtI1Fp2ri
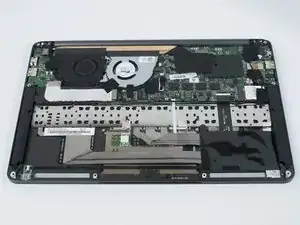
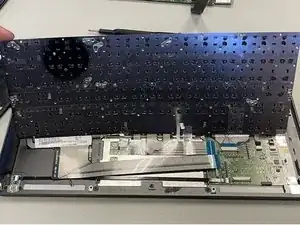
    • Use a Phillips #000 to remove all 55 1.6 mm screws from the metal plate.

    • Remove the metal plate from computer using your hands.

  10. IKh2xZGLvZmRhL2o
    IKh2xZGLvZmRhL2o
    gVU1XmsoVsNcrwq6
    1yuhwhTSFmnAH32o
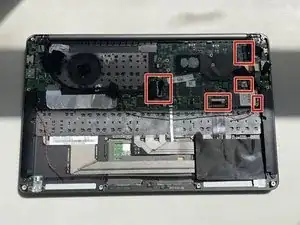
    • Use a spudger to remove foil tape.

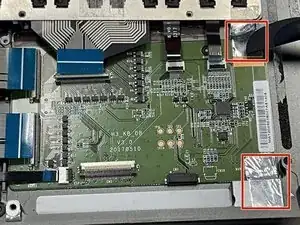
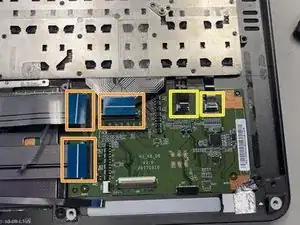
    • Pull the connectors off using fingers

    • Remove the connectors by lifting up the hinges by using fingertips.

    • Pull the connectors off.

  11. bnXKBrPSMBDOOJCm
    bnXKBrPSMBDOOJCm
    udULpWlQpWlnMdsw
    JIHddN4QM2aECbHS
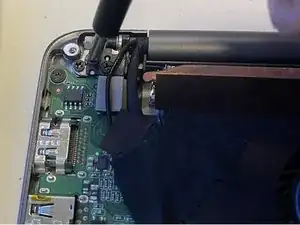
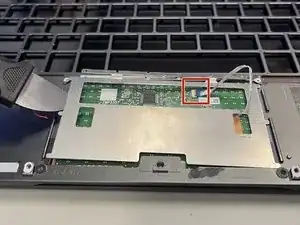
    • Pull the connector off from the mousepad connected to the daughterboard.

    • Use a Jimmy to remove adhesive from the metal bracket on the mousepad.

    • To remove adhesive, warm the area up that has adhesive.

    • Pull up on the metal bracket after removing adhesive.

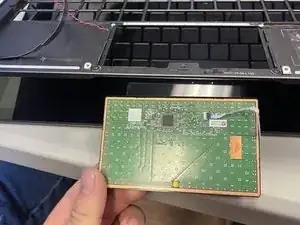
    • Push down on the mousepad to remove from the computer.

Conclusion

To reassemble your device, follow these instructions in reverse order.

Jovanny Reyes

Member since: 08/02/24

97 Reputation

0 comments