Introduction

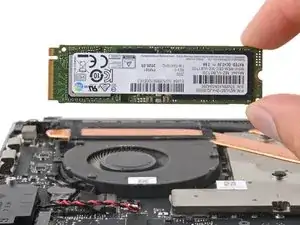
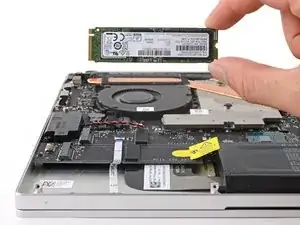
Use this guide to replace or upgrade the PCIe M.2 2280 SSD in your Razer Blade 15" (2020) laptop.

Note: This laptop doesn't support SATA M.2 SSDs.

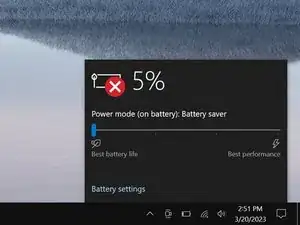
Before you perform this repair, back up your existing SSD if possible. If you're replacing the SSD where your operating system is installed, familiarize yourself with a disk cloning utility so you’ll be ready to migrate your data to the new SSD. There are many tools to do this, but this article is a good place to start if you're unfamiliar with the process.

  1. qJWDQqq15FbdAQh5
    qJWDQqq15FbdAQh5
    sDPHcOmlqZFm6nuo
    • Allow your laptop's battery to drain below 25% before starting this repair—a charged battery may catch fire if damaged.

    • Unplug all cables and fully shut down your laptop.

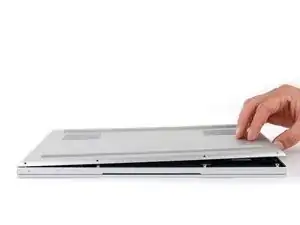
    • Close the lid and flip your laptop over so the back cover faces up.

  2. QXKNhOgcEdB4IAhI
    • Use a T5 Torx driver to remove the ten 3.7 mm-long screws securing the back cover.

  3. PtFV26uPOrRw6VEB
    PtFV26uPOrRw6VEB
    RPkJusFBRyHjqORY
    MQPnpZujtwdxhPmD
    • The back cover is lightly secured to the motherboard by thermal pads. Depending on the age of your laptop, it may be easier or harder to remove.

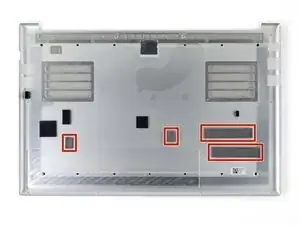
    • Use a finger to pry up the right side of the back cover, starting at the Ethernet port cutout.

  4. 1PtL256PRaO4CCSV
    1PtL256PRaO4CCSV
    CAEGXRyIgRVAICOA
    VbZXUqMHEAQwIOx2
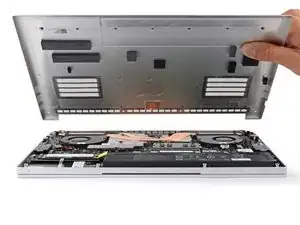
    • Remove the back cover slowly, as to avoid tearing the thermal pads underneath.

    • Lay the back cover down on its rubber feet to avoid damaging the thermal pads on its underside.

  5. XRkgHivDgZbisNw6
    XRkgHivDgZbisNw6
    M1LdDIrQVjLwRVnC
    • Apply a heated iOpener to the battery cable tape for one minute.

    • You can also use a hair dryer—but be careful, as overheating the battery may damage it or cause a fire.

  6. EoUPoXG31L6aRyAf
    EoUPoXG31L6aRyAf
    ykYMvaKZmhBGf2uP
    RuBuoMvcHbl6rIrs
    • Be careful not to damage the battery with your tool.

    • Use blunt nose tweezers or your fingers to peel and remove the battery cable tape.

  7. OeLTtP24eXZ1XKne
    OeLTtP24eXZ1XKne
    nG5o2urhstyEuH1u
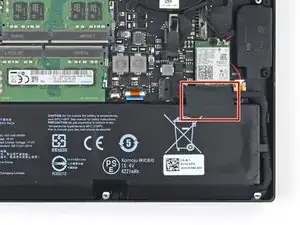
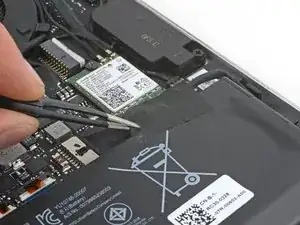
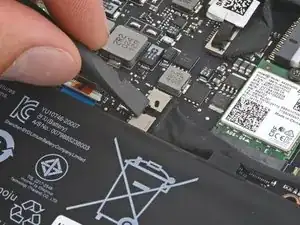
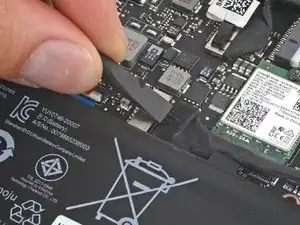
    • Use the flat end of a spudger to push the square tab on the battery connector and slide it out of its socket.

  8. tYBVRW4Gt5lsQAw2
    tYBVRW4Gt5lsQAw2
    XdYQtTaYXXcNALrX
    QNm3x6sZOH1yIYCO
    • Use a Phillips screwdriver to remove the 3.1 mm screw securing the SSD.

    • The SSD will pop up slightly.

  9. WMNAGedHXLo3X24U
    WMNAGedHXLo3X24U
    sMDgDjqwlq2NXhEg
    FgNXgpW2y6QmnfFi
    • Pull the SSD straight out of its socket and remove it.

    • During reassembly, insert the SSD at a slight downward angle before lowering it flat to the frame and securing it with its screw.

Conclusion

To reassemble your device, follow these instructions in reverse order.

Take your e-waste to an R2 or e-Stewards certified recycler.

Repair didn’t go as planned? Try some basic troubleshooting, or ask our Answers community for help.

Clay Eickemeyer

Member since: 19/09/22

77552 Reputation

0 comments