Introduction

This guide demonstrates how to remove the charging port in your Razer Blade 15" (2020) laptop.

  1. qJWDQqq15FbdAQh5
    qJWDQqq15FbdAQh5
    sDPHcOmlqZFm6nuo
    • Allow your laptop's battery to drain below 25% before starting this repair—a charged battery may catch fire if damaged.

    • Unplug all cables and fully shut down your laptop.

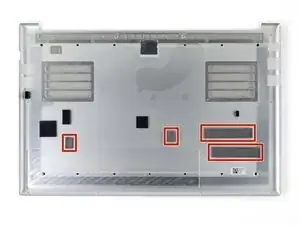
    • Close the lid and flip your laptop over so the back cover faces up.

  2. QXKNhOgcEdB4IAhI
    • Use a T5 Torx driver to remove the ten 3.7 mm-long screws securing the back cover.

  3. PtFV26uPOrRw6VEB
    PtFV26uPOrRw6VEB
    RPkJusFBRyHjqORY
    MQPnpZujtwdxhPmD
    • The back cover is lightly secured to the motherboard by thermal pads. Depending on the age of your laptop, it may be easier or harder to remove.

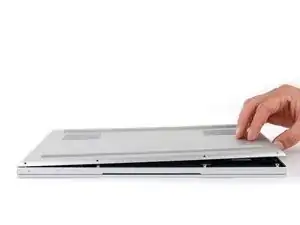
    • Use a finger to pry up the right side of the back cover, starting at the Ethernet port cutout.

  4. 1PtL256PRaO4CCSV
    1PtL256PRaO4CCSV
    CAEGXRyIgRVAICOA
    VbZXUqMHEAQwIOx2
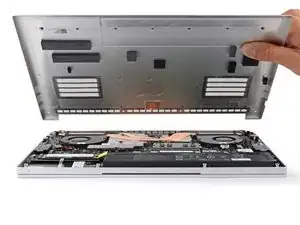
    • Remove the back cover slowly, as to avoid tearing the thermal pads underneath.

    • Lay the back cover down on its rubber feet to avoid damaging the thermal pads on its underside.

  5. XRkgHivDgZbisNw6
    XRkgHivDgZbisNw6
    M1LdDIrQVjLwRVnC
    • Apply a heated iOpener to the battery cable tape for one minute.

    • You can also use a hair dryer—but be careful, as overheating the battery may damage it or cause a fire.

  6. EoUPoXG31L6aRyAf
    EoUPoXG31L6aRyAf
    ykYMvaKZmhBGf2uP
    RuBuoMvcHbl6rIrs
    • Be careful not to damage the battery with your tool.

    • Use blunt nose tweezers or your fingers to peel and remove the battery cable tape.

  7. OeLTtP24eXZ1XKne
    OeLTtP24eXZ1XKne
    nG5o2urhstyEuH1u
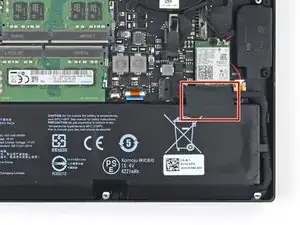
    • Use the flat end of a spudger to push the square tab on the battery connector and slide it out of its socket.

  8. 6WI3QGVhaQ2nZaaR
    6WI3QGVhaQ2nZaaR
    QeyoUbmG5ByZyKOM
    • In the next two steps, you'll disconnect the Wi-Fi antenna cables to access other components.

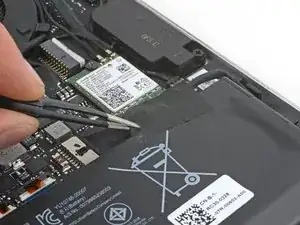
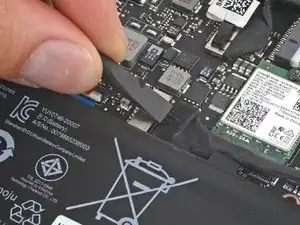
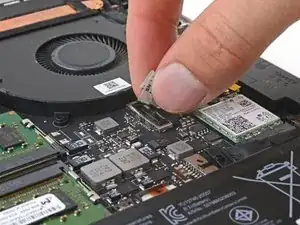
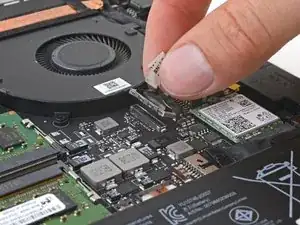
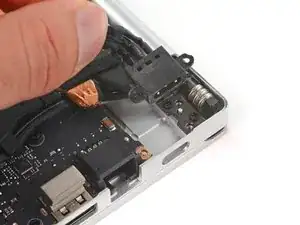
    • The antenna cables look very similar. Label one of them with a piece of tape or marker and remember which socket it connects to.

  9. oNZlGl1JaGUtdXyK
    oNZlGl1JaGUtdXyK
    dTfNC2SX6oELv3GA
    aWWXOeno4AJwTTeP
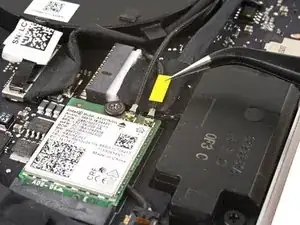
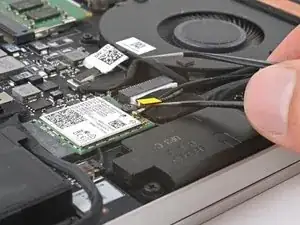
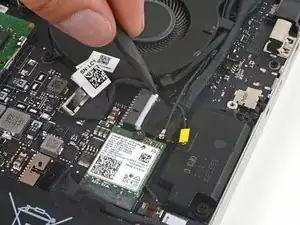
    • Insert one arm of angled tweezers under the metal neck of each antenna cable and pry up to disconnect it.

    • During reassembly, align the connector over its socket and gently press down with the flat end of your spudger or your fingernail until it clicks into place.

  10. 4IYKJlLjpvkXdTiF
    4IYKJlLjpvkXdTiF
    sVwDbOXAbVpainad
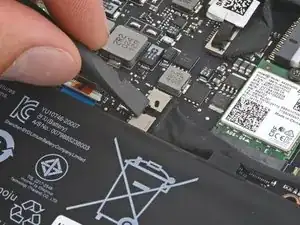
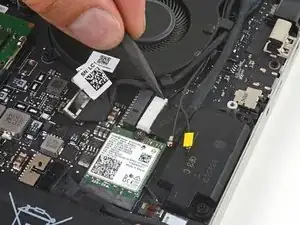
    • Grab the pull tab on the screen connector.

    • Pull up to disconnect the connector from its socket.

    • During reassembly, align the connector over its socket and press down until it clicks into place.

  11. kjgZXeMTEqN1jN3P
    kjgZXeMTEqN1jN3P
    va5PMufMqTyTOxx3
    gNlfQBfTTA5GxyZO
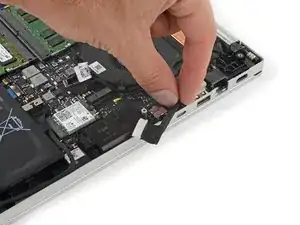
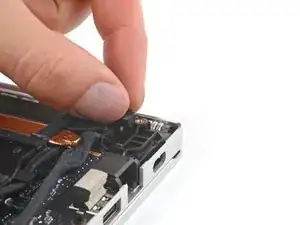
    • Use the point of your spudger to press on alternating sides of the charging port connector to "walk" it out of its socket.

  12. jtlYx3bTxJTr1tNP
    jtlYx3bTxJTr1tNP
    yZYJBOyDTQvErJAm
    • Move the charging cable over the right edge of the laptop.

  13. V1Ya2SZnMHcZEKXE
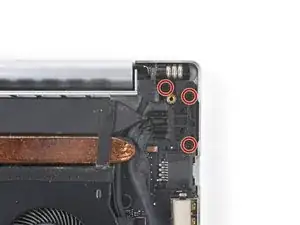
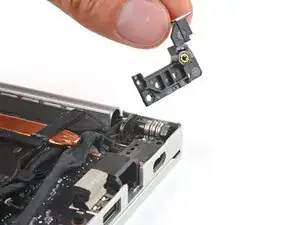
    • Use a Phillips screwdriver to remove the three 6.7 mm screws securing the right hinge cover.

  14. up5ikNMvlQ6wCLkM
    up5ikNMvlQ6wCLkM
    1QVWqx6RuWxVJVUl
    • Remove the right hinge cover.

  15. ETUKHlvKucltUNke
    ETUKHlvKucltUNke
    eDFD1hvjiZlbLo2V
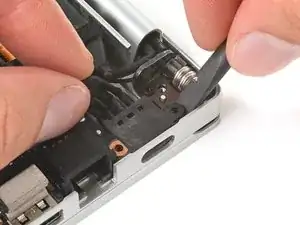
    • Hold the charging port cables out of the way of the heatsink.

    • Use the flat end of your spudger to pry up the top screw mount of the charging port until it clears the hinge.

  16. gn6vYSoCGyC6ZrnM
    gn6vYSoCGyC6ZrnM
    Xh2eBbsnEyVWdfgV
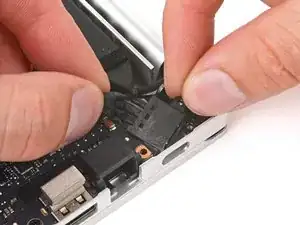
    • Rotate the charging port counterclockwise and slide the lower screw mount out from underneath the motherboard.

    • Remove the charging port.

Conclusion

To reassemble your device, follow these instructions in reverse order.

Clay Eickemeyer

Member since: 19/09/22

77552 Reputation

0 comments