Introduction

The Pokemon Go Plus+ uses the same battery replacement as the Nintendo Switch Official Joy-Cons, so finding the battery should be very easy!

  1. APjyFYXY5lgIDWZR
    • Flanking both sides of the charging port are J00 Screws. Remove these.

    • These screws go into plastic, so when re-assembling the device, be very careful not to over tighten them.

    • These two screws are identical to each other, but differ from the screws within the device, keep them separate from any screws you remove from within the device.

  2. 3Of25rM3CKnnUiZR
    3Of25rM3CKnnUiZR
    rrQxI3KZGmOsDny4
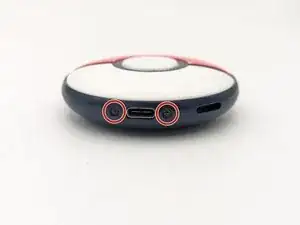
    • When looking at the front of the device, with the charging point at the bottom the device has a hinge clip and wires on the top right.

    • While opening, be extremely careful not to damage the fragile cables and connection between the main body and the faceplate.

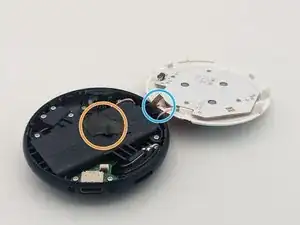
    • With a fingernail or some kind of slim pry tool, gently lift from the bottom left corner.

    • There is adhesive that is holding the faceplate on, If you have difficulty pulling it off, use a plastic spudger by inserting it in on the bottom left then slowly hinge the device open while applying pressure to the adhesive pad to loosen it.

    • Normally you'd disconnect the battery first, but with this device we cannot reach the connector until we remove the battery cover.

    • This connector is the same one on the Nintendo Joy-Cons, this connector has no retention clip, and must be pried upward to remove it.

    • Do not pull on the wires directly. They are fragile and will strip out of the connector with too much force, instead using the flat end of your spudger tool, reach under the connector and pry it up.

    Do you have a video of this please? I’ve tried to remove the battery clip but the wires came out. My device is sea water damaged. I have cleaned the board, can’t see any obvious damage but it doesn’t seem to be powering up

    Nimal -

    I do not have a video of it, I no longer have access to the light box to take additional photos, but hope to get a replacement to get some additional photos to make the process more clear. This is why step 4 does have that warning about not pulling the wires directly.

    David -

    • The battery is attached to the cover with some adhesive, use your spudger to carefully and gently lever it off the cover.

Conclusion

To reassemble your device, follow these instructions in reverse order.

David

Member since: 27/08/14

660 Reputation

2 comments

Do you need to solder the wires into the new battery, or is it just a clip system?

mitchellrochon -

There is a connector, it's not soldered. It's the exact same part and connector is the official joycon batteries.

David -