Introduction
Follow this guide to replace the motherboard on your Sony Playstation 4.
The motherboard and optical drive are paired, thus replacing only the motherboard will result in a non-functioning device. Be sure to order the correct paired optical drive and motherboard for your PS4 model and replace both.
Unplug your PS4 before beginning any repairs.
-
-
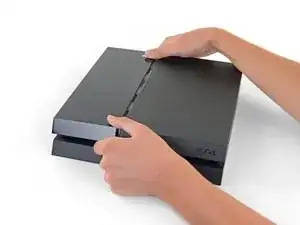
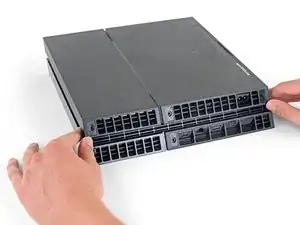
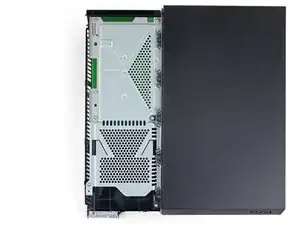
Grip the PS4 with both hands along the gap in the top cover.
-
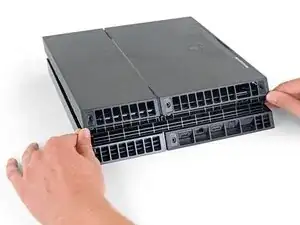
Push the glossy side of the top cover with your thumbs until it pops to the side.
-
Lift the glossy top cover up and back to remove it from the PS4.
-
-
-
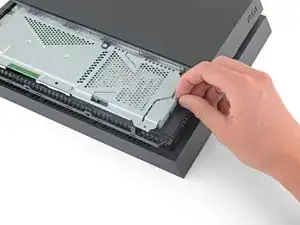
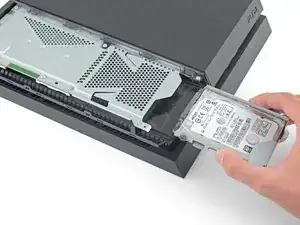
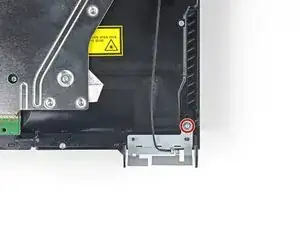
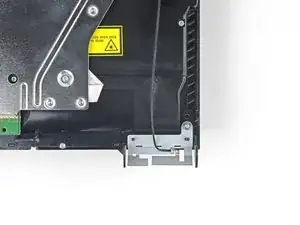
Use a Phillips screwdriver to remove the 6.5 mm screw securing the hard drive bracket to the enclosure.
-
-
-
Use tweezers to carefully remove the plastic screw covers in each corner, exposing two more case screws.
-
-
-
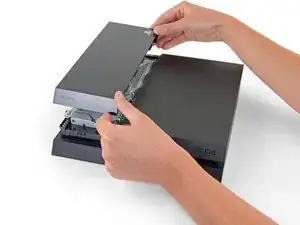
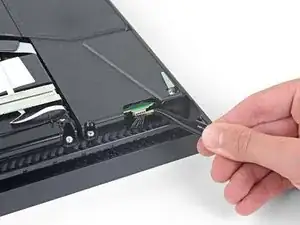
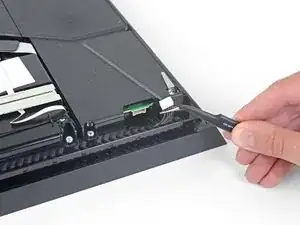
Use a pair of tweezers to pull the power supply cable straight out and disconnect the power supply unit from the motherboard.
-
-
-
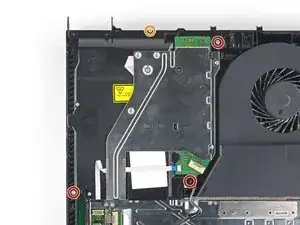
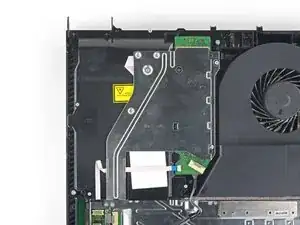
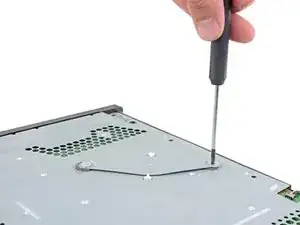
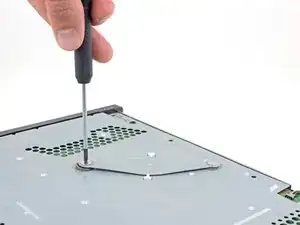
Remove three 9.7 mm-long TR8 Torx security screws.
-
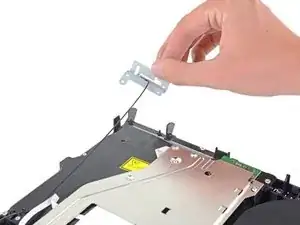
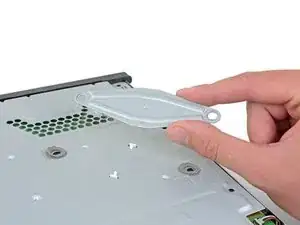
Remove two 41 mm-long Phillips screws and brackets.
-
-
-
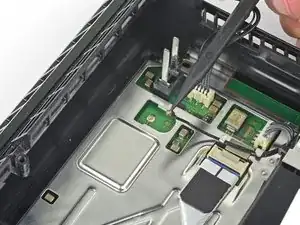
Use a pair of tweezers or your fingers to thread the antenna cable out from underneath the optical drive cable.
-
-
-
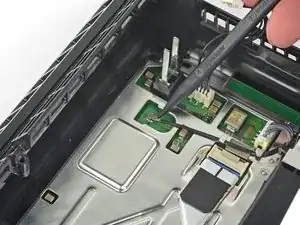
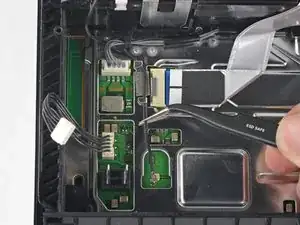
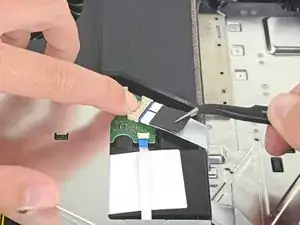
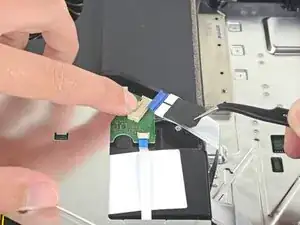
Use your fingernail to press down the metal release lever for the ribbon cable connected to the motherboard.
-
Use your fingers or a pair of tweezers to disconnect the ribbon cable by pulling on the black tab.
-
Set the ribbon cable aside for reassembly.
-
-
-
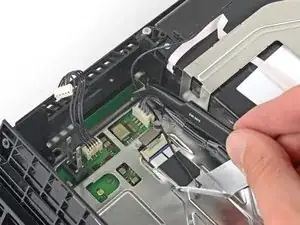
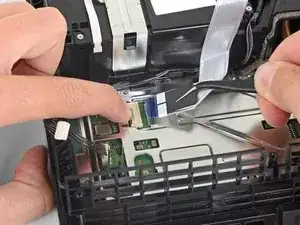
Use your fingers or a pair of tweezers to disconnect the optical drive cable from the motherboard.
-
-
-
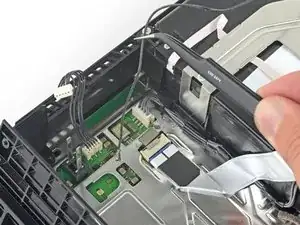
Use your fingers or a pair of tweezers to remove the optical drive cable from the cable guides that hold it in place.
-
-
-
Remove the four screws securing the optical drive.
-
Three 9.7 mm Torx screws
-
One 6.2 mm Phillips screw
-
-
-
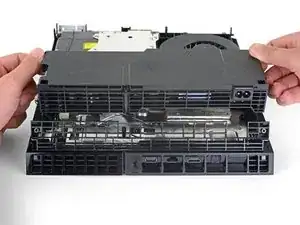
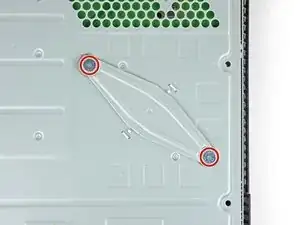
Remove the two 15.6 mm Phillips screws.
-
Gradually unscrew the pressure plate by turning each screw one half turn at a time.
-
Alternate between the two screws to maintain even pressure on the pressure plate.
-
-
-
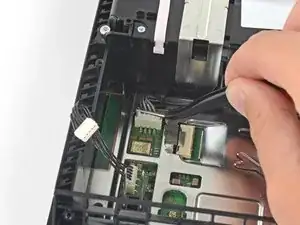
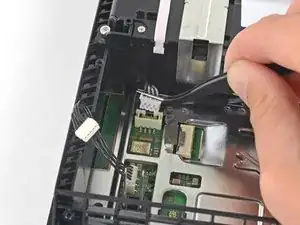
Insert the flat end of a spudger in between the fan cable and the motherboard.
-
Twist the spudger to lift the connector straight up and disconnect it from the motherboard.
-
-
-
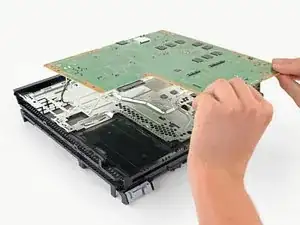
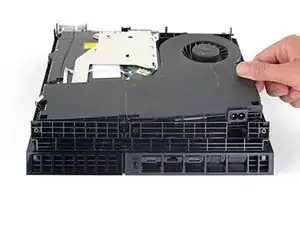
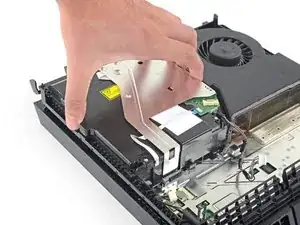
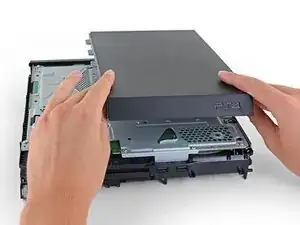
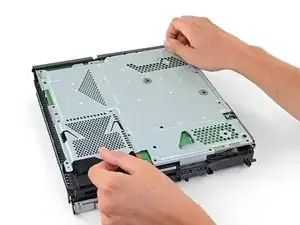
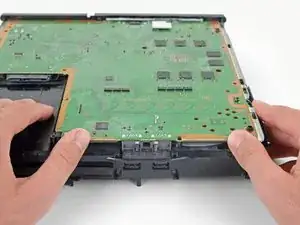
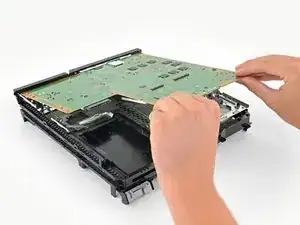
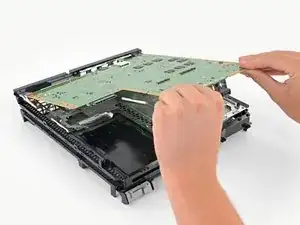
Grab the edge of the motherboard on the front of the PS4.
-
Lift the motherboard until the USB ports clear the PS4 case.
-


To reassemble your device, follow the above steps in reverse order.
Take your e-waste to an R2 or e-Stewards certified recycler.
Repair didn’t go as planned? Check out our Answers community for troubleshooting help.
Compare your new replacement part to the original part—you may need to transfer remaining components or remove adhesive backings from the new part before installing.

18 comments
Regarding the three wire plug in step 20 - is there a good way to repair this piece if, say, you pulled the wires out of the connector by accident? is there a place to get a replacement part?
I have tried to replace the hdmi port however being somewhat of an idiot I slipped and knocked off onto the little black squares just behind the port on the left hand side. Does anyone know what these are?
contacts of the motherboard
You may be talking about capacitors that are critically important for the unit to function.
South30 -
You mean that little brown parts next to the desoldered HDMI port chip? Seems to be capaciators.
Check it with a multimeter: No connection through that parts: Capaciator, Connection through that parts: Coil
Ok so I was taking mine apart, and while I was separating the ribbon wire from the optical drive during step 7, I broke the top off the connector by accident. I thought I could fix it with hot glue, but my ps4 doesn't read disks (at all, doesn't even know there's a disk in the drive). Is there a way to repair this without getting a new drive?
I have a CUH-1102A version of this PS4.
Would this teardown work for it?
Cary B -