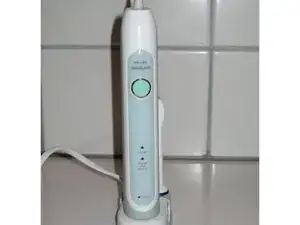
Introduction
Most common issue with this is the difficulty with which to open it up.
Tools
Parts
-
-
Remove the brush head
-
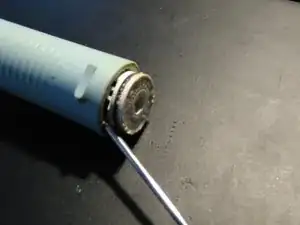
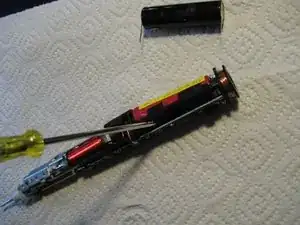
Using a thin screwdriver carefully pry open the bottom of the case.
-
Have a look to an alternative opening procedure.
-
-
-
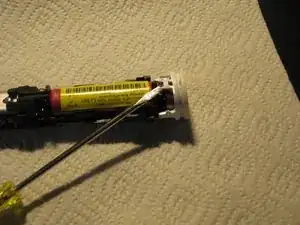
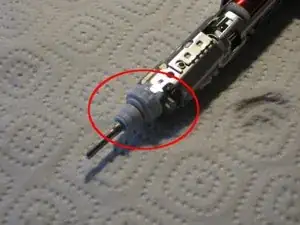
Remove lower cap (2 plastic tabs). O-ring is already removed in this picture.
-
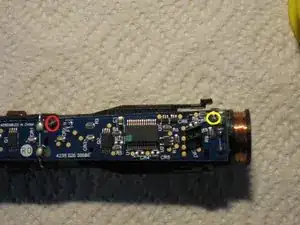
Here are the solder connections of the battery: + (red) and - (yellow).
-
-
-
Unwrap the battery and replace it (see Soldering Skills).
-
To avoid a short circuit (the battery will normally still have a remaining charge), start at the positive pole of the battery and unsolder completely from the board.
-
Continue with the negative pole.
-
At the end, loosen the soldering pads from remaining solder, so that the contacts of the new battery can be inserted into the board.
-
Solder teh positive and negative pole.
-
Requires a 3.7V battery, which is approximately 14mm x 49mm (similar to AA).
-


To reassemble your device, follow these instructions in reverse order.

One comment
I saw in another guide that it is advisable, before working on the Li-Ion battery, to break the join between the two pads of JP1 which disconnects the battery.
This is very important due to the volatile nature of Lithium-Ion batteries.
It also takes away some risk of shorting out the battery when we remove it.
So with the solder, before working, break the join between the two pads of JP1.
And at the end, after replaced the battery, re-join the two solder pads of JP1.
Albyee -