Introduction
Over time, the reading of the light meter in the Spotmatic can drift. This guide explains how to adjust the variable resistor in the light meter circuit to improve its accuracy.
If you are adjusting the meter as part of a larger overhaul or disassembly, it's a good idea to replace the top cover before doing the adjustment. This will prevent stray light from influencing the light sensors.
Tools
-
-
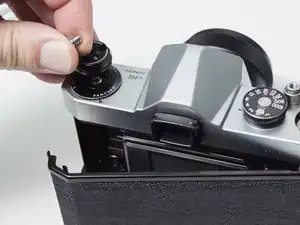
Place a thin, sturdy tool in the spindle fork.
-
Unscrew the rewind knob.
-
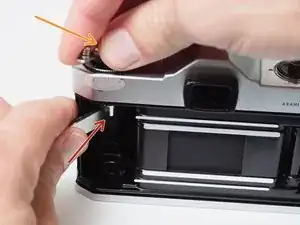
Use a spanner wrench to unscrew the retaining nut.
-
Remove the film reminder
-
Remove the spring washer.
-
Remove the friction plate.
-
-
-
Mount a lens on the camera.
-
Create a scene of known brightness in front of the camera.
-
Adjust the aperture, shutter speed and ISO to achieve proper exposure for the chosen scene.
-
Switch on the light meter.
-
-
-
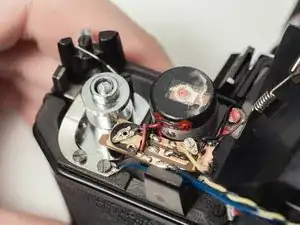
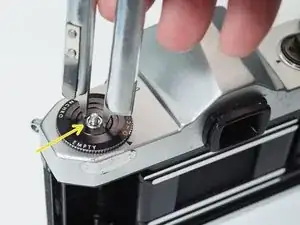
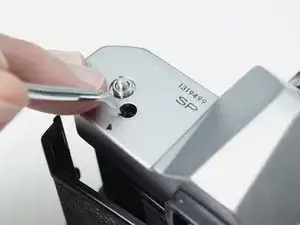
Use a pick to adjust the variable resistor through the opening in the top plate.
-
Turn it until the needle in the viewfinder is centered in the opening, indicating a proper exposure.
-
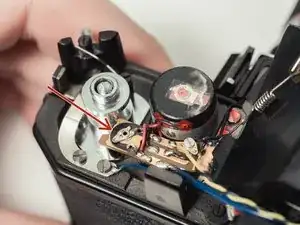
The adjustment resistor shown with the top cover removed.
-
Repeat steps 3 and 4 for several different light levels.
-

To reassemble your device, follow these instructions in reverse order.