Introduction
The light meter of the ME Super is very reliable and doesn't typically need adjustment. But if parts of the electronic meter are replaced such as the ISO resistor, aperture resistor or light sensor, calibration should be performed. It's also good practice to check the accuracy of the light meter after a major disassembly to ensure that the camera is working properly.
Tools
-
-
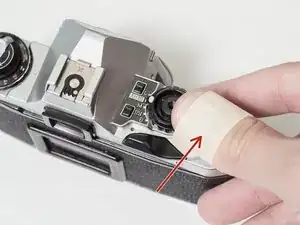
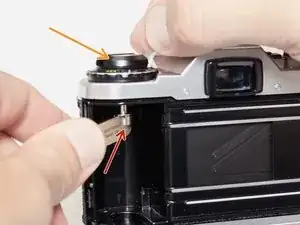
Wrap a piece of masking tape around your thumb, sticky side out.
-
Turn the wind lever cap clockwise to remove (it is reverse threaded).
-
Remove the wind lever lock ring (it is also reverse threaded).
-
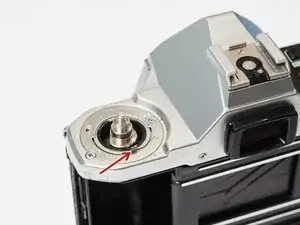
Remove the brass spring washer.
-
-
-
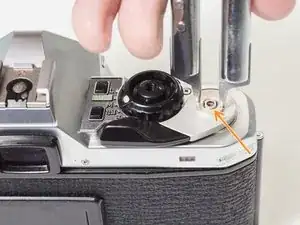
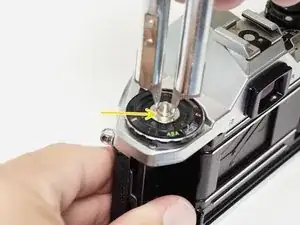
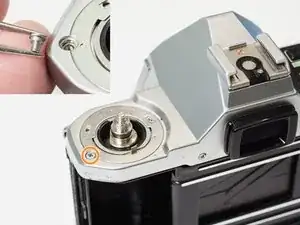
Place a tool in the fork of the rewind spindle.
-
Unscrew the rewind lever.
-
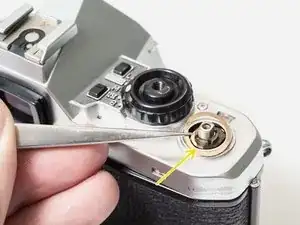
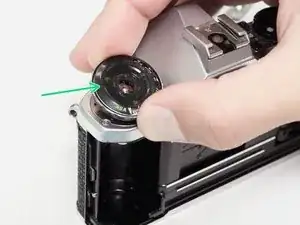
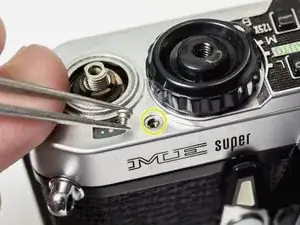
Remove the lock ring with a spanner.
-
Lift off the ISO/Exposure Compensation dial.
-
-
-
Ensure that the ISO dial couples with the tab on the resistor.
-
Turn the Exposure Compensation to 1/4x then back to 4x while gently pushing down. This will help the dial engage with the detent mechanism properly.
-
-
-
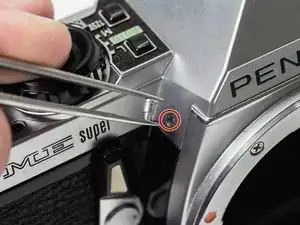
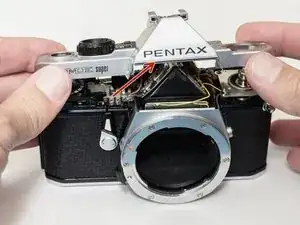
Lift off the top cover. The silver trim piece is loose and may fall away.
-
Remove loose washer.
-
-
-
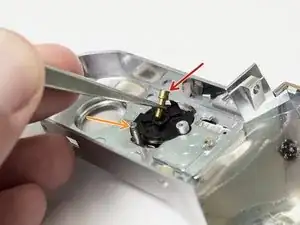
The shutter pin is loose. Make sure it is in place before installing the top cover.
-
The mode dial pin must be properly coupled with the mechanisms in the camera for it to work.
-
Set the mode dial to 'M'. Place the top cover on the camera. Move the mode dial to 'B' then back to 'M' while gently pushing down.
-
The mode dial should click into place and work properly.
-
-
-
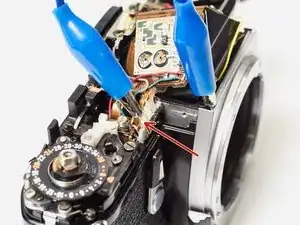
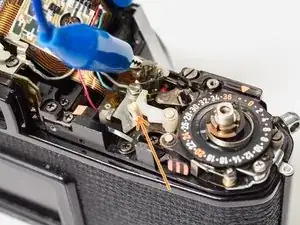
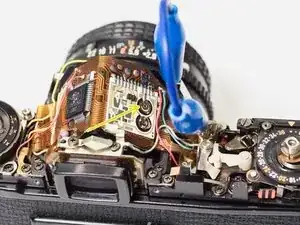
Ground the right most mode contact to the camera body. This puts the camera electronics in 'Auto' mode.
-
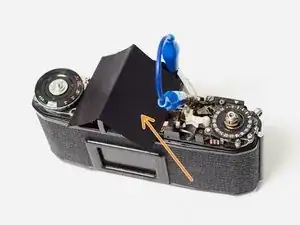
Insert a small rod between the mode levers. This puts the mechanics of the shutter in 'Auto' mode.
-
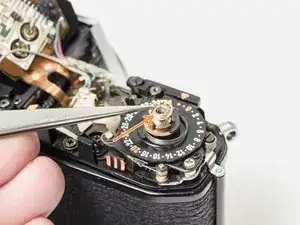
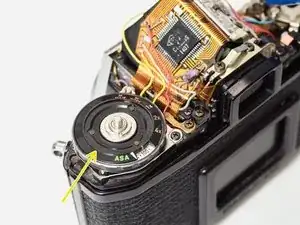
Install the ISO dial.
-
-
-
The ME Super has a stepless shutter in 'Auto' mode, which means it can fire at speeds inbetween the standard one stop increments. The indicated speed may be 1/60 but the metered speed could be anywhere from 1/45 to 1/90. The shutter will fire at the metered speed.
-
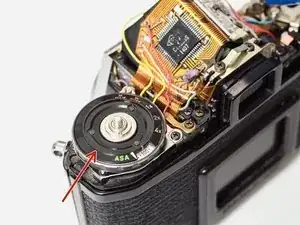
Use the 1/3rd stop increments of the ISO dial to determine if the indicated value is in the center or at the edge of the possible range. Adjust until it is centered.
-
Use a shutter speed tester to check the actual speed of the shutter and compare it to the indicated speed.
-
Adjust VR2 until the measured speed matches the indicated speed.
-
-
-
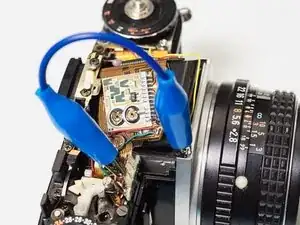
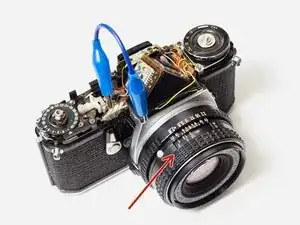
Mount a lens on the camera and measure the exposure for the scene with a known good light meter or camera.
-
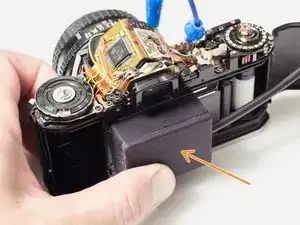
Use a shroud to keep ambient light away from the light sensor. The light meter should only read light from the focusing screen of the camera.
-
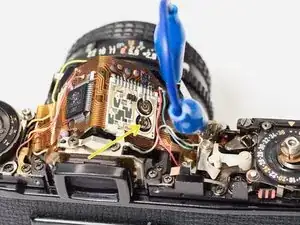
Adjust VR1 until the metered exposure matches the correct exposure.
-
Repeat the last two steps at different exposure values for additional calibration points.
-


To reassemble your device, follow these instructions in reverse order.
2 comments
Hi, do you know if moving vr1 changes the shutter speeds in manual mode? I’ve read the service manual but haven’t been able to find how to adjust the slow shutter speeds (0,5 to 4s)
Kpanga -
No, the manual speeds are not affected by the variable resistors. If the manual speeds are off the first step is to service the shutter (i.e. disassemble and clean the shutter). If they are still inaccurate, there is an adjustment screw on the shutter itself but it is difficult to use properly. And it's more useful for adjusting the fast speeds rather than the slow speeds as it changes the release timing of the closing curtain.
In my experience it's hard to use a masking tape to unscrew the wind lever. I'd recommend a camera lens friction like this: https://www.amazon.com/Japan-Vacuum-Came...
Sergi -
Yeah, those tools are great. But I try to recommend solutions with non- specialized tools whenever possible. The only issue I've had with masking tape is that it can rip if the cover is very tight. Doubling up the wrap helps.
Sam Gustafson -