Introduction

Cracked/broken LCD? No problem! Replace it with ease.

  1. XO6sdwqRCRycqiIA
    XO6sdwqRCRycqiIA
    4mRegB1VDoLKyWtR
    xTyAXH3XLXD1Om1M
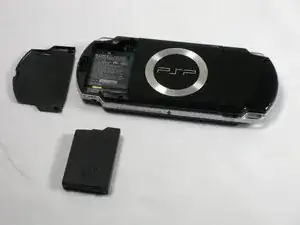
    • Place PSP face down, so that the UMD Drive is facing upwards.

    • Locate the battery door and open.

    • Remove the battery from inside.

  2. Dikdo3qUVr2t1ZtY
    • This step requires the removal of the warranty sticker. Removing the sticker will void the warranty. According to the FTC removing this will not void your warranty.

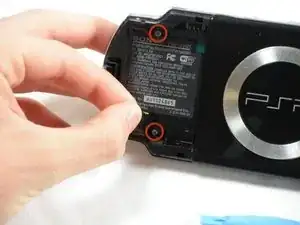
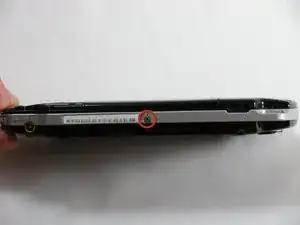
    • Locate the sticker in the battery compartment labeled: "En: Warranty Void if Seal Damaged."

    • Remove the sticker using the PSP Opening Tools.

    • Under the sticker is a 5mm Phillips screw needed in the next step.

  3. RtxXG3POPjorw1TF
    RtxXG3POPjorw1TF
    tnMbdLQBL4qTOENO
    • Remove four 5 mm Phillips from the case.

    • If the screws stick in the case, you can use a magnetized screwdriver to draw them out.

  4. h1nV2UQrXMyUapF1
    h1nV2UQrXMyUapF1
    qtbUK1Df5oACJZna
    • Remove the following screws from around the bezel:

    • Two 4 mm Phillips

    • One 5 mm Phillips

    • The two shorter 4 mm screws are on the top of the PSP; the longer 5 mm screw is on the bottom.

    Beware that some models of PSP 2000 (mine is a limited edition Crisis Core FF7 silver version, so I suppose it is related to it being a japanese PSP) have 2 minute TORX screws (T1? T2?) instead of the 2x 4mm Phillips pointed in orange around the USB port.

    Mighty Sashiman -

  5. ahAccPrwEVo2ZT1M
    ahAccPrwEVo2ZT1M
    NOktUSHuGnXItXUT
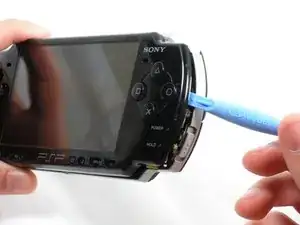
    • Gently pry the front bezel away from the casing using a PSP opening tool.

    • Start on the right hand side of the PSP bezel, and carefully work the tool around the side.

    • If you want to clean the control buttons or D-pad, you can easily pop them out once the faceplate is off and wipe them clean.

  6. fg3PHuHeHOFiGxEp
    fg3PHuHeHOFiGxEp
    CXeGrqO4NpcsVEUH
    eFKUMBU2fNchJRFr
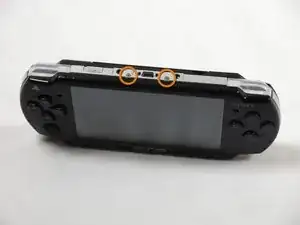
    • Remove the home bar by gently prying on the left and right sides of it with the opening tools. Lift the bar out of the device.

    • A ribbon cable connects the home bar to the logic board. Be careful not to damage the cable when removing the bar.

    Theres a latch you have to pry on the other side of the console through the small hole in order to remove home menu bar

    Janus Golovka -

  7. qDeeW61mKA1fBXQs
    qDeeW61mKA1fBXQs
    DLyAgIMf2gQwJg5R
    IfB5EGOmIkujyCbe
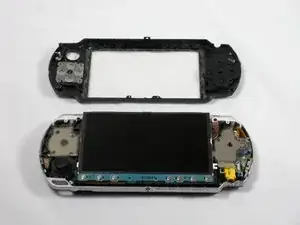
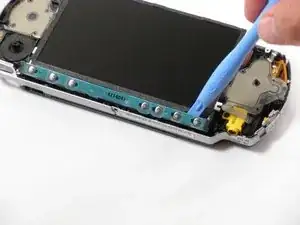
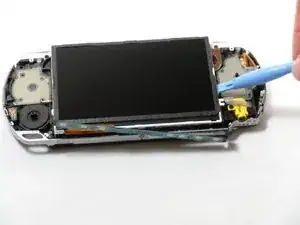
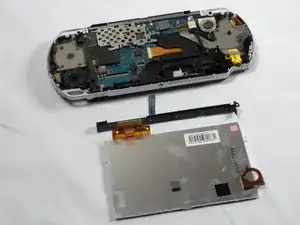
    • With the home bar out of the way, gently pry up the display using the opening tools.

    • There is another ribbon cable attached to the bottom of the LCD. Be careful not to damage either of the connectors when removing.

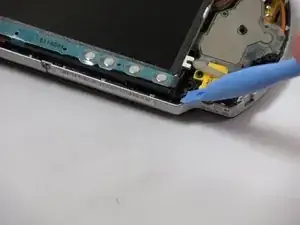
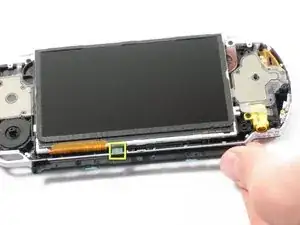
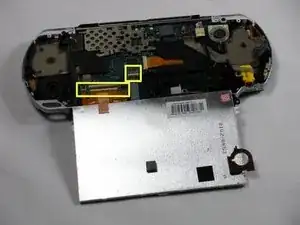
    • Lift the black tabs of the ribbon cable connectors using a opening tool. Pull the ribbons out towards the bottom of the PSP to disconnect.

    • Gently lift out the display.

    There are 2 ribbons connected to the screen. Both of them have to be disconnected in order to remove the screen.

    Ovismue Veholkin -

    Do not lift the black tab on the thin cable. That's attached to the logic board.

    Colin Wack -

Conclusion

To reassemble your device, follow these instructions in reverse order.

espinks

Member since: 18/10/09

3573 Reputation

5 comments

That does’t seem that hard. Is this tutorial working with the PSP2004?

Jack Galinski -

Yes it is, just did it :)

Billy -

Thanks for the great tut just fixed a trash find psp with a cracked lcd.

myhero667 -

Parfait tutoriel pour remplacer mon écran de PSP 2004. Un grand merci

Ramius59 -

I was wondering why after replacing the screen that the new one only shows a blank black screen. The backlight turns on and it plays the boot up sequence and you can play around on the Home Screen, but you just cant see what you’re doing on the screen. Everything seems connected right. Any suggestions??

Dylan Thomas -