
Introduction
If you are having problems with your OnePlus 6 not holding a charge or not powering on, use this guide to replace your phone’s battery.
The battery of a phone is what gives the phone power and having a good battery is key to a long phone life.
From time to time, the battery life of a phone, even in the OnePlus 6, may be depleted over time and cause you some frustration. These problems can come from a variety of things like overloading the phone with too many apps running to simply having a faulty and depleted battery. Be sure to check out the OnePlus 6 Troubleshooting page to see if there is a easy fix before taking action to replace anything. If nothing is working, this step-by-step process will guide you through replacing your old battery with a new one so you can get your OnePlus 6 back to running like new.
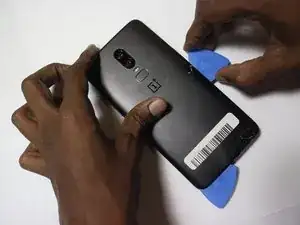
The first step in this replacement guide is to remove the back panel of the phone, the back panel is made of glass so be careful not to shatter it. Also, be on the lookout for a swollen battery as it can be a fire and explosion hazard.
Be sure to disconnect any power sources and shutting down the phone before beginning the replacement process.
-
-
Turn on the heat gun to a low heat and and gently heat the curved edges on the back of the phone.
-
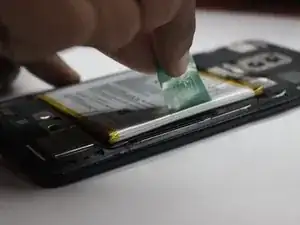
Wedge the opening picks between the front and back panel and slide them around the perimeter to break the adhesive securing the back cover.
-
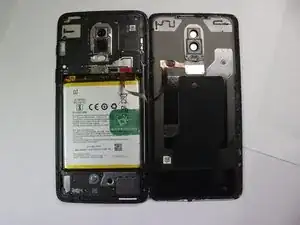
Repeat until the back panel is fully released.
-


To reassemble your device, follow these instructions in reverse order.
For optimal performance, after completing this guide, calibrate your newly installed battery.
Take your e-waste to an R2 or e-Stewards certified recycler.
6 comments
How do I glue the phone back together when I am done? Do I need to add more glue? Do I just heat it with the heat gun again and squeeze it together?
I agree, this is unclear.
The "Parts" section at the top includes "Precut adhesive card", but when you click on that item, it gives a whole bunch of different size options for rolls of tape (8mm, 5mm, 1mm, etc.) and it's unclear which size to get. Does anyone have details of this?
Greg -
Great tutorial, battery is fixed thank you ! If you prefer videos, this one is a good complement https://www.youtube.com/watch?v=OBN7Tc7J...
Battery good so far, instructions clear enough! I turned the phone on immediately after replacing the battery to make sure everything worked. This was to avoid putting the phone back together only to find it wouldn't turn on, and then having to dismantle it again.
One thing you may want to pay attention to is not to separate the screen (front) layer from the phone, rather than the back side, which is what I did on my first try.
I opted not to get adhesive strips and I simply applied thinly cut electrical tape around the phone's edges, on the outside, to keep it together after fixing. Not terribly aesthetic but does the job well enough, especially if you use a book-style phone case like me.
Pretty doable fix for a first-timer, especially when using the fixit tools (picks, spudgers etc). Happy with the results. Thank you for the guide!
Nic F -
I used half a razor blade here
derhagen -
If you have a glass back cover, be careful not to pull too much or it may crack. It's better if you keep heating the area before trying to get in with the opening picks, specially around the corners.
tottimeatter -
I was using a hairdryer on 2/3 heat level and my phone was very hot to the touch and it still wouldn't budge a millimeter to get the plastic tools in. Any advice? I'm not sure heating it more is safe for the rest of the phone, so I'm not sure what else to do.
Tim Harry -