Introduction

Use this guide to replace the earpiece speaker on your Nothing Phone (1).

You’ll need replacement adhesive to reattach the rear glass when reassembling the device. Your device will function normally, but will most likely lose its IP (Ingress Protection) rating.

  1. bNXONSNEPhNABEgt
    • Prepare an iOpener and apply it to the rear glass for at least two minutes to loosen the adhesive underneath.

    • A hair dryer, heat gun, or hot plate may also be used, but be careful not to overheat the phone—the display and internal battery are both susceptible to heat damage.

    Bereite einen iOpener* vor und platziere ihn für einige Minuten am rückseitigen Glas, um den Kleber darunter zu lösen.

    *Ein Haarfön, eine Heissluftpistole und ähnliches könnte auch zum erwärmen verwendet werden. Dies aber BITTE mit Vorsicht, Akkus mögen zu starke Hitze nicht z.B.

    byte park -

    eine frage wo kann mn ne glassrückseite kaufen zum replacen

    aoaoaoa aoaoaoa -

  2. eHqiReJ6LbREgqTR
    eHqiReJ6LbREgqTR
    KyRcYrfOkgrmWrae
    eEByrbHRapwtTvWT
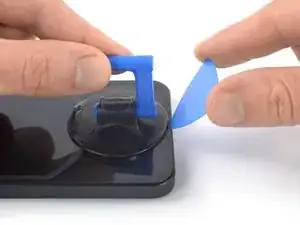
    • Secure a suction handle to the bottom edge of the rear glass, as close to the edge as possible.

    • If the rear glass is cracked, the suction handle may not stick. Try lifting it with strong tape, or superglue the suction handle in place and allow it to cure so you can proceed.

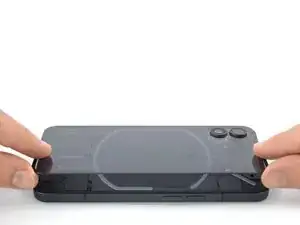
    • Lift the rear glass with the suction handle to create a small gap between the back cover and the frame.

    • If you're having trouble creating a gap, apply more heat to further soften the adhesive. Follow the iOpener instructions to avoid overheating.

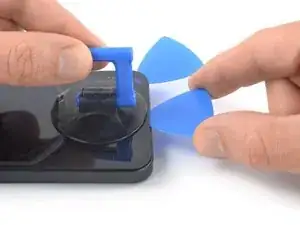
    • Insert an opening pick into the gap you created.

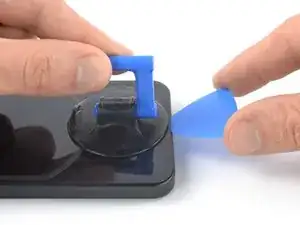
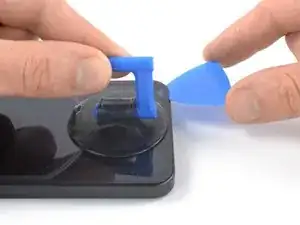
    • Slide the opening pick to the bottom right corner to slice the adhesive.

    • Leave the opening pick in place to prevent the adhesive from resealing.

    .Einen Sauger unten am hinteren Glas anbringen, so nah wie möglich am Rand. i:Falls das Glas schon gesplittert ist, lässt sich der Sauger nicht verwenden. Man kann es mit einem starken Klebeband versuchen, oder man klebt den Sauger mit SuperKleber fest.

    .Das rückseitige Glas minimal anheben, um einen kleinen Spalt zwischen der Rückseite und dem Rahmen zu erzeugen. i:Bei Problemen nochmals mit iOpener oder Wärmegeräten versuchen, den Kleber etwas zu lösen.

    .Einen Plektrum bzw ein geeignetes Werkzeug in den geschaffenen Spalt einführen.

    .'Schneiden' Sie mit dem Werkzeug durch den Kleber zur rechten unteren Ecke.

    .Das Werkzeug nicht entfernen, um Wiederverkleben zu verhindern.

    byte park -

    Findet das jemand ganz ok übersetzt, oder sogar gut? mfg

    byte park -

    ¿Dónde puedo conseguir el cristal trasero ya que se me rompió?

    Alan Rodriguez -

  3. uJx4GocOXnpHTRWy
    uJx4GocOXnpHTRWy
    4aBut1cob3LQNuSB
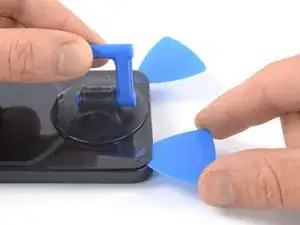
    • Insert a second opening pick at the bottom edge of your phone.

    • Slide the opening pick to the bottom left corner to slice the adhesive.

    • Leave the opening picks in place to prevent the adhesive from resealing.

    Hello help please! I'm in France and I'm desperate to find the back glass for my Nothing Phoane 1help me with a link outside india where i can find? India does not ship to France

    costache marius -

  4. QFxiLQllfSFhXlGX
    QFxiLQllfSFhXlGX
    KW536QTInRUBy64Q
    wSIG2yns3mSLlATA
    • When you slice near the glyph, insert only the tip of the opening pick (~2-3 mm) to avoid damaging the LEDs.

    • If the adhesive becomes hard to cut, it has most likely cooled down. Use your iOpener for one to two minutes to reheat it.

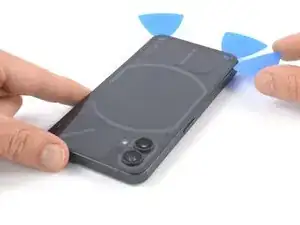
    • Insert a third opening pick at the bottom left corner of your phone.

    • Slide the opening pick along the left edge of your phone to slice the adhesive.

    • Leave the opening pick in the top left corner to prevent the adhesive from resealing.

  5. RVj6csadxA33WjeZ
    RVj6csadxA33WjeZ
    KRBJdZG2RMgLoPMT
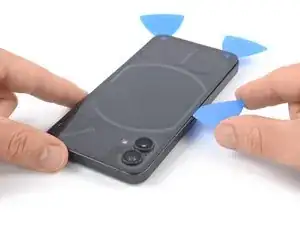
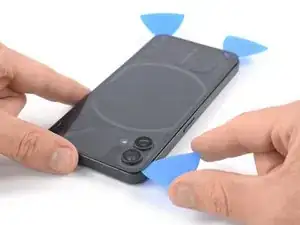
    • Insert a fourth opening pick underneath the top left corner of your phone.

    • Slide the opening pick along the top edge to slice the adhesive.

    • Leave the opening pick in the top right corner to prevent the adhesive from resealing.

  6. JDThviOlEYWeZnQK
    JDThviOlEYWeZnQK
    VXQyutRToIZQPqJy
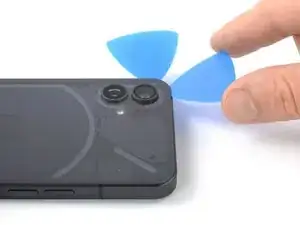
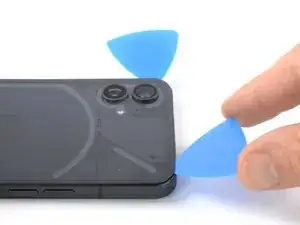
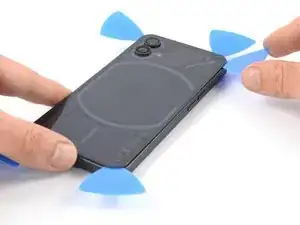
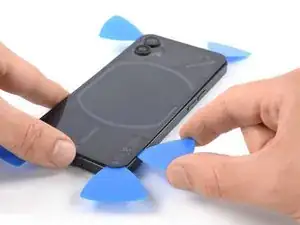
    • Insert a fifth opening pick underneath the top right corner.

    • Slide the opening pick along the right edge of the rear glass to slice the remaining adhesive.

    • At this point, the rear glass should be separated from the frame. If there's still resistance around the edges of the glass, use an opening pick to separate any remaining adhesive.

  7. 3KsNWYfoXSnYjS5i
    3KsNWYfoXSnYjS5i
    PNfLo4AAQYrTThW6
    • Remove the rear glass.

    • Apply new adhesive where necessary after cleaning the relevant areas with isopropyl alcohol (>90%).

    • Since the rear glass of the Nothing Phone (1) is transparent a dust blower may come in handy for cleaning before installing a new rear glass.

    • Secure the new back cover with pre-cut adhesive or double-sided adhesive tape. After installing the back cover, apply strong, steady pressure to your phone for several minutes to help the adhesive form a good bond—a stack of heavy books works well.

    Bonjour,

    La vitre arrière est introuvable.

    C'est scandaleux..

    Stéphane 34 -

    Bonjour @stephane34,

    Nous n’avons malheureusement pas de pièces pour le Nothing Phone. J'ai transmis la demande à notre département d'achat.

    Bonne continuation de vos recherches !

    Claire Miesch -

    Nothing phone 1 real glass kidar milega

    Nothing 1 -

  8. HOQTdDhd1DBifPRg
    HOQTdDhd1DBifPRg
    XmBB3vgPsN3CIxmO
    sxFFJSBJKhFw5bGg
    • The plastic covering the earpiece speaker is held in place by mild adhesive. If you're having a hard time removing it, apply a heated iOpener for 1-2 minutes to loosen the adhesive underneath.

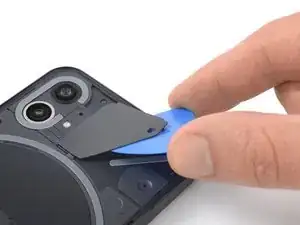
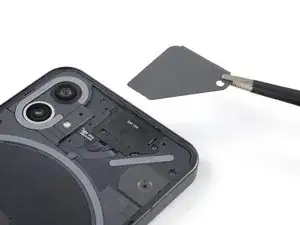
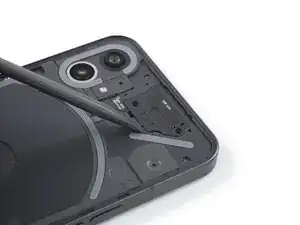
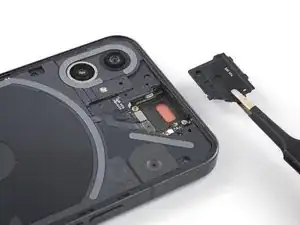
    • Insert an opening pick underneath the grey plastic cover at the top edge of your phone.

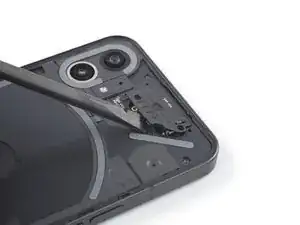
    • Use your opening pick to pry up the plastic cover.

    • Remove the plastic cover.

  9. wnJVdhUXLjEmPuXu
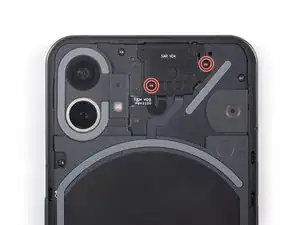
    • Use a Torx T5 screwdriver to remove the two 4.2 mm-long screws securing the earpiece speaker.

  10. ZPHppFAqsMwwKn1P
    ZPHppFAqsMwwKn1P
    fpeMuIvybluM54ck
    MX6sKfb35bwHV2AX
    • Insert the flat end of a spudger underneath the bottom edge of the earpiece speaker.

    • Use your spudger to pry up the earpiece speaker.

    • Use a pair of tweezers or your fingers to remove the earpiece speaker.

Conclusion

To reassemble your device, follow these instructions in reverse order.

Take your e-waste to an R2 or e-Stewards certified recycler.

Repair didn’t go as planned? Try some basic troubleshooting, or ask our Answers community for help.

Dominik Schnabelrauch

Member since: 23/11/16

224702 Reputation

0 comments