Introduction
This guide is to assist with replacing the power board on the Nintendo Wii mini. It contains the power button and other components needed to power on this device. If it does not power on or show any indications of being powered on, you will need to replace this part, which is included in the troubleshooting page for this product, Nintendo Wii mini troubleshooting. While this could be a reason, other reasons can be faulty cables, such as the power cable and/or AV cable.
Parts
-
-
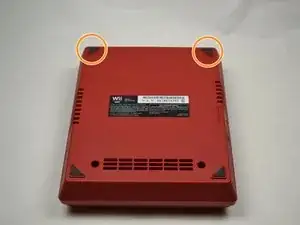
Remove the two rubber feet at the back of the console to reveal the hidden screws.
-
Remove the four 6mm Phillips #0 screws.
-
-
-
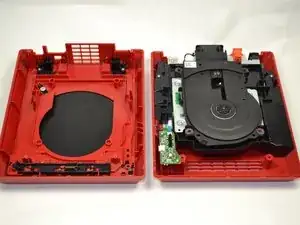
Turn the Wii mini right-side up. Then run a plastic opening tool around the middle edge of the console to loosen the top piece.
-
Gently lift the top piece of the console and set it aside.
-
-
-
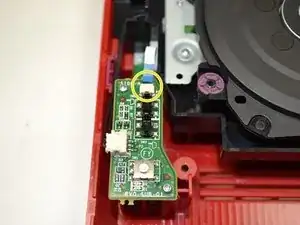
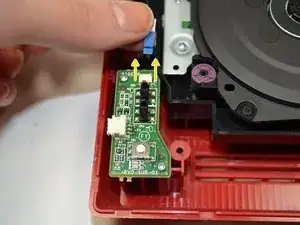
Using your fingers, slide out the blue ribbon cable from the the top of the power board.
-
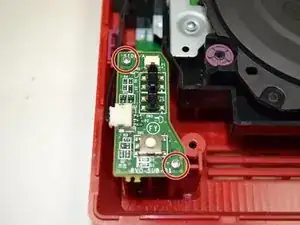
Using a Phillips #0 Screwdriver, unscrew the two 4mm screws at the top and bottom of the power board.
-
-
-
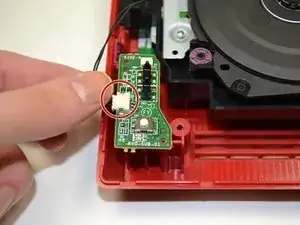
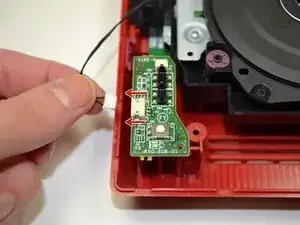
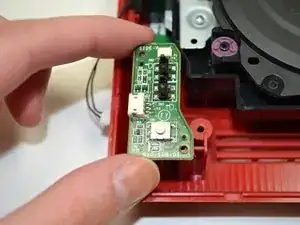
Using your fingers, gently pull the pin connector to disconnect the power board from the disc drive.
-


To reassemble your device, follow these instructions in reverse order.