Introduction

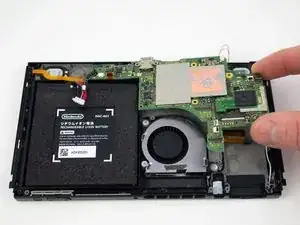
Follow this guide to replace the motherboard in a Nintendo Switch video game console.

  1. FYflMwdCN2VBIXS1
    FYflMwdCN2VBIXS1
    iMPZMejNuwBxEjdI
    • Disconnect the right loudspeaker from the motherboard.

  2. P5OFpSIHleSciR6N
    P5OFpSIHleSciR6N
    sp1OhTZFLEmwlTCS
    • Disconnect the left speaker from the motherboard.

  3. JC6eIkBCCPJrgbX2
    JC6eIkBCCPJrgbX2
    BswAMQfBRelWPItP
    • Use a spudger to flip up the small beige locking flap on the display ZIF connector.

  4. CeqWsADrx3SRFuEB
    CeqWsADrx3SRFuEB
    Grb3dTK6UtMgOHiK
    • Use the pointed end of a spudger to slide the display ribbon cable out of the ZIF connector.

  5. f2IQQb2KplcB2Onr
    f2IQQb2KplcB2Onr
    3aGPaEA536mJkN6B
    • Use a spudger to flip up the small black locking flap on the power/volume button ZIF connector.

  6. tJRbeLHoFHrSnfUe
    tJRbeLHoFHrSnfUe
    GgWAgYXqBM5bjdPc
    • Use a spudger to flip up the small gray locking flap on the fan ZIF connector.

  7. XiGW5uIAxnZ6PNJ4
    XiGW5uIAxnZ6PNJ4
    XYYf1l6IcUY3fLDH
    • Use the flat end of a spudger to disconnect the white coaxial antenna cable from the motherboard.

  8. ILu6jWpG6lPsRrWU
    ILu6jWpG6lPsRrWU
    eSwCgK1RFOkL4kiB
    • Use the flat end of a spudger to disconnect the black coaxial antenna cable from the motherboard.

  9. Mx6UANeRHSQkjMMN
    Mx6UANeRHSQkjMMN
    XwTiYKO6ygNCb3Pk
    • Use a spudger to flip up the small gray locking flap on the right Joy-Con rail ZIF connector.

  10. LWKE111mtvHPLK1n
    LWKE111mtvHPLK1n
    SVQrSYaorWlnONud
    • Use a spudger to flip up the small black locking flap on the ZIF connector.

  11. UNVyyUKuplKtpYpm
    UNVyyUKuplKtpYpm
    1mxYrIBYbn5xmIXX
    • Use a spudger to flip up the small gray locking flap on the left Joy-Con rail ZIF connector.

  12. gbSDUWmkM6ZvpBtl
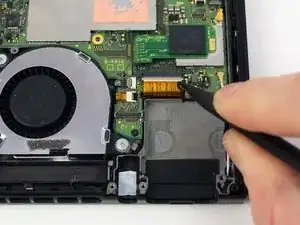
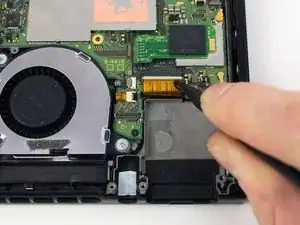
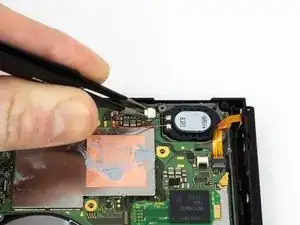
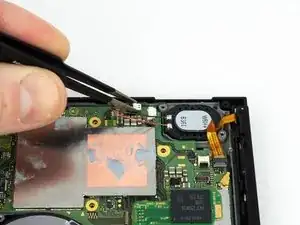
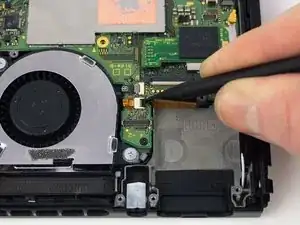
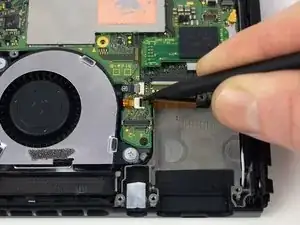
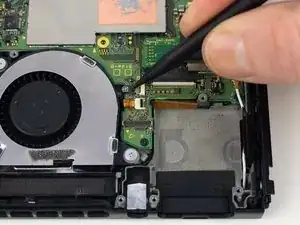
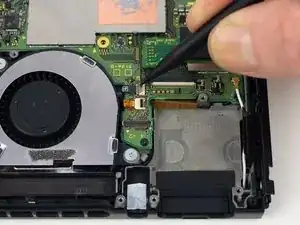
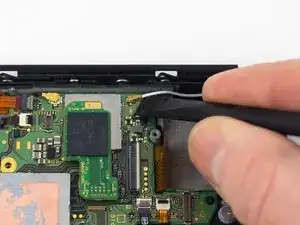
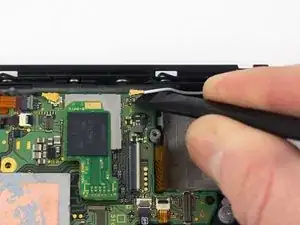
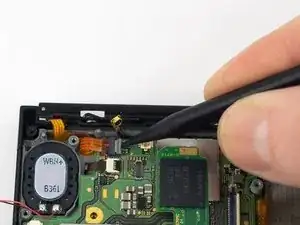
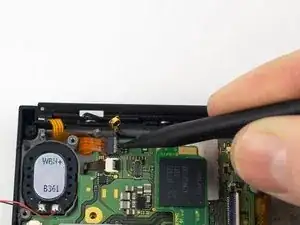
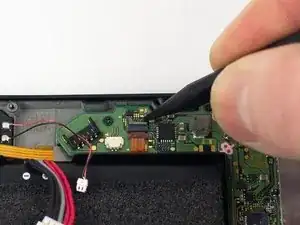
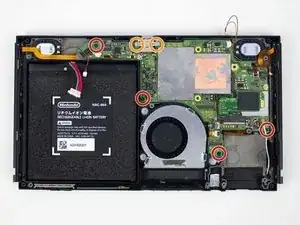
    • Remove the four 2.50 mm JIS #000 screws from the motherboard.

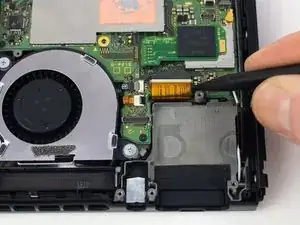
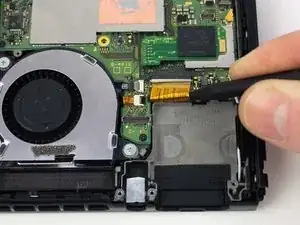
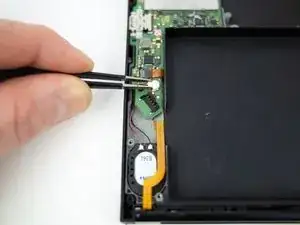
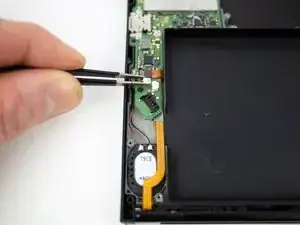
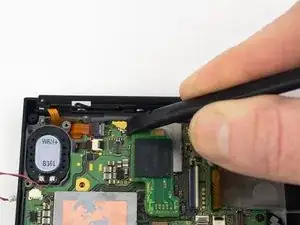
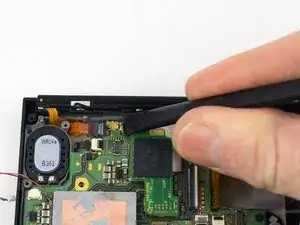
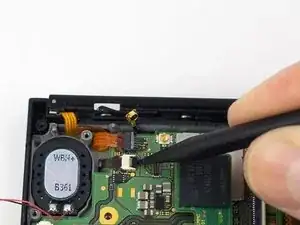
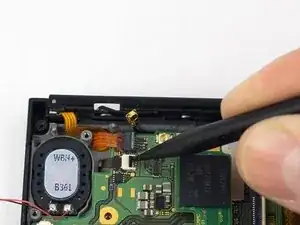
    • Remove the two 3.14 mm JIS #000 screws from the USB-C port.

  13. 1lFucb5WHuymXjlA
    • Gently lift and wiggle the motherboard to remove.

Conclusion

To reassemble your device, follow these instructions in reverse order.

Blake Klein

Member since: 30/01/17

71611 Reputation

0 comments