
Introduction
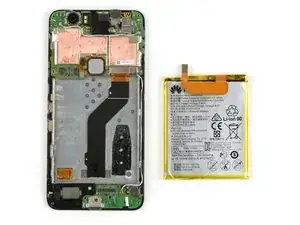
Use this guide to remove and replace the display in your Nexus 6P smartphone.
To protect your eyes from glass shreds and get a better grip to open the phone you might want to apply some tape onto the screen.
When reassembling apply new adhesive where it is necessary.
-
-
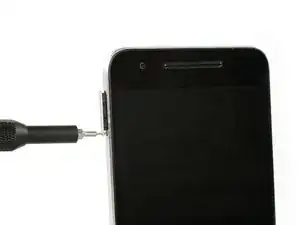
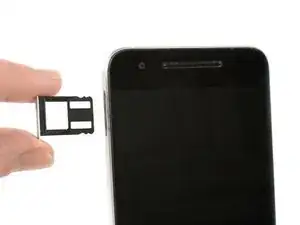
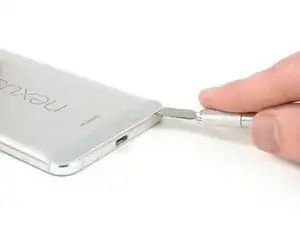
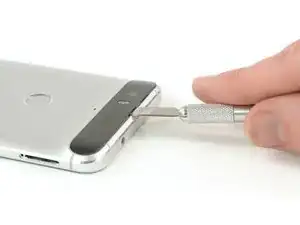
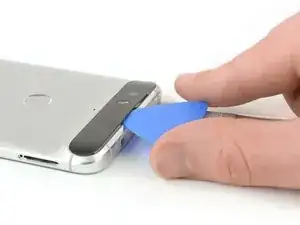
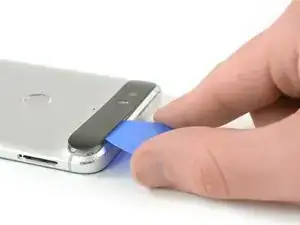
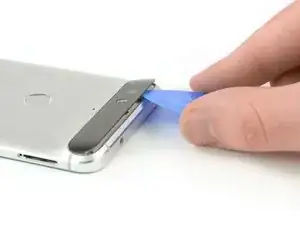
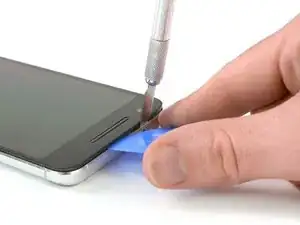
Use a SIM card eject tool, to pop out and remove the SIM card tray.
-
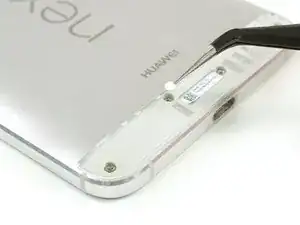
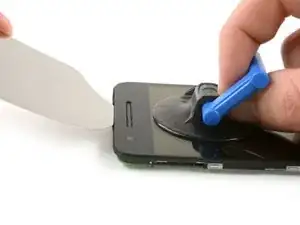
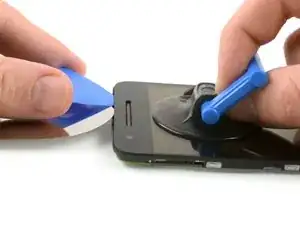
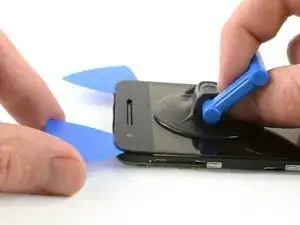
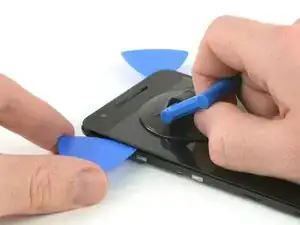
Use an iOpener to loosen the adhesive underneath the small plastic cover at the bottom of the phone.
-
-
-
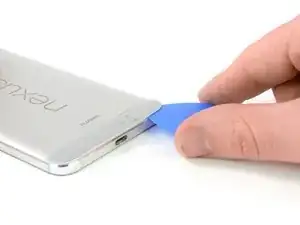
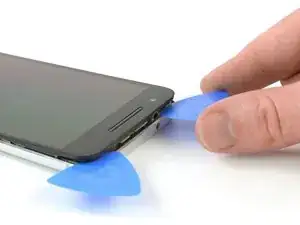
Insert a knife between the phone and the plastic cover. Pry up the plastic cover until you can insert an opening pick.
-
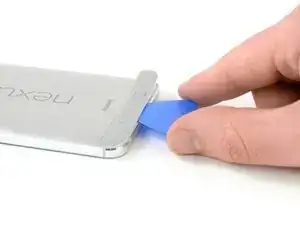
Slide the opening pick underneath the plastic cover to cut the adhesive.
-
-
-
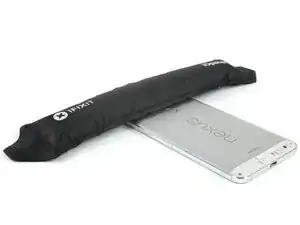
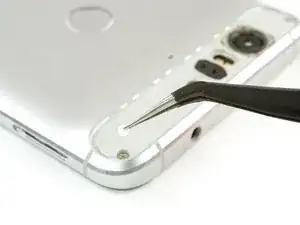
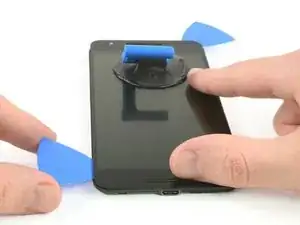
Use an iOpener to loosen the adhesive underneath the glass cover at the top of the phone.
-
Insert a knife between the phone and the glass cover. Pry up the glass cover until you can insert an opening pick.
-
-
-
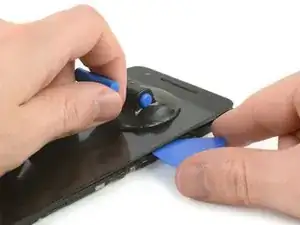
Slide the opening pick underneath the glass cover and use it to cut the adhesive underneath.
-
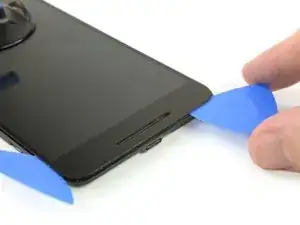
Pry off the glass cover.
-
-
-
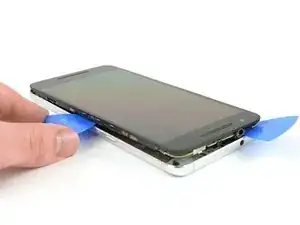
Insert a razor knife between the metal back cover and the front glass to create a gap. Insert an opening pick into the gap and slide it to the top right corner.
-
Insert a second opening pick and slide it to the top left corner.
-
Slide the opening picks along the edges to seperate the plastic clips, holding back cover and midframe together.
-
Remove the rear cover.
-
-
-
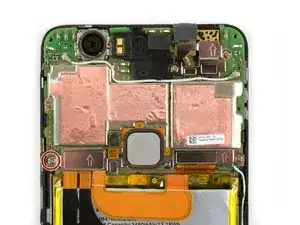
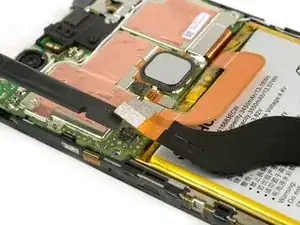
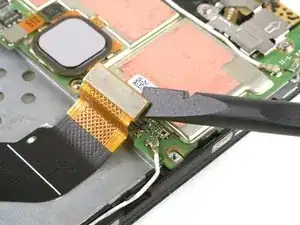
Use the flat end of a spudger to disconnect the interconnect cable from the daughterboard.
-
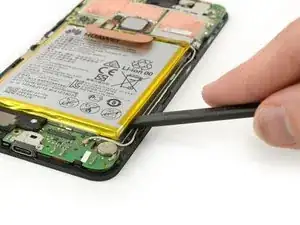
Use an iOpener to loosen the adhesive under the battery.
-
-
-
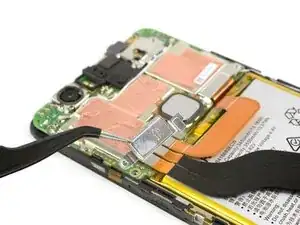
Insert the flat end of a spudger as deep as the notch and carefully slide along the edge to cut the adhesive…
-
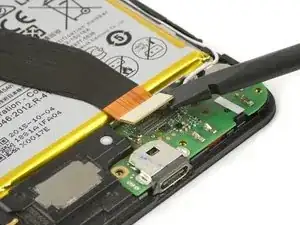
Use a plastic card to cut the remaining adhesive on the left side underneath the battery.
-
-
-
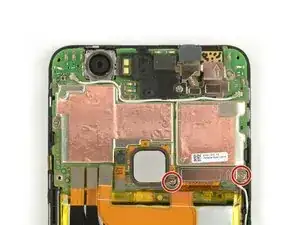
Remove the two Philipps #000 screws.
-
Remove the metal plate.
-
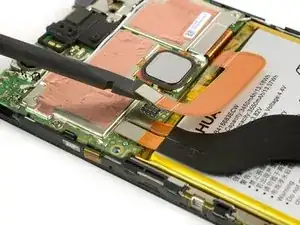
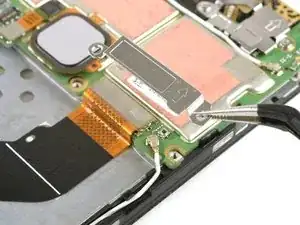
Use the flat end of a spudger to disconnect the display flex cable.
-
-
-
Work an iFlex opening tool between the display and the midframe to create a gap.
-
Insert an opening pick into the gap and carefully slide it to the top right corner.
-
Insert a second opening pick and move it to the top left corner.
-
-
-
Slide the opening pick from the top left corner down the left side of the smartphone to the bottom left corner.
-
-
-
Slide the opening pick from the top right around the corner and down along the side to the lower right.
-
Move it around the corner and towards the charging port to separate the rest of the adhesive.
-
-
-
When all the adhesive is cut, separate the display from the midframe at the top of the phone.
-
Thread the display flex cable through the gap in the midframe.
-
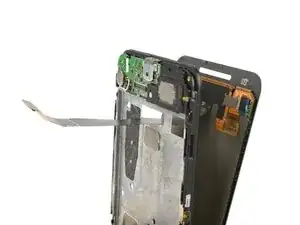
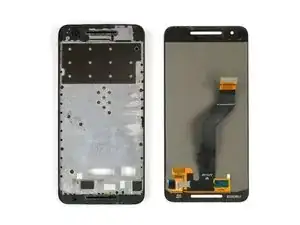
Remove the display.
-


To reassemble your device, follow these instructions in reverse order. When reassembling your phone apply new adhesive where it is necessary.

For the heat gun users — any approximate temperature, and distance from phone, to not damage it?
Kamal -
Hi Kamal,
my advice is the be very, very gentle with a heat gun. Especially the small plastic cover at the bottom end deforms within seconds. Try the lowest heat you can, with a good distance to the cover. Then try to remove the cover. If it doesn’t go off, lower the distance of the heat gun to the phone and try again and so on. I recommend to rather pry a little bit more than to use to much heat. If the cover deforms you’ll need a new one.
Dominik Schnabelrauch -
Is their a particular time i should have my heat gun on it like for ex: 10 secs
PlayStation Studios -
Hi,
there’s no particular time but I advise you to go only for a couple of seconds and then try to remove the plastic cover. If you can’t manage to remove it, repeat the heat gun process and so on. Under strong heat the plastic cover deforms very fast and is not usable anymore.
Dominik Schnabelrauch -
Hi,
I used a hair dryer (exhaust air about 60°C) instead of a heat gun: this temperature was sufficient to soften the glue. The plastic and glass cover could be removed without damage.
Daniel Demuth -
The Ifixit SIM removal tool is a bit rough for the 6P SIM eject opening I suggest a small paper clip and its easier for aged fingers to use.
Terry Ess -
The IOpener may need to be applied more than once in cold weather. Even for a first time repairer it is possible to remove the small lower rear cover without damage.
Terry Ess -