Introduction

The official guide has been updated and can be found here. This guide is archived for historical purposes.

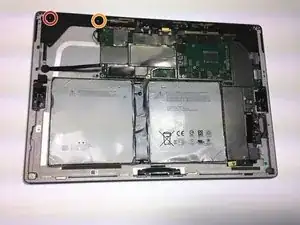
This guide will show you how to replace the left speaker of the Microsoft Surface Pro 4 left speaker. The power and volume controls are integrated into this speaker, so removing this speaker will be necessary to replace either of those buttons.

  1. dUYbLHliwTRZhXVq
    dUYbLHliwTRZhXVq
    onEMUqL6yZJOgcdt
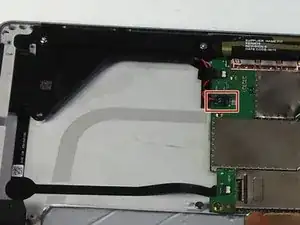
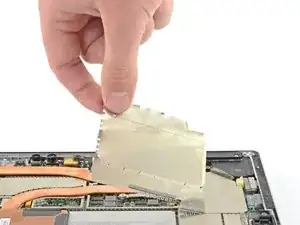
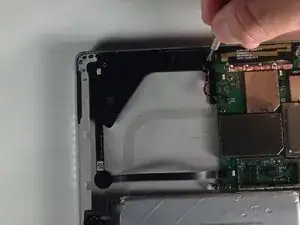
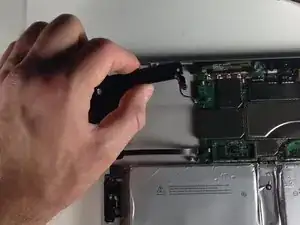
    • Insert one point of a pair of pointed tweezers into a gap in the corner of the EMI shield covering the heat sink.

    • Use the tweezers to pry the EMI shield away from the motherboard as much as you can without bending it. Do not remove it yet.

    • Take care not to puncture the battery with the tweezers while working on this shield.

  2. vp4BAvM4Rl14TAXP
    vp4BAvM4Rl14TAXP
    3YQubJkMWeQXcguh
    YAOmpCXIJODw6e1N
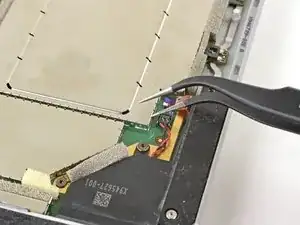
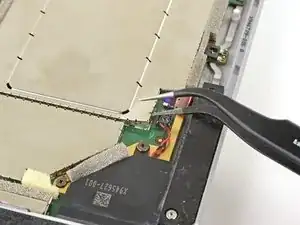
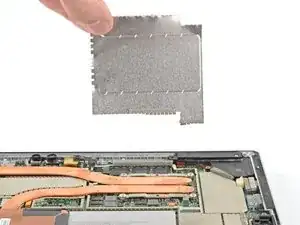
    • Repeat the last step at various locations around the perimeter of the EMI shield covering the heat sink.

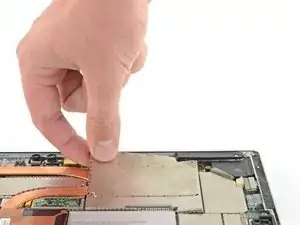
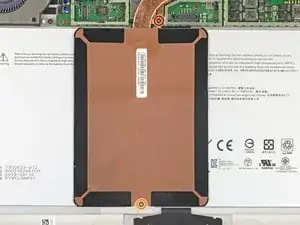
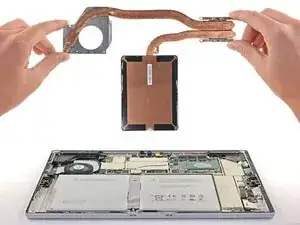
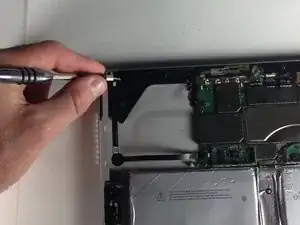
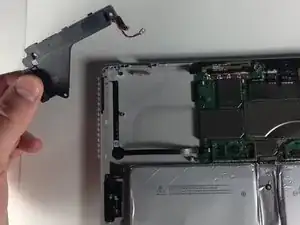
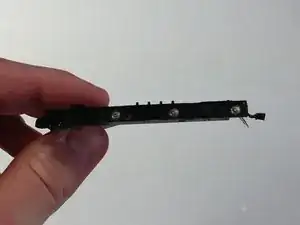
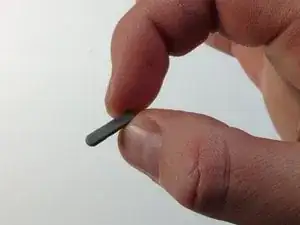
    • Remove the CPU shield.

  3. itBNsQWgtBqPkghl
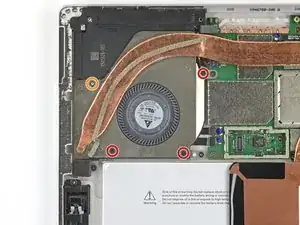
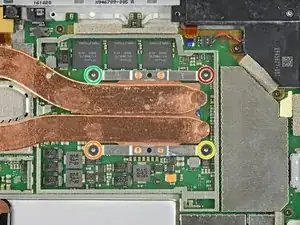
    • Use a T3 Torx screwdriver to remove two screws from the heat sink:

    • One 2.4 mm screw along the top of the rectangular plate covering the battery.

    • Make sure you don't lose this bracket, as it might separate from the heatsink.

    • One 2.2 mm screw along the bottom of the rectangular plate covering the battery

    La première vis de 2,4 est une Torx 4, pour ce qui me concerne et non pas une Torx 3.

    Attention la deuxième vis est bien une TORX 3

    Remarque : La boite à outil "Essentiel electronics Toolkit - Grade B (ref EU145571-1)" ne contient pas l'embout T3

    Pour ma part j'ai utilisé donc le T4 en forçant un peu. Pas cool ;-(

    Jean-Claude Guinel -

    2.4 is not included in kit either I'm going mad I want to fix my surface pro but now I gotta go buy 2.4 and 2.2 torx screwdriver

    Stars V -

  4. VPDxJO1w2MUgwXSl
    • The heat sink is firmly adhered to the fan.

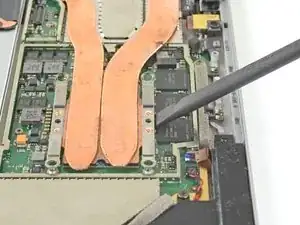
    • Use a Phillips screwdriver to remove three 2.4 mm screws securing the fan.

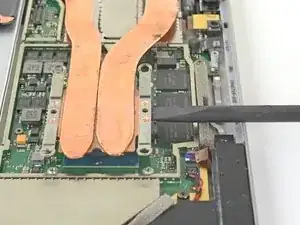
    • Use a T5 Torx screwdriver to remove the final 4.4 mm screw securing in the fan cover.

    These screws were in a different area on my Surface, Pro 4 bought at release. The fan was visible and attached to the heat sink. Remove the two torx screws on the fan housing. No need to remove the Philips head screws that secure the fan.

    mike_mcquillan -

    My Surface Pro 4 has a fan here. Remove the screws around the fan and the whole heatsink including the fan can now be lifted off. DO NOT try and remove the heatsink from the fan as it is glued on.

    Andy -

    Sorry I’m super brand new to the game. I don’t know the difference between 1.5mm Torx T4 and 3.0mm Torx T4. I look under tools I need to buy, and the tool kits only say Torx T4 or T5, without the milimeters dimensions.

    MInh Le Nguyen -

    Je fais écho au commentaire de vennic, les longueurs indiqués en mm sont les longueurs des vis et n’impactent pas les tournevis à utiliser. Bien ranger les vis par longueur permets de mettre les bonnes vis aux bons endroits lors du remontage de l’appareil.

    Cajuteq -

    MInh Le Nguyen, the mm size refers to the length of the screws, not the size of the bit driver

    vennic -

    Don’t forget to unplug the fan (if present) before yanking on the heat sink! It’s just a small grey clasp that needs to be lifted up.

    vennic -

    The fan connector on mine was held in place by a white clamp on the side closest to the middle of the chassis. The long edge toward the middle flips up to vertical. That frees up the fan connector. Likewise for the black “wire” connector right beside it.

    David Hill -

    As previously mentioned, the fan should be disconnected (look at step 36) BEFORE you remove the fan/heat sink assembly. Ive done DOZENS of these repairs and the fan has always been part of the heat sink assembly.

    Gregg Stanley -

    I did all of this, now surface won't turn on. Any ideas?

    AlejandroC -

  5. pURRx6qUDI3rTwuI
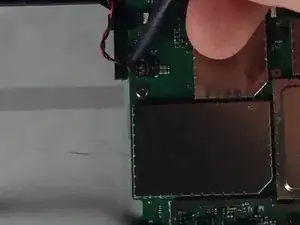
    • Use a T5 Torx screwdriver to remove the heat sink screws surrounding the CPU in the following pattern, one turn at a time, until they're free.

    • Screw 1

    • Screw 2

    • Screw 3

    • Screw 4

    • During reassembly, use the same method to install these screws, tightening one turn at a time until each screw is snug.

    These screws were T5 Torx in mine, not T3 as in the instructions.

    Joshua Snavely -

    T5 Torx screwdriver is correct.

    Majid Mazouchi -

    T4 Torx for me.

    Geert Timmermans -

    What does one turn at a time mean?

    Fernando Ramirez -

    One turn for the "red" screw, one for the orange, one for the yellow, then green and now again one turn red, orange, yellow, green ... This cross pattern distributes the pressure evenly .

    VauWeh -

    I think I need a T6 torx screw the screwdriver is not working for these screws

    Hassan Ali -

  6. R6S1FsIVpbm3i4Xf
    R6S1FsIVpbm3i4Xf
    WPhHPU1QrNnbZBfW
    • Use the flat end of a spudger to gently pry the heat sink straight up and off of the CPU.

    • Take care not to dent or crease the heat sink pipes during removal.

    Hallo, kurze Frage ist der Kühlkörper also die Kupferstücke innen hohl?

    Peter Pyzik -

  7. Z5d3N3xpAaWDwGWl
    Z5d3N3xpAaWDwGWl
    kk2qocM3FcWKYnRp
    gdHWq1GOxGUnaFOu
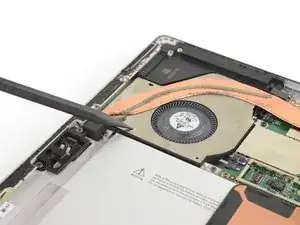
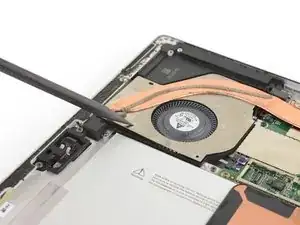
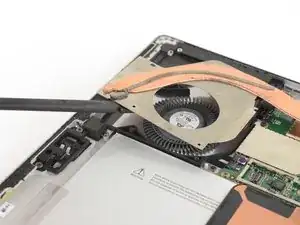
    • Insert the pointed end of a spudger into a screw hole in the fan shield and lift up to separate it from the fan.

    • The fan shield is held in place with light adhesive.

    • Take care not to dent or crease the heat sink pipes during removal.

    The fan should be disconnected (look at step 36) BEFORE you remove the fan/heat sink assembly. Ive done DOZENS of these repairs and the fan has always been part of the heat sink assembly.

    Gregg Stanley -

    I'm not sure if adhesive was involved or if time and heat had caused the protective plastic film under the top section of fan to stick to the heat sink, but I had to use the Spudger to separate the heat sink from the plastic film to get it out.

    Ryan -

    These instructions were correct for my Surface. The fan cover was attached to the heatsink but the fan was not.

    Eddie McGlone -

  8. 1LjnVE6mJFbPgnCK

    Fan assembly may be taped to heat sink so fan screws and ribbon cable can be disconnected to remove as one with heat sink.

    Matt Dove -

  9. fZTsXEuaGplumIqC
    fZTsXEuaGplumIqC
    4vGbDE2YqpKEp6Sd
    • Detach the speaker connector from the motherboard.

  10. OXMX4BxjbbglKPfn
    OXMX4BxjbbglKPfn
    4jyKsEsYr5Kfx15s
    NVfdELky5T3ZSQU1
    • Remove screws from the speaker.

    • 2mm Torx T5 screw

    • 3 mm Torx T5 screw

  11. YTQFjOAY3YAKpt1M
    YTQFjOAY3YAKpt1M
    bKwaGjpmwv5vOcwG
    XB1ZoYMTMcAcEitr
    • Work the speaker out with your fingers.

    • The speaker is still wedged tightly into the frame and is difficult to remove.

  12. BbaHWNlqPuObJUH6
    BbaHWNlqPuObJUH6
    4BLBhpDsRr13oBpP
    uL2QruFGXNXGCaAR
    • Remove the speaker, the volume button and the power button from the Surface Pro 4.

Conclusion

To reassemble your device, follow these instructions in reverse order.

Andrew Prater

Member since: 01/02/16

5771 Reputation

0 comments