
Introduction
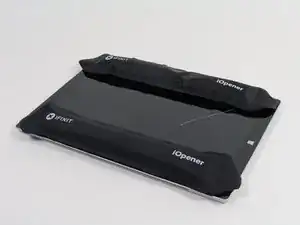
This guide will teach you how to safely remove your battery from your Surface Pro 3. The guide starts by removing the screen and digitizer and then goes right into removing the battery.
-
-
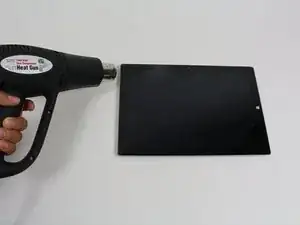
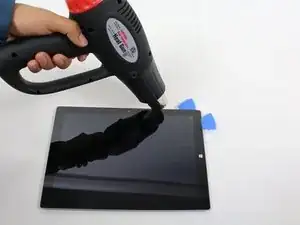
To remove the display, first soften the adhesive by applying heat. You can use a heat pad, heat gun, or iOpener. In a pinch, a hair dryer can also work.
-
Steadily and evenly heat the perimeter of the display until it's too hot to touch, and try to maintain that temperature for several minutes.
-
-
-
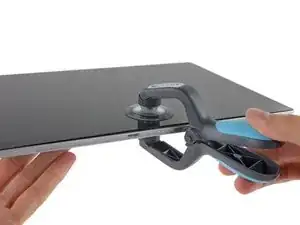
Use a suction cup or an iSclack to pull up on the glass and create a slight gap between the glass and the metal frame.
-
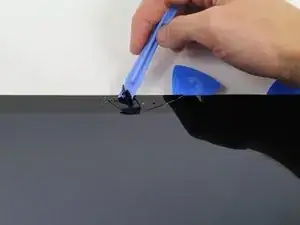
Carefully insert an opening pick into the gap between the screen and the device to cut the adhesive.
-
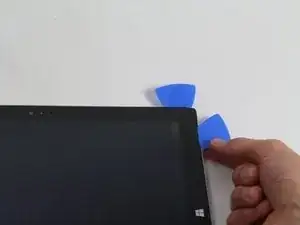
Slide the pick around the sides and bottom of the display to cut the adhesive. Apply more heat as needed.
-
-
-
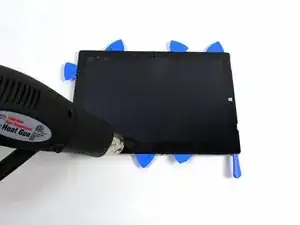
Continue to heat sections of the screen with the heat gun.
-
As you make your way around the screen with the heat gun, use the plastic opening tool and the opening picks to pry the screen loose.
-
-
-
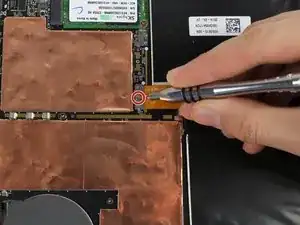
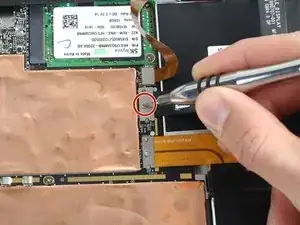
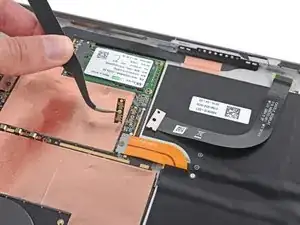
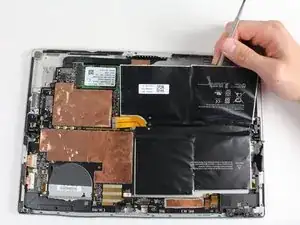
Remove the 3 mm T3 Torx screw securing the battery connector, and disconnect the battery connector.
-
-
-
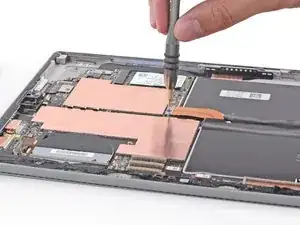
Remove the single 4 mm T3 Torx screw securing the display cable.
-
Lift the connector to disconnect the cable.
-
-
-
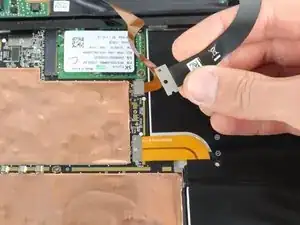
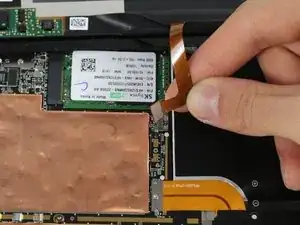
Grasp the orange cable connected to the silver connecter.
-
Carefully lift the orange cable up until the connecter pops off.
-
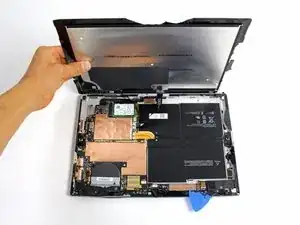
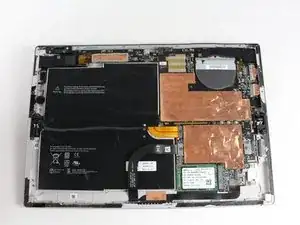
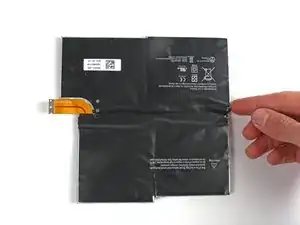
The screen will now be completely disconnected.
-


To reassemble your device, follow these instructions in reverse order.
32 comments
Do you have to glue everything back together? Do you heat the parts back up to get the glue to stick again?
I slowly removed the old adhesive watching out for glass shards. A spundger and razer blade didn’t really help. In the end, I just used my fingernail and finger to roll the adhesive like I was removing rubber cement. It too about 30 minutes but I was able to get it cleaned off. I replaced the adhesive with 2 mm Tesa tape. This worked great.
Has anyone ever successfully opened a surface pro 3 without breaking the screen?
Yes I have successfully open the surface pro with out breaking the screen by using a heat gun, the islack and the using the picks around the screen as anchors, then use the islack as you will use it to replace the screen in the iphone. It takes time and patience and a lot of heat. It took me 25 minutes to remove the screen with out breaking it.
Only wizards can accomplish this task without breaking the screen. Yes the screen must be reheated for the glue to stick again. A simple fix to avoid all of these problems is to switch to Apple products.
Apple products are worse. I've worked with Ipads and Iphones and seen my fair share of ballooned batteries that lift the screen off for you.
I successfully removed many screens without cracking by heating to 100 deg with a heat gun, using a small suction cup to lightly tug on the cutting area, using a small syringe to insert alcohol into the adhesive, and using a thin single edge box cutter to slice through the adhesive. The best place to start is at the top near the camera as it's not as sticky there. Make sure your suction cup has a good grip, or you risk cracking the screen if the suction cup lets go with the knife under it.
Oh yeh… because Apple products are so easy to change batteries…
This makes no sense at all. Apple products are where almost impossible to fix devices originated.
Switching to an apple product is not an option.
...but then you have an Apple product. A much worse problem.
I just replaced both my screen and battery. It took four hours and a couple of wrong turns but I was successful learning what to do next time. However, I am not sure I would do it again.
It takes more heat than one imagines - all most too much and made me queasy fearing I was going to damage something. I would say it actually too hot and likely to damage something so be careful and do not prolong the removal. To get started I used a glass top warming/buffet heating tray set to about 200 degrees. I turned the surface pro glass side down before turning it one so it would heat gradually with the tray. I let it heat for 15 minutes. In end, I am not sure it helped or not by starting this way. This was not an easy removal so I shudder to think how worse it would have been if this didn’t help. I used a variable heat gun for the remaining steps. My screen was broken so breaking it further while nerve racking was not going to be catastrophic.
michael jones -
I attempted battery replacement, but during disassembly, i damaged the display by inserting the picks to far, and separating the display circuitry from the glass.
I used a Milwaukee precision hot tool model 1400, which has only a fixed heat setting, but it worked perfectly to soften the adhesive.
(I was very careful to heat the entire glass panel by playing the heat gun over the entire surface so that it would expand uniformly.
Robert Gerlach -
I just broke mine during the heating process as well…. The glue at the corner was so strong that I cant even slip a blade into the edge… Then when keep applying heat using a hair dryer at low tempreture the glass expanded too much and broke……
C Y Wong -
If you have never done this repair, YOU WILL SHATTER THE SCREEN! I've repaired dozens of these over the last several years for my client's and I still shatter them. It's a 98% probability that you will break the glass; it's very thin and shatters easily. Be prepared.
Gregg Stanley -