Introduction

Follow this guide to replace a broken or unresponsive trackpad in your Microsoft Surface Laptop 7 (13.8‑inch).

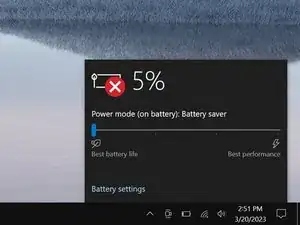
You may need to replace the trackpad if it's non-responsive, has erratic movement, or isn't detecting touch properly.

Before starting this repair, try updating your trackpad firmware to make sure the trackpad issues aren't software related.

  1. pLaoFHetRFEVh2sU
    pLaoFHetRFEVh2sU
    DgSxy3daBSoXIZNA
    L2adWoXTRTli32DM
    • Before starting this repair, allow your laptop's battery to drain below 25%. A charged battery may catch fire if damaged.

    • Unplug all cables and fully shut down your laptop.

  2. 1OLhjNJLTLJMcARr
    1OLhjNJLTLJMcARr
    hlS6l4Hts6TMZLW6
    jRZjDS4oJSaQwrwL
    • Close your laptop and lay it down so the rubber feet are facing up.

  3. s3FLbRNojPmjUY2b
    s3FLbRNojPmjUY2b
    NWxYixQhNN4mWDcV
    YJsxktBQKPUGk1Dt
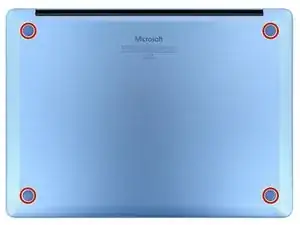
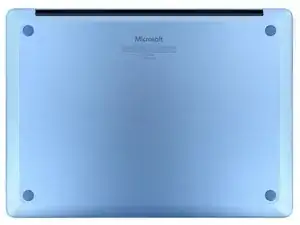
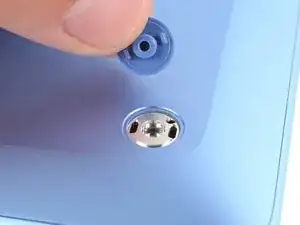
    • Gently slide one arm of your angled tweezers into the recess near the upper right edge of one of the feet.

    • You can also use the point of a spudger. However, you're more likely to damage the foot, if you're reusing it.

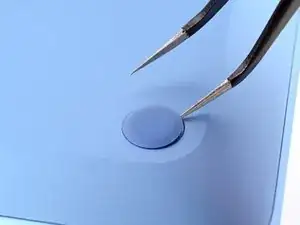
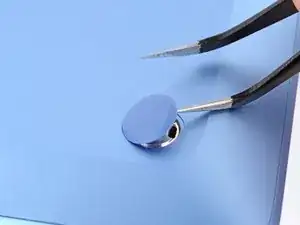
    • Use your tweezers to pry up and remove the foot.

    • The feet may eject very quickly—be careful not to lose them.

    • Repeat the process to remove the remaining feet.

    • To install a foot, align the pegs on the bottom with their cutouts in the frame and press the foot into place.

  4. 4FRVeiqJuxvBwVUm
    4FRVeiqJuxvBwVUm
    KjXi2r4q3vI1hdQ5
    • Throughout this repair, keep track of each screw and make sure it goes back exactly where it came from.

    • While the Surface Laptop 7 uses Torx Plus screws, standard Torx bits work. Make sure to apply constant, downward force to prevent stripping.

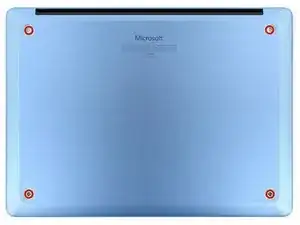
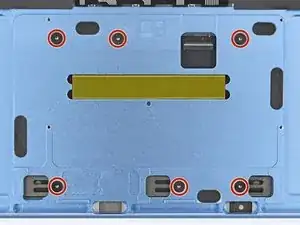
    • Use a Torx Plus 5IP screwdriver to remove the four 4.5 mm‑long screws (with washers) securing the lower case.

  5. XQ4GNyTIlnlOSHPB
    XQ4GNyTIlnlOSHPB
    ExteNkfEv6lAfa2d
    AbvbbSICZkhxIc2E
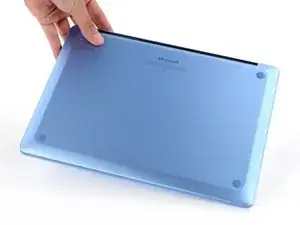
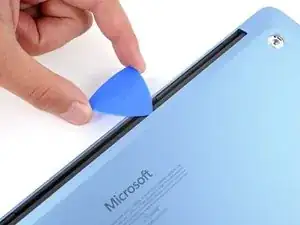
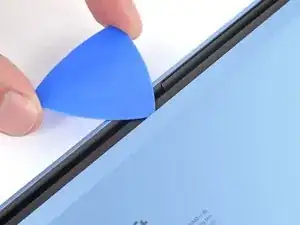
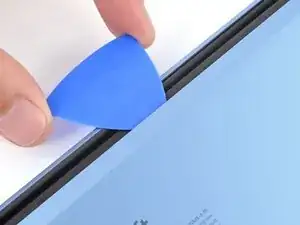
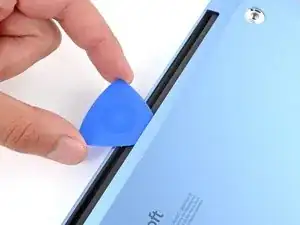
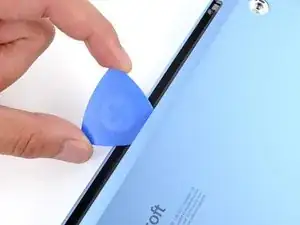
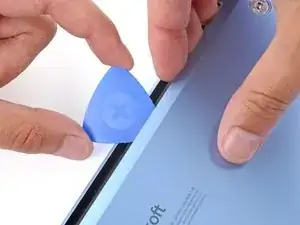
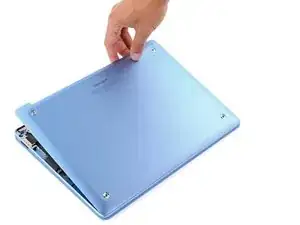
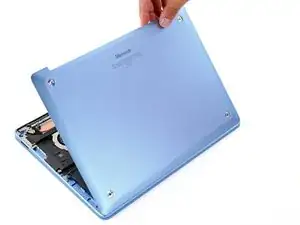
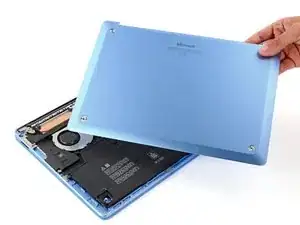
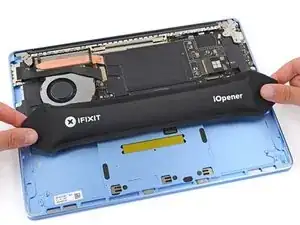
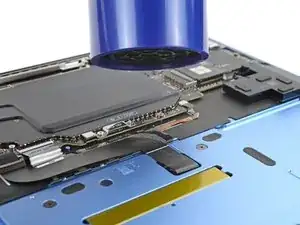
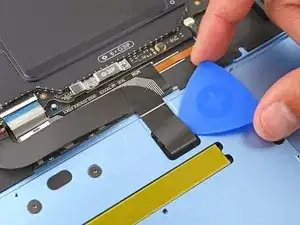
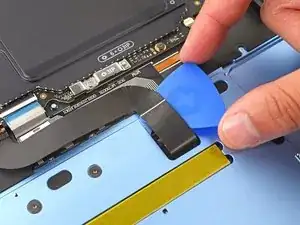
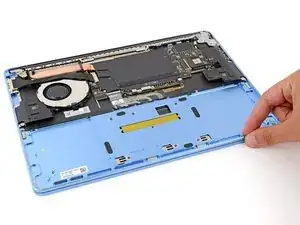
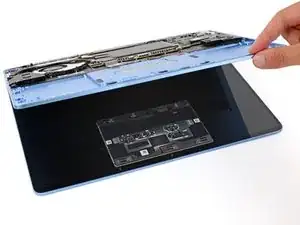
    • Insert the tip of an opening pick under the top edge of the lower case, about an inch (2.5 cm) to the left or right of the Microsoft logo.

    • Don't insert the pick near the outer edges or you'll damage the antenna bar.

  6. mSPYSPoSwErGrPXn
    mSPYSPoSwErGrPXn
    WbchX4FijRPxW1WQ
    Ir1axlIHCHJR616s
    • Twist the pick to lift the lower case enough that you can grip it with your hand.

  7. KopKb1IkGwVL5JoJ
    KopKb1IkGwVL5JoJ
    Lf4lfn4HIoWSJkpR
    WLZRNwAGjgpftyVG
    • Lift the lower case and remove it.

  8. OjCKNNVR2xXenJSl
    OjCKNNVR2xXenJSl
    jWiZnTFmd5U5JJmr
    mVNDMTVF3IdyyGmt
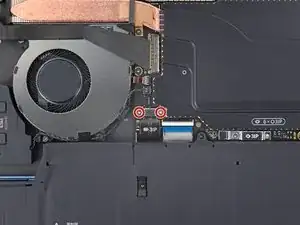
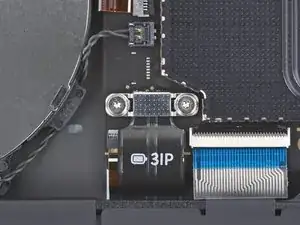
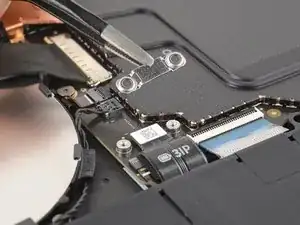
    • Use a Torx Plus 3IP screwdriver to remove the two 2.3 mm‑long screws securing the battery connector cover.

  9. BLF3YGwZV1bMPsMw
    BLF3YGwZV1bMPsMw
    T64XNCKZAPFo2L5K
    • Use tweezers or your fingers to remove the battery connector cover.

  10. pJkcq32giDBXdOky
    pJkcq32giDBXdOky
    PaVbSWLlu6dokZaS
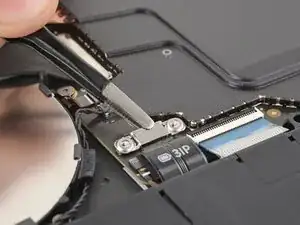
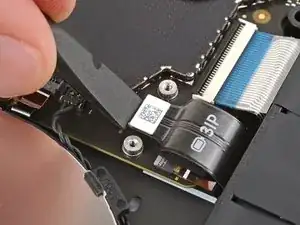
    • Insert the flat end of a spudger under the top edge of the battery press connector and pry up to disconnect it.

    • To reconnect a press connector, align it over the socket and gently press down on one side until it clicks into place, then press down on the other side. It may take a few tries to align the connector—don't try to force it into place.

  11. tW3CWwBpVdjaIxHN
    tW3CWwBpVdjaIxHN
    2RxOCuJjDA1XCINM
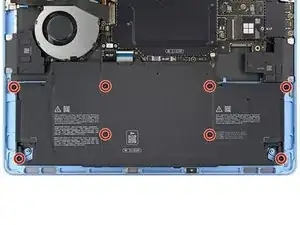
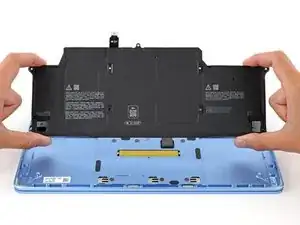
    • Use a Torx Plus 5IP screwdriver to remove the eight 5.4 mm‑long screws securing the battery.

    • Be very careful not to puncture the battery with your screwdriver.

  12. F26G5XpsYHBB1SKT
    F26G5XpsYHBB1SKT
    OJqjeuMlMsNbA52w
    PLlGNq1ZxgHaRNgY
    • Lift the battery and remove it.

    • If your battery is swollen, take appropriate precautions.

    • Never reuse a deformed or damaged battery—it's a fire hazard. Replace it with a new battery.

  13. EM1hJImp4C66nDqo
    EM1hJImp4C66nDqo
    hkLWFEvOpZ5ATIyN
    kO1RLEIPKFVd6NrM
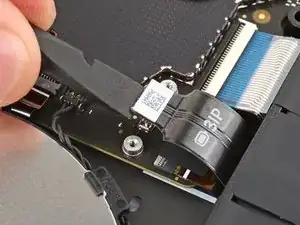
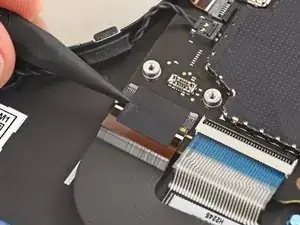
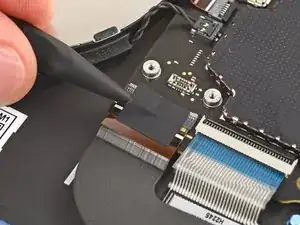
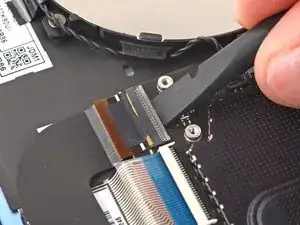
    • Gently slide the point of a spudger under the piece of tape on the trackpad cable ZIF connector, near the bottom left corner of the motherboard.

    • Use the spudger to lift the tape from the connector.

    • You don't need to fully remove the tape, it just needs to be off the connector.

  14. 2SNdCLndMssGINVj
    2SNdCLndMssGINVj
    BjyLlig5dF2AAQHJ
    LH64E4PWHatIPPIC
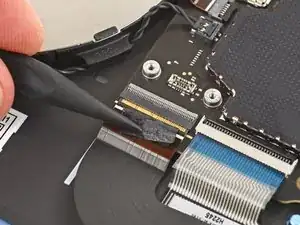
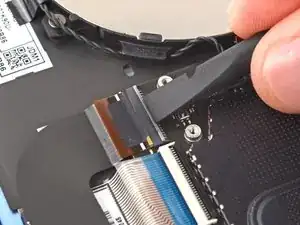
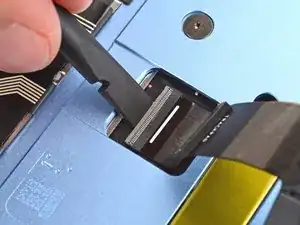
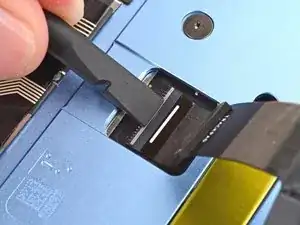
    • Use the flat end of a spudger to lift the hinged locking flap on the trackpad cable ZIF connector.

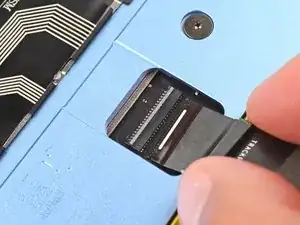
    • Use tweezers to grip the trackpad cable's plastic pull tab and slide the cable out of its socket.

    • During reassembly, reconnect the trackpad cable to its ZIF connector on the motherboard. Then, press the right side of the cable firmly into place to secure it with the adhesive.

  15. FBZfbeIVvLI4wLGN
    FBZfbeIVvLI4wLGN
    tOVKLVCKyrJoYVDG
    VOdcE2CUAD1eouV6
    • The right side of the trackpad cable is secured with strong adhesive. Heating the cable softens the adhesive, making it easier to separate.

    • Heat an iOpener and lay it on the trackpad cable for one minute to soften the adhesive.

    • Alternatively, you can use a hair dryer or heat gun to heat the cable.

  16. RZCDYtVOXglZaHLD
    RZCDYtVOXglZaHLD
    OFCQuQlZwgFT34wK
    FpBLOdkuCSWSWDnd
    • Be very careful not to crease or damage the trackpad cable during the next few steps.

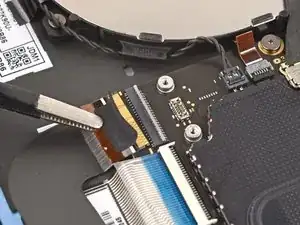
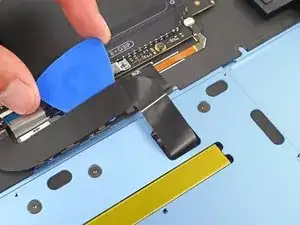
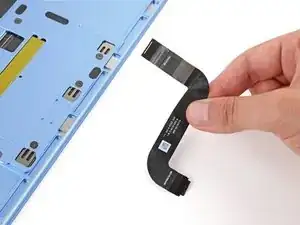
    • Carefully slide an opening pick under the right side of the trackpad cable to separate the adhesive securing it to the frame.

    • If you're having trouble, reheat the cable and try again.

  17. LiE3eFPyeYXbajX3
    LiE3eFPyeYXbajX3
    pnQUZQWfq1G22oJd
    oEEQUkwgbaEmYTXN
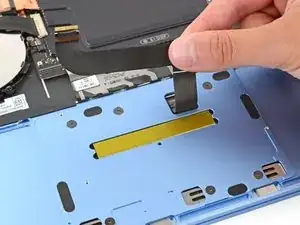
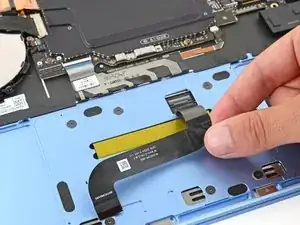
    • Use your fingers to flip the trackpad cable towards the bottom of your laptop, so you can access the ZIF connector on the trackpad.

    • During reassembly:

    • Don't secure the trackpad cable with adhesive yet—wait until you've reconnected the other end. Otherwise, the cable may not reach its socket if positioned incorrectly.

    • If you're using the original trackpad cable, the adhesive should be sticky enough to reuse.

    • If you have a replacement trackpad cable with adhesive pre-installed, remove the liner.

    • If your replacement cable doesn't have adhesive pre-installed, or if the adhesive isn't sticky enough, apply a strip of thin, double-sided tape to the bend on the right side of the cable.

  18. PHjXIowe1PEoyoRQ
    PHjXIowe1PEoyoRQ
    LJS1LnfnUgCeZGXf
    Ae6HIViCnWBuANfd
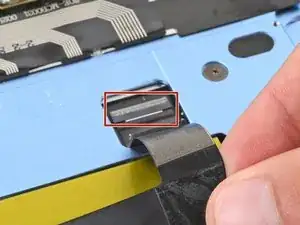
    • Use the flat end of a spudger to lift the hinged locking flap on the trackpad cable ZIF connector, located on the trackpad itself.

    • Use your fingers to carefully grip the trackpad cable and slide it out of its socket.

    • During reassembly, reconnect the end of the cable marked "TRACKPAD" to the ZIF connector on the trackpad, so the end of the cable with a white strip is facing up.

  19. ERGhSNewDJNYgulQ
    • Remove the trackpad cable.

  20. VHVGrBybRgmF4bak
    VHVGrBybRgmF4bak
    AvmXtGenpWgWN15X
    kagqdrYXMcKibSOO
    • These screws strip easily. Apply constant, downward force to prevent stripping.

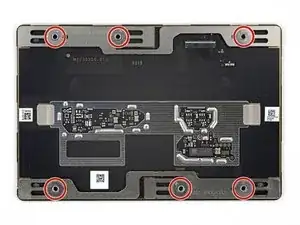
    • Use a Torx Plus 5IP screwdriver to remove the six 2.1 mm‑long screws securing the trackpad.

    • During reassembly:

    • Partially tighten the six trackpad screws.

    • Open your laptop and check the edges of the trackpad for any large gaps, repositioning it as necessary.

    • Continue tightening the screws and checking the trackpad alignment until the screws are fully tightened.

  21. 2rjiZe2Y5gPOhaVH
    2rjiZe2Y5gPOhaVH
    RBETkkgik1QfmMCf
    pETHNvGn3hhIlaKA
    • During the next two steps be very careful not to lose the six washers resting on the trackpad's screw posts. Without them, your trackpad won't fit properly.

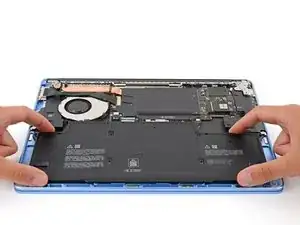
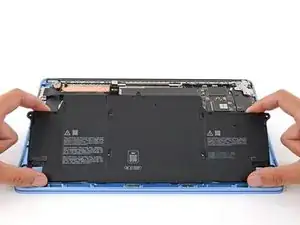
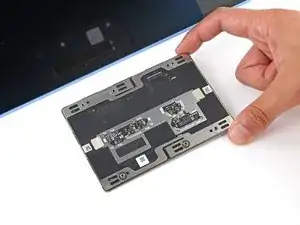
    • Slowly lift the main body of your laptop until it stays up on its own—the trackpad will stay on the screen.

    • During reassembly, carefully close your laptop with one hand while using your other hand to guide the trackpad into place. Use a finger to help position the trackpad through one of the cutouts in the frame.

    • If your replacement trackpad comes with a new cable pre-installed, you'll need to carefully guide the cable through its cutout in the frame.

  22. esaNhJqKwZffZLl3
    esaNhJqKwZffZLl3
    XxtBb1Omu13XBbIj
    qc4tvMuRjeumXesK
    • Remove the trackpad, being very careful not to scratch the screen.

    • During reassembly:

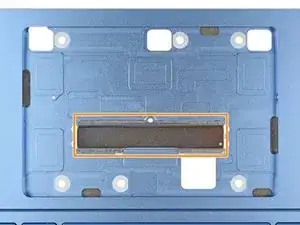
    • Make sure all six washers are in place on the trackpad's screw posts.

    • If any washers are missing, check the magnet in the trackpad well—they may have gotten stuck to it when removing the trackpad.

    • Gently place the trackpad onto the screen so the screw posts line up with their cutouts and the edge with a ZIF connector is closest to the hinges

    • Be very careful not to scratch the screen.

Conclusion

To reassemble your device, follow these instructions in reverse order.

Take your e-waste to an R2 or e-Stewards certified recycler.

Repair didn’t go as planned? Try some basic troubleshooting, or ask our Answers community for help.

Spencer Day

Member since: 14/09/22

88286 Reputation

0 comments