Introduction
Replacing the keyboard is very involved, be prepared this is not an easy task and will require much patience.
-
-
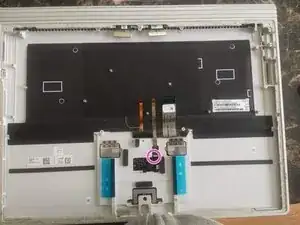
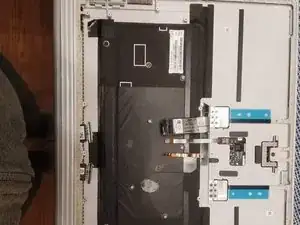
Open the back and remove all components in the way of the keyboard, Graphics, USB ports etc.
-
Also gently disconnect the touch pad cable at the bottom.
-
This guide will help you open the back. Microsoft Surface Book 2 15" Dock Port Connector Replacement
-
-
-
Bring your patience
-
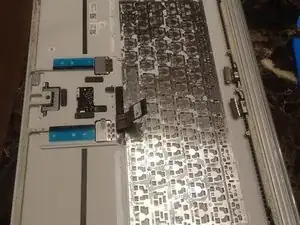
Using the Plastic Scalpel tool (very important it's plastic) and the isopropyl alcohol, maybe a toothbrush to help, and SLOWLY peel off the black sticky backlight from the keyboard.
-
Sorry I do not have a photo/video of this part, but just be slow and slice through the glue do not man handle this take your time.
-
-
-
WARNING: Small Parts fly
-
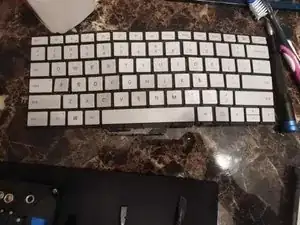
WARNING: Removing the keyboard will most likely damage it, so only remove it if you have to.
-
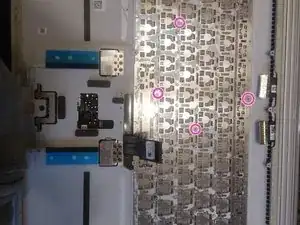
Pop the keyboard out, there are pins and they will fly. So turn it as though you were typing onto some sort of cloth to capture the pins.
-
-
-
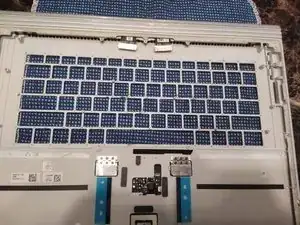
There's 40 some different pins, you do not want to lose any if you can help it as it helps the rigidity of your keyboard.
-
Put the pins back you will want a thin small tool that you can push the pins back in. Be careful sometimes putting a pin in can pop another out.
-
It's a good idea to have a magnet on the side too, so that you can test the pins and ensure they're in properly. Check a lot since mine seemed tight but as I put pins in it became loose.
-
-
-
Clean the backlight with isopropyl alcohol, it's the clear side, don't clean the sticky off.
-
Use some electrical tape to tape it back in where you need.
-

To reassemble your device, follow these instructions in reverse order.