Introduction
How to tear down and reassamble the mouse. In order to fix the microswitch I used just a blow of pressurized air.
Tools
-
-
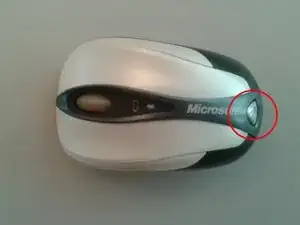
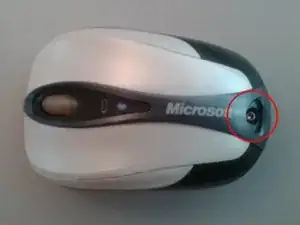
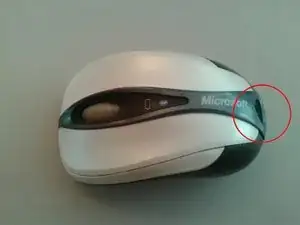
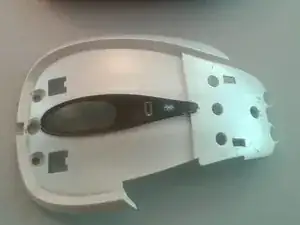
With a little flat screwdriver like iFixit 2.0 gently remove the laser plastic icon; it's attached with bi-ahdesive tape
-
Keep the plastic cover in a safe and dust free place
-
-
-
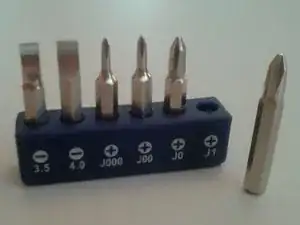
Unscrew the torx6 that is under the cover you just removed
-
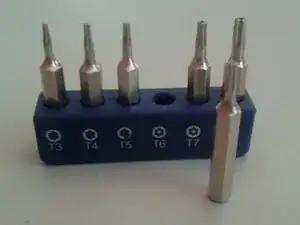
You'll need a T6 bit like the iFixit one I used
-
-
-
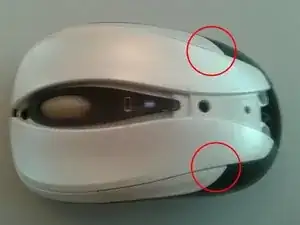
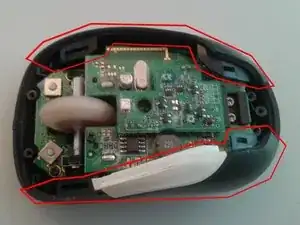
This is a tricky one, you can easily now lift the lid from where I pointed out
-
After this you have to "unclick" the front of the lid, gently lifting from down to up, nothing will break
-
As you see in the next image the lid has a "clip" that clips on the base
-
-
-
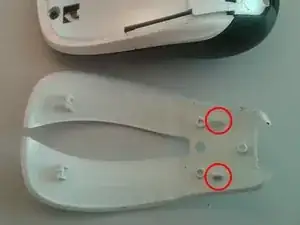
You have to carefully unclick both left and right the plastic lid with buttons, acting with your nails under the lid
-
It's easy to insert your nails starting from the button side to the left in this image, and then shifting to the right
-
You'll clearly hear the "click" when the tab loose: simply do it on the other side, and raise the whole thing up
-
You can see the two tabs of the buttons in the second picture of this step
-
-
-
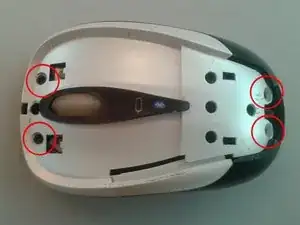
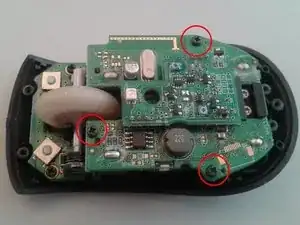
Unscrew the four black J1 screws showed in the pic
-
You'll need a J1 bit like the iFixi one I used here
-
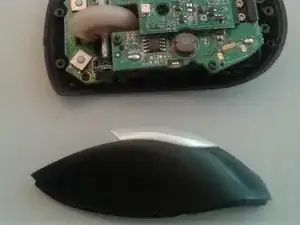
The cover will now remove without any effort
-
-
-
No effort to remove both side, just raise them up vertically
-
No nees to remember the position, there's only one way to put them back
-
-
-
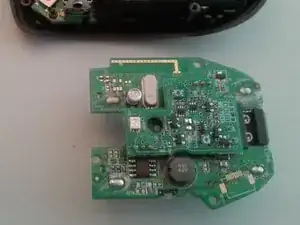
Unscrew the three J1 black screws showed in the pic
-
Gently lift up the circuit board
-
You have to be careful reinserting: both the four battery connectors, and the multi plug should go in the right places: nothing difficult!
-
-
-
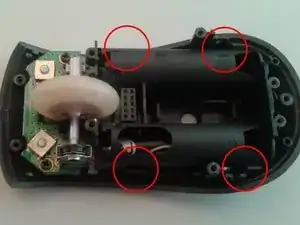
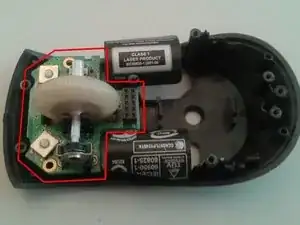
Unclick the plastic in the four point showed up
-
It's easy, once unclicked the tabs stay put, no need to hassle
-
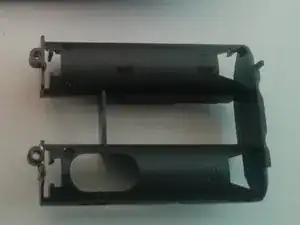
Gently lify up and put aside. Reassembling be careful to bring out the light plastic battery guides from down
-
-
-
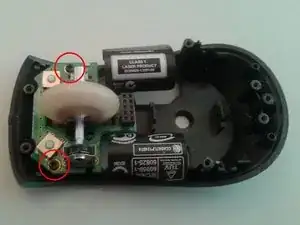
Unscrew the two black J1 screws shown in the pic
-
Simply lift up the board, see the second picture
-
Be careful not to loose the bluetooth discovery button from the main plastic base underneath; it's missing in my second picture
-
Forgot to snap a picture of the grey button, sorry :-)
-
Reassemblig be careful and check that the on-off switch showed with circle in the third picture is in the right place before proceeding with reassembly
-
-
-
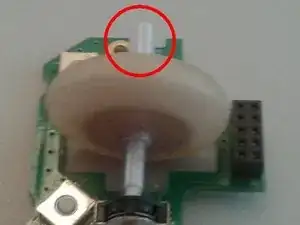
Lift up the wheel gently from the side shown in the pic
-
You can use this opportunity to deep clean the wheel, and the area
-
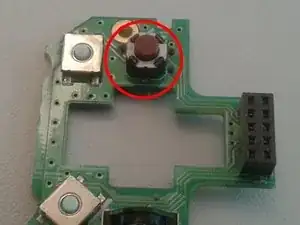
You can see the central wheel button microswitch in the second pic
-
In my case just cleaning with blowing air the switch worked! If needed you can now substitute any defective switch
-
To change the switches with new one you need the appropriate tools, and a discrete ability with soldering!!
-


To reassemble your device, follow these instructions in reverse order.

5 comments
Hello,
Thanks for this nice tutorial. I have an issue with the laser I believe. All three buttons work properly but there is no light appearing (may be this is normal if the laser beam is not in the visible range ?) and no motion al all.
I remember that this mouse never worked very well at the beginning (no fluid motion) and now there is no motion at all. The mouse is quite clean because i almost never used it, and now it seems there zero motion detected.
What should i do ?
Thank you very much! Today i fix the wheel and the dirty micro-switch. The mouse is like new again!
I love this mouse. The problem I am now having is the power. Despite opening it up, and cleaning it out, there is no power. I thought maybe something was wrong with the on/off switch, but everything seems fine there. Very sad about this situation.