Introduction

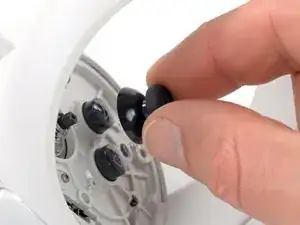
This guide shows how to remove and replace a worn out thumbgrip on your Meta Quest 2 controller.

The thumbgrip is a rubbery cover and not the actual joystick module. If you're experiencing controller drift, follow this guide instead to replace the joystick module.

This guide is written with the right controller. If you're repairing the left controller, you can still use this guide, as the procedure is identical.

  1. GR1vUXWJnqTqxkuD
    GR1vUXWJnqTqxkuD
    ONAX1IHTvNwdwVpt
    U4RBcddMIFYdiwYd
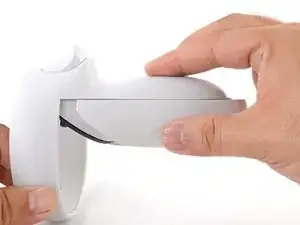
    • Use your fingers to slide the battery cover down towards the strap end of the controller.

    • Remove the battery cover.

    • If you're taking the controller apart for repairs, remove the batteries in the controller.

  2. cwCQdmhW4jcBuyva
    • Heat an iOpener and apply it to the bottom edge of the controller faceplate for a minute.

    Why is this step needed? Yes there is adhesive on it, but it isn't that bad.

    DAB ARMY -

    you dont need it, prob better to have it but not required to get the cover off

    jek -

    For anyone stumbling across this like me, I can agree with the others: it is almost definitely a nice to have I'm sure, but I was able to get in just fine using an opening pick and opening tool.

    Aranohr -

  3. cBWRFaOMSrheKNcy
    cBWRFaOMSrheKNcy
    VEcbSBsWtARQjiUb
    NXB5KDisr3JacXxi
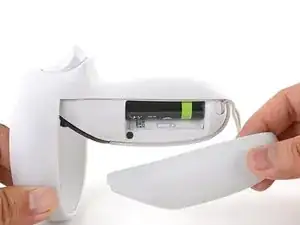
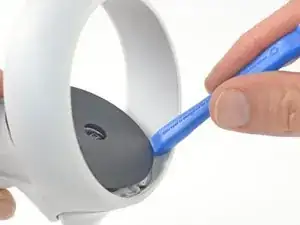
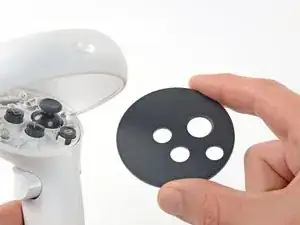
    • The controller faceplate is secured with adhesive and three friction pegs.

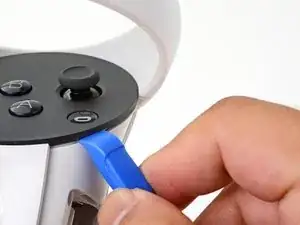
    • Press the edge of an opening tool into the seam between the controller faceplate and shell, near the Oculus button.

    • If you can’t get the opening tool into the seam, heat the area with an iOpener for a minute and try again.

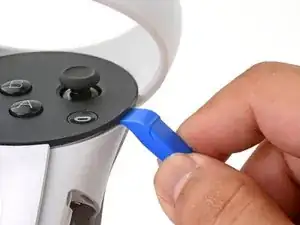
    • Slide the opening tool to the base of the ring shell to loosen the adhesive.

  4. PDjvVXVfVAHoRCrU
    PDjvVXVfVAHoRCrU
    hACIuYysbfrTTQ6Q
    • Use an opening tool to pry up on the seam to loosen the first friction peg.

  5. L6TLFMfcjVjmZ5RH
    L6TLFMfcjVjmZ5RH
    G6vKkvIYepj6ZSR6
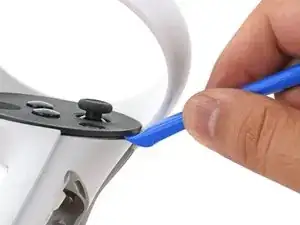
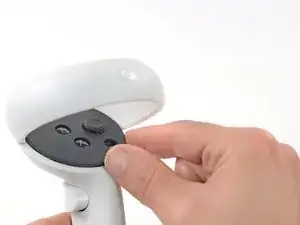
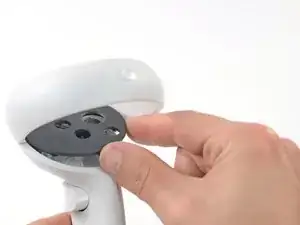
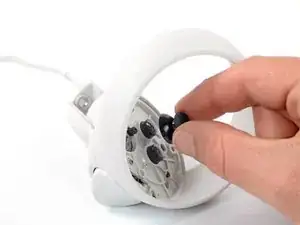
    • Continue prying around the entire faceplate to separate the remaining friction pegs and adhesive.

    • If you're having trouble, apply a heated iOpener to the faceplate for a minute and try again.

  6. 5K2MXJ1XZXK4PKXf
    5K2MXJ1XZXK4PKXf
    lT1tVJWEmcJwTs6L
    UMGlJdK4d5gLMAhQ
    • Remove the controller faceplate.

    • The three friction pegs should hold the faceplate securely, so you don’t need to replace the adhesive during reassembly. Be sure to firmly press the faceplate onto the controller so that all friction pegs fully engage.

  7. CgMAYUjXuXPZIjnq
    CgMAYUjXuXPZIjnq
    ZMf1XlNyPUt61MUy
    • Use your fingers to pull the thumbgrip straight off of the thumbstick and remove it.

Conclusion

To reassemble your device, follow these instructions in reverse order.

Repair didn’t go as planned? Try some basic troubleshooting, or ask our Answers community for help.

Arthur Shi

Member since: 03/01/18

272294 Reputation

0 comments