Introduction

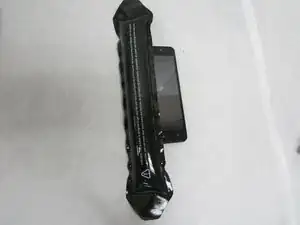
This guide will show the process of replacing the glass screen of a Maze Speed phone. You will need a plastic opening tool, tweezers, iOpener, Phillips #00 Screwdriver, and soldering equipment. Soldering experience is beneficial in order to avoid damaging the phone’s other components. If the glass screen is cracked or shattered, you need to take extra precaution not to cut yourself.

  1. oNBlrEHJYwGVqUCF
    oNBlrEHJYwGVqUCF
    REqvF4FWaJaDHsEL
    5dJT5yVEXEX1VJrq
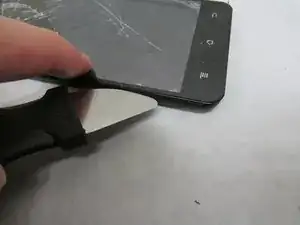
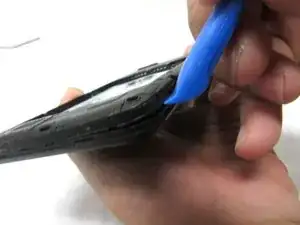
    • Remove the back cover by inserting the plastic opening tool at the bottom left corner of the device.

    Check grammar and spelling throughout the guide, please. See, for example, conner, for corner, here. I also would consider switching the order, and using a more specific verb (e.g., insert the plastic opening tool at the bottom left corner of the device to remove the back cover).

    Alex Watkins -

  2. nGQgNmdeOFNmWZHB
    nGQgNmdeOFNmWZHB
    hNJUZdGprJpYpcaq
    • Remove fifteen 2mm Phillips #00 screws.

    The directions should start with a verb (e.g., use, unscrew), rather than you. The you is implied for commands.

    Alex Watkins -

  3. 6Ats2lbAPpyvFUgc
    6Ats2lbAPpyvFUgc
    LdORak3YDuXbhFkF
    rCExA1MECYtTPCwK
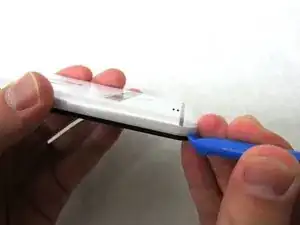
    • Lift the plastic opening tool up at the bottom left corner to create the gap.

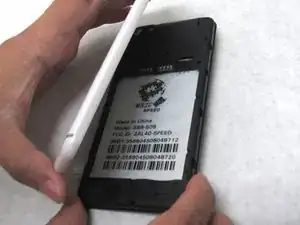
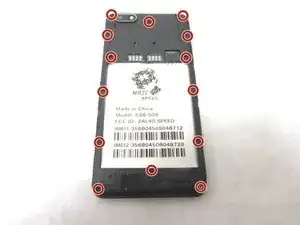
    • Repeat this through all corners to remove the internal casing.

    Can you be clearer in this step about how to remove the internal casing?

    Alex Watkins -

  4. aJhguM4VIdYdtcSg
    aJhguM4VIdYdtcSg
    iLrjw1QWeFw4eaVj
    sO5K4Lft1fKAsWpV
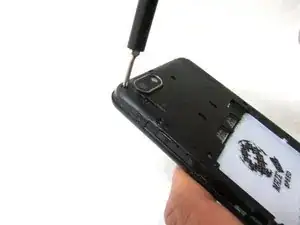
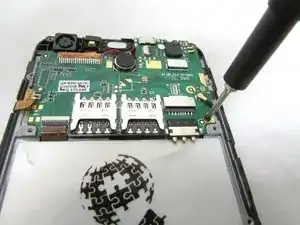
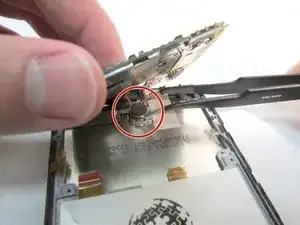
    • Unscrew the 2mm screw at the bottom right of the motherboard.

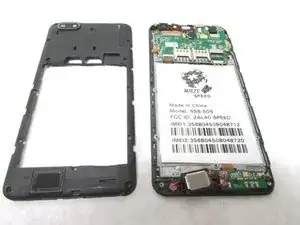
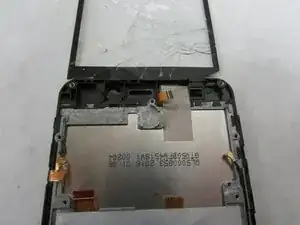
    • Remove the internal antenna casing from the motherboard.

    Make sure to follow ROYGBIV directions for markup.

    Alex Watkins -

  5. N6vNYreRZRmH1eeY
    N6vNYreRZRmH1eeY
    rdg6x43VZaFfiMIy
    • Unplug the speaker at the top of the motherboard.

  6. PHQ6KoR2oq6jD5a2
    PHQ6KoR2oq6jD5a2
    f3aWeelBYfnGyscv
    • Desolder the gold ribbon that is connected to the motherboard at the bottom left corner.

    Consider linking to iFixit’s resource on soldering, as noted in feedback.

    Alex Watkins -

  7. CfFR5j5LkgCGv5sL
    CfFR5j5LkgCGv5sL
    XAGJcGvhdS3DLorI
    CZ4tEkdNxTsuVJOs
    • Use tweezers to remove cable from the ZIF connectors located at the bottom left of the motherboard.

    • Use the tweezers to remove the second cable from ZIF connector located to the right of the speaker that you unplugged in step five.

    • ZIF connector stands for Zero Insertion Force. Flip the small locking tap before removing the cable.

    Make sure to check all steps for end punctuation (periods).

    Alex Watkins -

    See also the feedback about ZIF connectors from iFixit regarding this step.

    Alex Watkins -

  8. uKNJXOEWWEooDnMS
    uKNJXOEWWEooDnMS
    UM3x2JI1USaaaGC5
    • At this point, the motherboard should be able to be lifted up from the bottom.

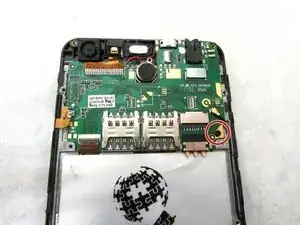
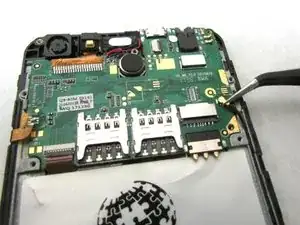
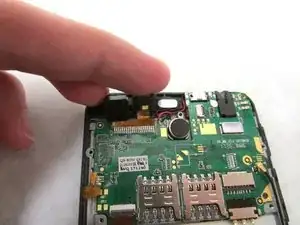
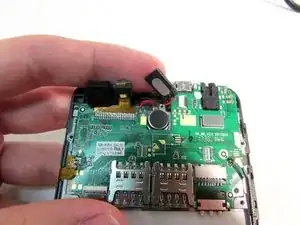
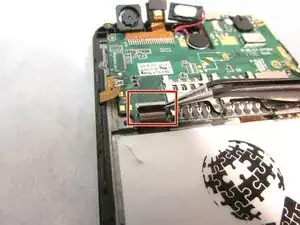
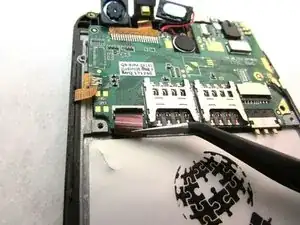
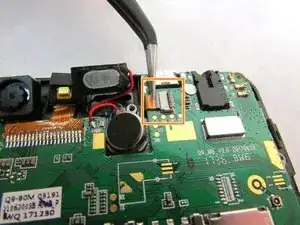
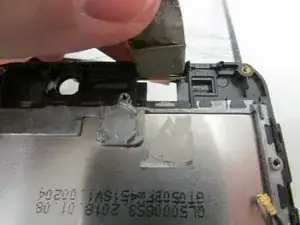
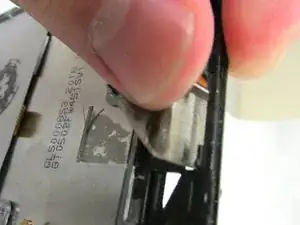
    • Use the tweezers to dislodge the speaker.

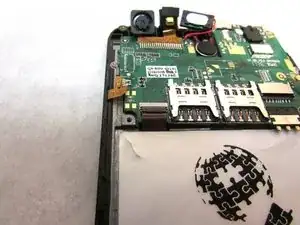
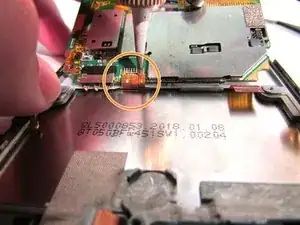
    • After the speaker is dislodged, flip the motherboard up so that you can see the cable.

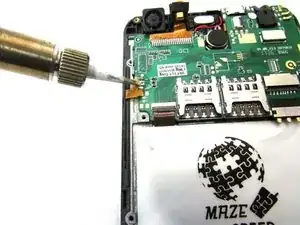
    • Using a soldering tool, desolder the cable from the back of the motherboard.

    Note that it’s is for the contraction it is. Its should be used for the possessive its. Also, check verb tense in this step. Remember, also, the ROYGBIV order of steps.

    Alex Watkins -

  9. CjjfewMXOy3LEddZ
    • Remove the motherboard from the back.

    “Remove the motherboard” would be clearer here—I would also suggest adding some shots to show this action happening.

    Alex Watkins -

  10. GbjJMcjaZFTYSYyb
    GbjJMcjaZFTYSYyb
    jOno1JOhlMNQKrEh
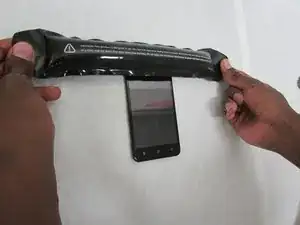
    • Apply the heated iOpener to all sides of the screen (left, right, top, and bottom) for 90 seconds (or more if necessary) to soften the adhesive.

    This is a really clear, specific step—can you combine Steps 10 and 11 to be more concise?

    Alex Watkins -

  11. ZQfGIASXKXtlxCXZ
    ZQfGIASXKXtlxCXZ
    kYXQW2OJbYhOGnSS
    HDLyEO2PFIvlVBNS
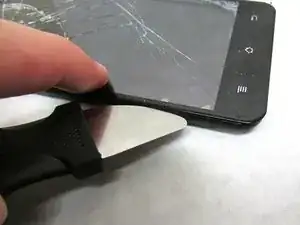
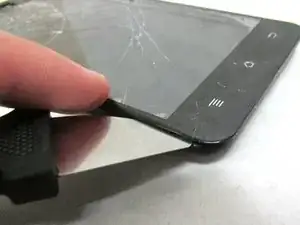
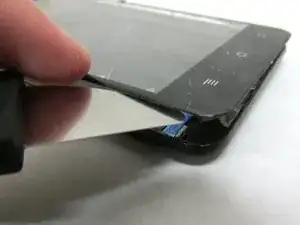
    • Use a Jimmy's flexible steel blade to separate the screen from the frame. Insert the blade between the frame and screen then carefully lift using the blade.

    • Gently lift the glass screen and remove from the frame.

    Check spelling errors here.

    Alex Watkins -

  12. Vd3nff6wEICLQaPR
    Vd3nff6wEICLQaPR
    srVvB1lHfe232pCZ
    WglsLUFLIx23nBWI
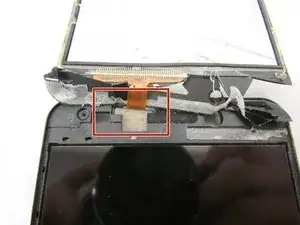
    • There will be a thin flat cable at the top of the screen in which you need to carefully peel back.

    Can you be more concise here? Also, is this a ZIF connector?

    Alex Watkins -

  13. WBEXAcysZNSTMjKS
    • Move the connecting wire through the hole at the top frame.

    • Then, remove the glass screen and replace with the new one.

    What’s happening in the first picture, here? Is there missing information from this step?

    Alex Watkins -

Conclusion

To reassemble your device, follow these instructions carefully in reverse order.

Jun Soo Kim

Member since: 08/07/19

373 Reputation

0 comments