Introduction

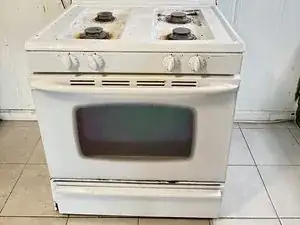
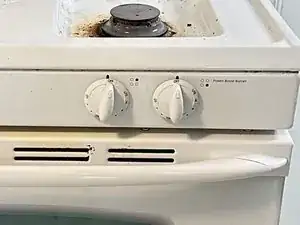
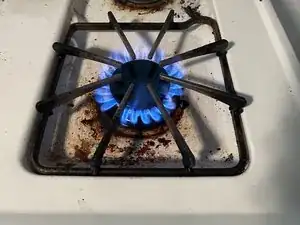
The following guide will show you how to replace a gas burner and igniter assembly on a Maytag model MGR44552BDW. Oven burners often wear out over time and can lose the ability to spark and produce a cooking flame properly. This guide will show a step-by-step process for replacing a burner.

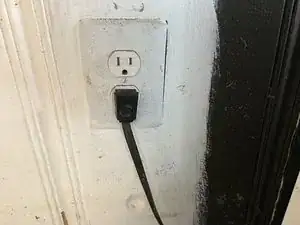
Before you begin the repair, make sure to turn off your stove/oven and unplug your appliance from the socket. If you have recently used the stove top, wait until it has cooled before you start the repair.

  1. NHPHT4RfVBvieVwm
    NHPHT4RfVBvieVwm
    c1LggpTdVKOqCkUD
    • Assess the stove to ensure the burners are in the off position.

    • The off position is marked on the dial. Each knob will have an arrow that points up to indicate the stove is "off".

  2. NnxfwZvSeEyQIwiI
    • Put on rubber insulated safety gloves.

    • Disconnect the power cord from the socket.

    • It is important to unplug the unit before disassembling the burner to avoid injury.

  3. PxBY1jXKSFSP5Fdy
    • Remove the burner grate from the stove top.

  4. wTTk5pZRSZSNJJnJ
    • Turn the burner in a counterclockwise direction to remove it from the range.

    • Don't yank it off as it is connected to the stove by two wires.

  5. mLtYowiAPXhXIufv
    • Inspect the wiring for any defects.

    • Frayed or exposed wiring can cause the burner to malfunction, leading to an electrical short in the unit.

  6. iKVnkRNN3RdNWPd1
    iKVnkRNN3RdNWPd1
    XbSpfHZOYS6ee5Ug
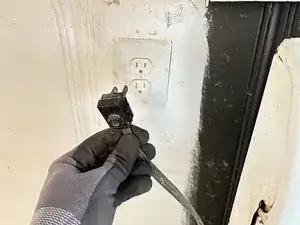
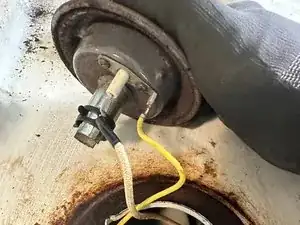
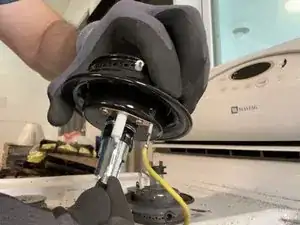
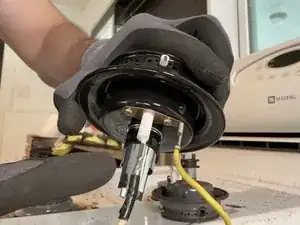
    • Pull downward on the silver connector to unplug the black wire from the ignitor's white connection point.

  7. XmbrGksGCgudtwEl
    XmbrGksGCgudtwEl
    klV2HypAUP2OfyEv
    • Pull the yellow wire out by the silver connector from the connection point.

  8. hxGEe5QGBdsIOBYs
    hxGEe5QGBdsIOBYs
    mVDyPxk4SiUWTVvX
    KdgT2ynBHVTJdBqs
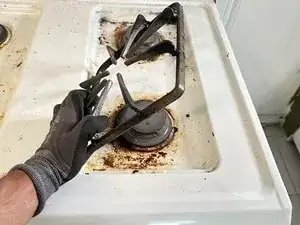
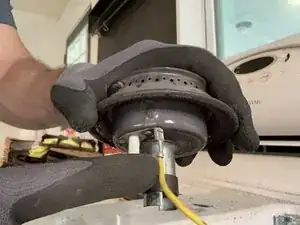
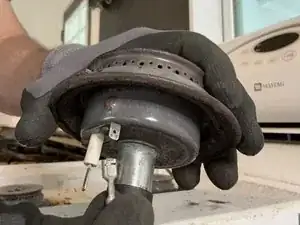
    • Push the black wire onto the new ignitor and the yellow grounding wire onto the connection point on the burner until both are securely connected.

    • Use caution when terminating the black wire onto the igniter. The white insulator is delicate and can break under too much force or if dropped.

  9. aMVbjEt5DrWFVnDa
    aMVbjEt5DrWFVnDa
    jLgvog3ArixUdWtm
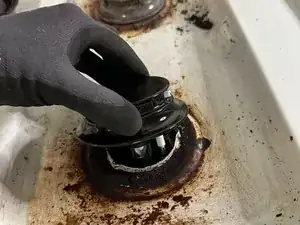
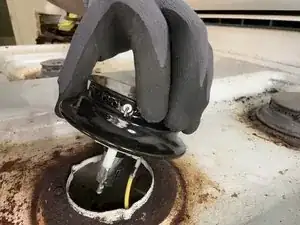
    • Replace the burner so it sits flush with the stovetop.

    • Screw it in by hand in a clockwise direction.

  10. wMpqOXsP1mQkR3dW
    • Plug the power cord back into the wall.

  11. FbNoG2xBOSiaeYYX
    • Replace the grate and test the new burner to ensure the new burner is functioning properly.

Conclusion

To reassemble your device, follow these instructions in reverse order.

Marcus Gasaway

Member since: 15/06/24

193 Reputation

0 comments