Introduction
This is a simple guide to disassembling a Marsback Zephyr Pro mouse to replace the fan, with some tips on selecting a replacement fan and how to avoid breaking the mouse during disassembly.
Fan Selection
- The fan in the Marsback Zephyr Pro is a 5v 30x30mm fan with 8mm thickness - so for this replacement you will need one matching those dimensions. A 10mm thick fan is too tall and will prevent the mouse shell from being closed.
- You will also need to make sure that the replacement fan has the same connector, a 1.25mm Molex PicoBlade or JST Female connector - alternatively, you can snip off the old connector and solder it onto the new fan.
- The original fan has holes about 3.3mm in diameter to fit onto the mounting posts inside the mouse. Additionally, the holes on the 'blow'/'outlet'/top side of the fan are larger at around 4.7mm in diameter to accommodate the head of a screw. This larger diameter extends about 3mm deep through the total 8mm depth of the fan. Finding a fan with these matching features isn't strictly necessary, and a fan that has simple holes ~3.3-3.4mm all the way through should work fine - just note that the screw head may get slightly stuck and the fan may simply be held by friction onto the posts.
-
-
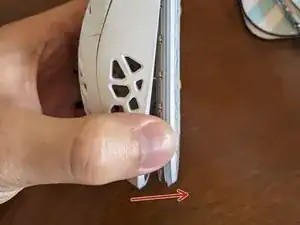
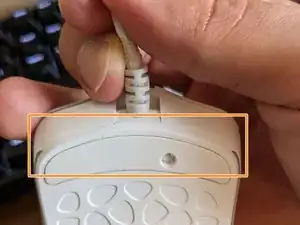
First, pull the bottom of the shell slightly apart to create clearance
-
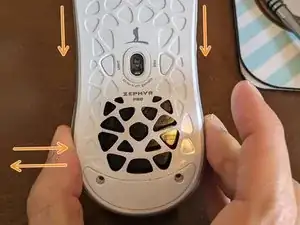
Next, wiggle the bottom of the mouse's base left and right while pulling down
-
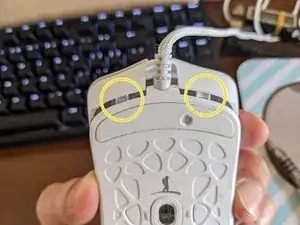
Once the locking pieces at the top are free, the base of the mouse will be detached from the top shell
-
-
-
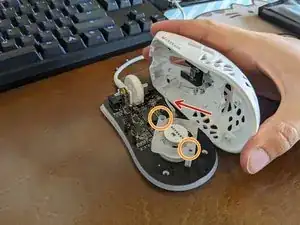
Open the top shell to the right.
-
Optionally disconnect the ribbon cable to give extra working space by pulling up on the ribbon cable connector's locking piece until the ribbon cable can freely slide out.
-
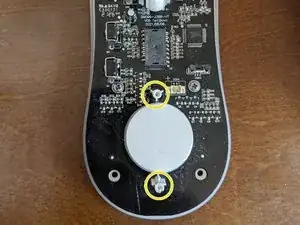
Unscrew the 2 screws holding in the fan and pull the fan connector out. There is no locking mechanism on the fan connector.
-
Slide the new fan onto the mounting posts and replace the screws.
-
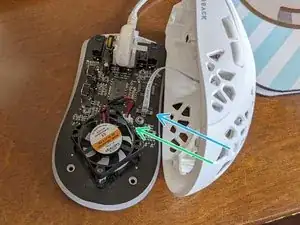
Reconnect the fan connector. Ensure the positive side (red) of the fan cable is on the left.
-
Reconnect the top shell ribbon cable and press down the locking tab fully before reassembling the mouse.
-
-
-
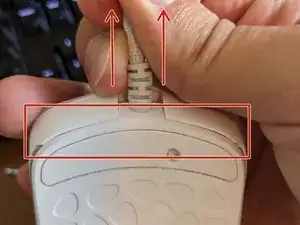
Pulling up gently on the cable can help slide the locking pieces unto place. Pay attention to the seam between the top/bottom shells.
-
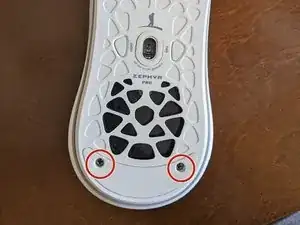
Once the seam is flush, the shells are aligned and can be reattached with the screws under the rear skate.
-
To reassemble your device, follow these instructions in reverse order.