Introduction

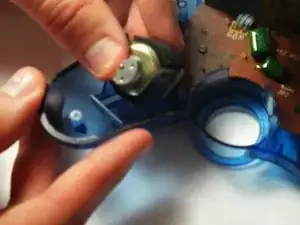
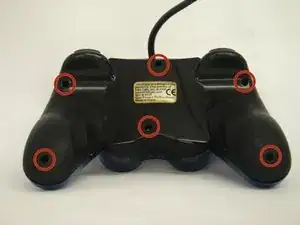
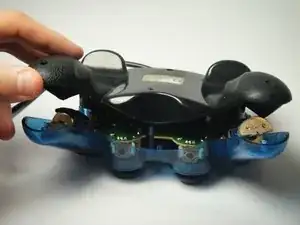
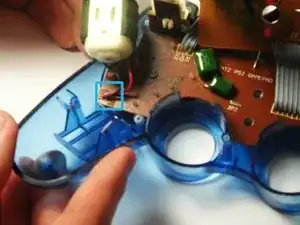
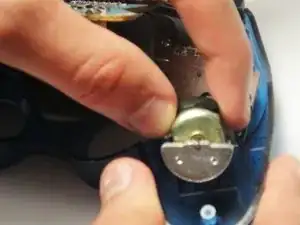
This repair guide contains every step needed on how to replace your vibration motors on your Mad Catz Dual Force 2 Pro. Remember, these controllers aren't meant to be repaired, so don't worry if you need to be forceful when raking apart. Also, all the screws are the same type.

  1. h5APsM1AKI5GwYD1
    • Unscrew the six 7 mm Phillips screws from the rear cover.

  2. rtSV53DwTXoEMbZQ
    • Gently pry off the back of the controller from the front piece and lift it away.

    • The controller has no loose parts, so you can open it confidently without worrying about anything falling out.

  3. lCPVXO64DqIJ5j54
    • Unscrew the two 7 mm screws on the green circuit board.

  4. onBM5sf1DSeItIiB
    onBM5sf1DSeItIiB
    K25S154idTGqtGYB
    • Grip the sides of the motor you wish to replace and lift up.

    • Be careful not to tear the motor wires that are soldered to the motherboard.

  5. MEfLmCq1tWY6h6uX
    • Use a soldering iron to de-solder both vibration motor wires from the motherboard.

    • The positive (red) wire connects to the nearest the edge of the motherboard.

    • If you do not know how to solder, see the soldering guide for instructions. Also when soldering on circuit boards, be sure not to overheat the connection as permanent damage may result.

  6. XCJFs6mxR6qqbA5S
    • If necessary, repeat the previous two steps for the other vibration motor.

Conclusion

To put your device back together, just follow these steps in reverse order.

Alexander Coyne

Member since: 11/01/15

745 Reputation

0 comments