
Introduction
A drink was spilled on a Macbook Air so the keys started to stick. I didn't find a guide to replace the keyboard on iFixit, nor any YouTube videos that were comprehensive or well photographed. So I took the leap to do the job and documented as I went. I learned a few lessons that will be useful to others. Since I am not an expert, I may call a few things by the wrong name, like doohickey, but -- I was successful and everything on the repaired Mac is working. An OEM keyboard comes integrated with the top case for the laptop. Replacing it requires completing tearing down the laptop and rebuilding it on a new keyboard/top case. This was actually not very difficult to do. Keeping all screws and parts separated and cataloged as you go is key.
-
-
Disconnect battery cable from motherboard. Lift then locking clip then lift up on connector with a spudger.
-
-
-
Disconnect the track pad cable from both the motherboard and the sisterboard. Two screws hold a bracket and connection to mother board. At the sisterboard lift a locking clip and pull cable toward the battery, pulling on its black tape cover, to disengage it from the board
-
-
-
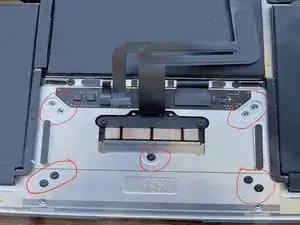
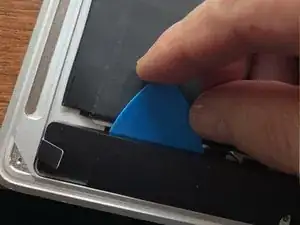
Remove 9 black T5 screws holding track pad into the bottom case. 8 black screws in the corners and one in the middle. Then open the laptop to receive the trackpad into your hand and tuck the trackpad cable through hole in the bottom case.
-
-
-
Disconnect the right speaker and mic cables. Speaker cable can be lifted off the motherboard using flat end of a spudger. The mic has a lock-down bracket that must be raised first so you can use the flat end of a spudger to lift if from its connector.
-
-
-
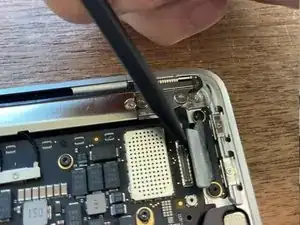
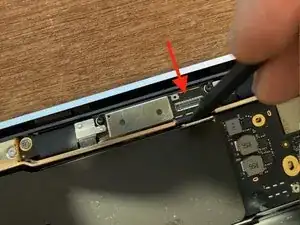
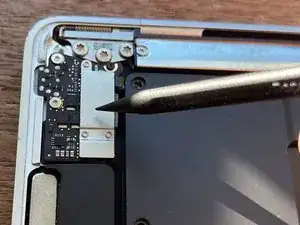
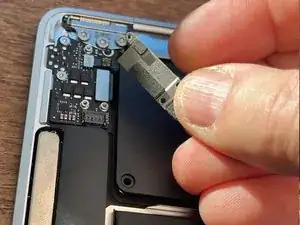
Remove the USB-C jack's connection cable from the motherboard. Remove two T4 screws that are holding down silver and black bracket. Remove the bracket and use flat end of a spudger to lift the connector from the board.
-
-
-
Remove one T4 screw and lift the silver-colored Wifi connector hold down bracket. Lift two cables up from their sockets on the motherboard
-
-
-
Remove two T4 screws and cover from the screen-to-motherboard connection. Lift the cable with tip of a spudger.
-
-
-
Remove there T4 screws and remove the silver colored hold-down bracket. Use spudger to lift cable from motherboard to earphone board.
-
-
-
Remove five black T4 screws holding down board. Four are seated in gold marker rings on the boards. Note that one of these screws has a rubber spacer on it. Note where it goes when reassembling.
-
-
-
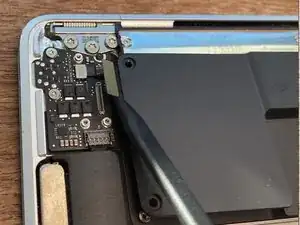
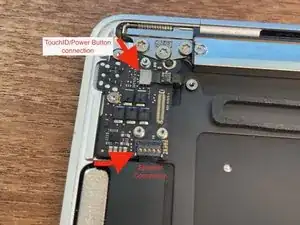
Disconnect the left speaker cable and touchID/power button cable from earbud jack small board at top left.
-
-
-
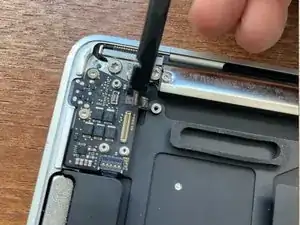
Remove two T4 silver screws and one black T4 screw that are seated in gold rings on the small board. Earbud jack is slightly under the side of top case.
-
-
-
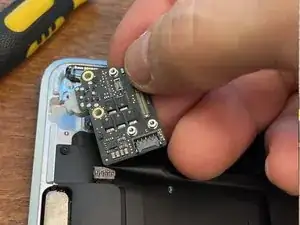
Remove six T4 screws to remove the biometric power button connector. Open the laptop so the TouchID button can fall out, pulling its cable through a slot in the top case.
-
-
-
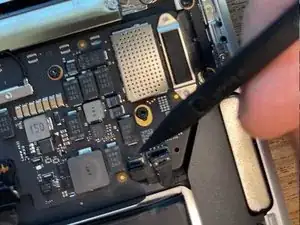
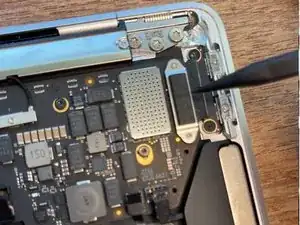
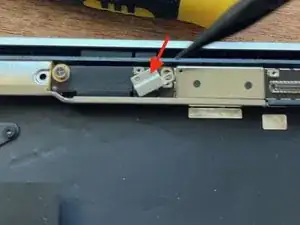
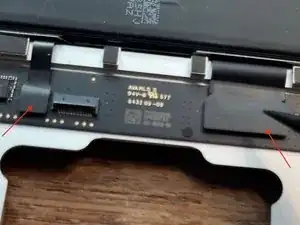
Remove five T5 screws. Remove two T4 screws and a silver hold-down bracket on each of two connectors. Lift connector off radio with tip of spudger. Three screws are shown in the photo. There is another to the right.
-
-
-
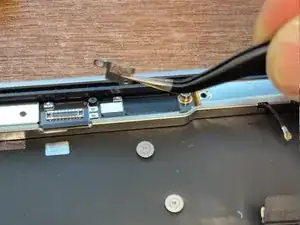
The radio is taped down to the case with double-sided tape. Press a plastic card between the radio and the case to pry the radio up.
-
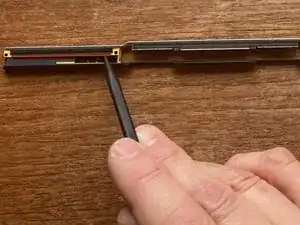
Pull the screen connectors through the slot in the WiFi radio to remove the radio.
-
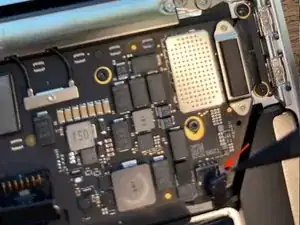
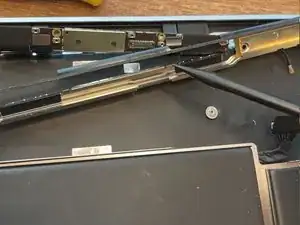
To reinstall, use tweezers to remove the old two sided tape and replace with strips between the screw holes on each side. The red line in the photo shows where to put new double-sides tape during reassembly.
-
-
-
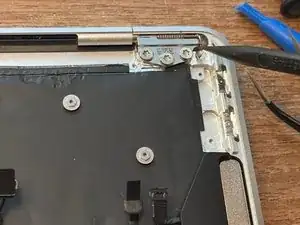
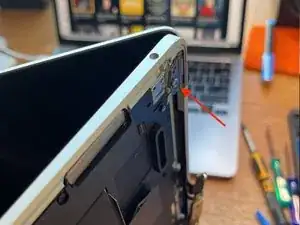
Remove two T8 hinge screws, the inside and outside ones on each of the two hinges, but only loosen middle ones.
-
Stand the laptop on one side and open to about 90 degrees. Remove the remaining hinge screws. The slide the hinges out of the top case to separate the screen from the case.
-
-
-
Not sure what this thing is called. Remove three T4 black screws and use a pick or card to separate and pry bracket off the top case.
-
I used a Sharpie pen to mark the outlines of the bracket so I could see where to put drops of glue when reinstalling the bracket so that the screw holes would be lined up.
-
-
-
Remove one T4 screw holding down each of the speakers. Use a pick to pry the speakers up from two-sided tape. On reinstall, remove the old tape and replace. The third photo shows the new tape applied to each speaker.
-
-
-
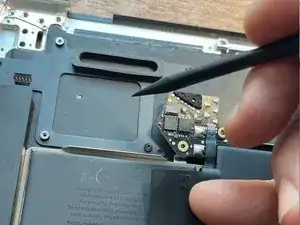
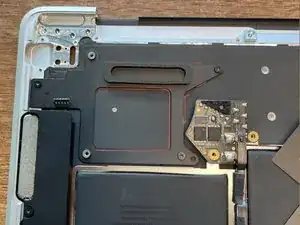
I think this is the storage drive. It might be the GPU. Remove two T4 screws seated in gold rings on the board. The one closer to track pad has black pad glued to it. On reinstall I added some fresh two sided tape to the cover and then stuck it down.
-
-
-
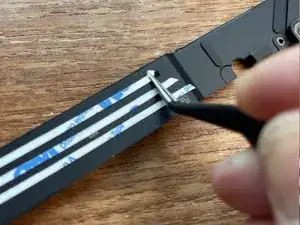
Lift lockdown brackets on the two connectors and use tweezers to grip black tape to pull each of the two cables out of their connectors on the sisterboard.
-
-
-
Remove one T4 screw on each side of the laptop.
-
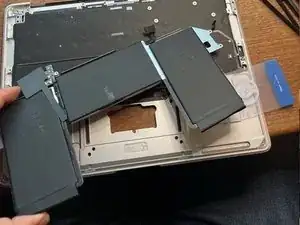
Use tweezers to grab and pull three pieces of double-sided tape from between the battery and the top case on the left and right sides.
-
One piece of tape tore before I could remove it, so I pried under the battery with a card to separate the battery and tape. Lift to remove battery from top case.
-
-
-
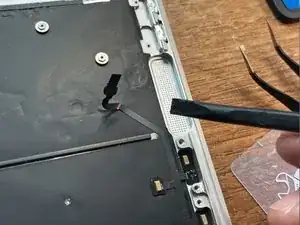
The mic cable is taped down. Slip a pick between the cable and top case. Disconnect the cable from a sprocket in the top case.
-
Two microphones are glued into slots on the top case. I tore the cable when trying to separate them from the case. Had to order a replacement from iFixit and wait a week to get it. You may want to order one before you start. You might be able to use an eyedropper to put drops of rubbing alcohol around the edges of each mic to loosen its glue.
-
Third photo shows the torn mic cable. On reassembly, I used two tiny drops of B-7000 glue to attach the mics to the top case. As it says on the tube (from China), "This is magic glue, European market very popular...other products not afraid of bed"!
-
-
-
Remove four screws. They are not Pentalobe or T4. I used needle nose pliers to grip them so I could loosen them and then use tweezers to remove.
-
-
-
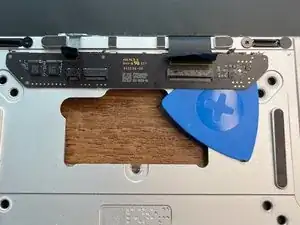
My new top case -- Apple-made and bought from iFixit -- did not come with the daughterboard so I had to loosen the tape holding it down and gently pry it up.
-
Use a heated Iopener under the case, and drops of rubbing alcohol placed with an eyedropper around the edges of the trackpad daughterboard to loosen it. Then use a pick to separate the board from two-sided tape underneath it.
-
On reassembly, add strips of two-sided tape to the top case and press the daughter board down to it.
-
-
-
Reassemble all parts onto a new keyboard top case.
-
Two-sided tape is needed to reinstall the daughterboard and the batteries. The paper peeled off nicely when I simply pressed on it with my tweezers.
-


To reassemble your device, follow these instructions in reverse order.

One comment
Thank you for this guide :)
andrew -