Introduction

For the official, updated iFixit guide, click here. This guide is archived for historical purposes.

  1. 3YibEDiSTRVFECCV
    3YibEDiSTRVFECCV
    5TsA2ilkSOsYsSQR
    • Before starting this procedure, you must disable your Mac's Auto Boot feature. Auto Boot powers on your Mac when you open the lid, and may be accidentally triggered during disassembly. Use this guide or follow the abbreviated instructions below to disable Auto Boot.

    • Completely power off and unplug your MacBook Air before you start. Close the display and flip the entire laptop upside-down.

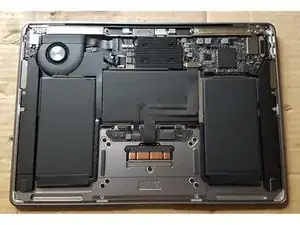
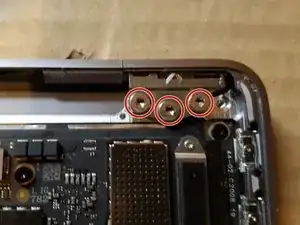
    • Use a P5 driver to remove the following screws:

    • Two 7.6 mm screws (with a 2.7mm collar)

    • Two 7.1 mm screws

    • Six 2.3 mm screws

  2. dH1jVVZRsUlnrAo5
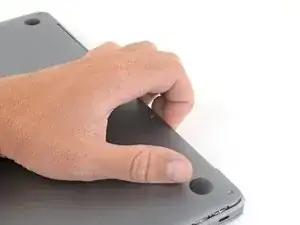
    • Wedge your fingers between the display and the lower case and pull upward to pop the lower case off the Air.

    • Remove the lower case.

  3. BDB5GhlbVnoBSRaB
    BDB5GhlbVnoBSRaB
    bNToMnNFCMUajLN2
    • Remove the plastic shield covering the battery PCB.

  4. pKUD6SXUeMEoBoDM
    pKUD6SXUeMEoBoDM
    Xi2Bax2QtGVWBTaO
    • Use a T3 torx driver to remove two 2.3mm screws from the battery PCB:

  5. WcwJakh5FRqCeTPV
    WcwJakh5FRqCeTPV
    OdNpMklPhFC6h2dl
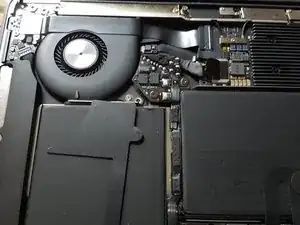
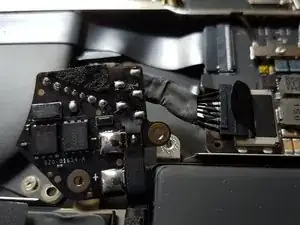
    • Use a spudger to slide the battery connector parallel to the logic board and out of its socket on the logic board.

  6. moABlGCy1ImjMNXt
    moABlGCy1ImjMNXt
    GEKK6woO1m4PYrmi
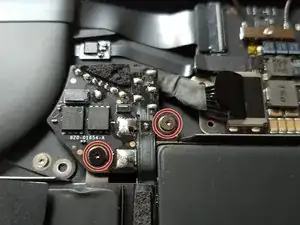
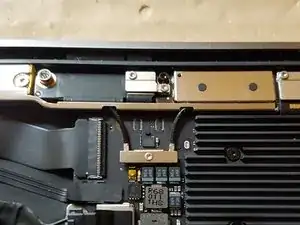
    • Use a T3 Torx driver to remove the one 1.1 mm screw securing the antenna cable bracket.

    • Remove the antenna cable bracket.

  7. wLhWHZU3CEFfdsDM
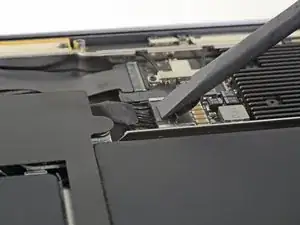
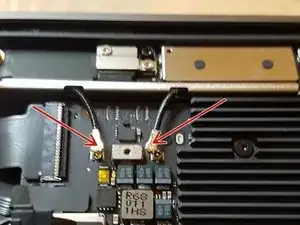
    • Insert the point of a spudger under one of the antenna cables close to the connector.

    • Pry straight up to disconnect the cable.

    • Repeat for the other antenna cable.

    I have had the board side connector come right off when removing the antenna cable. Use something like the spudger or a fine screwdriver tip to put some pressure on the board connector to keep it in place during removal of antenna cable.

    Ross Elkins -

  8. fKH6WiItArJvuwXt
    fKH6WiItArJvuwXt
    QxuTQF4KOcxF4rJD
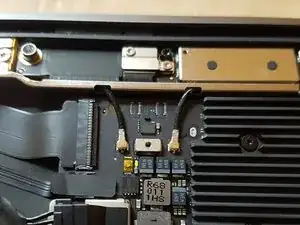
    • Use a T3 Torx driver to remove the two 1.3 mm screws securing the display cable connector bracket.

    • Remove the display cable connector bracket.

  9. Q4fyLBGLjveBJpTP
    Q4fyLBGLjveBJpTP
    SVqCU6IxPsixUFXY
    • Use the flat end of a spudger to pry up the display cable connector.

  10. GrLBoIZlQEk64UQu
    GrLBoIZlQEk64UQu
    UpunYQdNY6VGOUMi
    • You can skip this step if your replacement display assembly comes with these two brackets preinstalled.

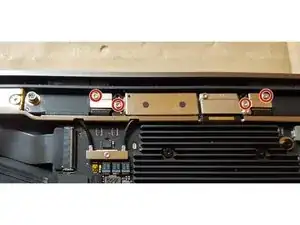
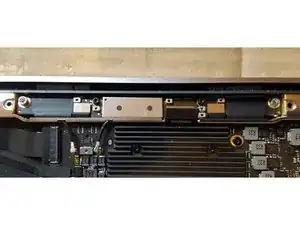
    • Use a T3 Torx driver to remove the two 1.1 mm screws securing the flex cable brackets.

    • Remove the two brackets.

  11. n5Up6NL4VNZrrVBU
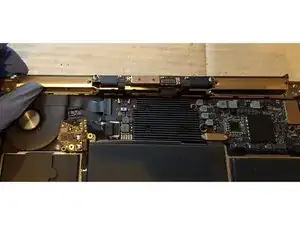
    • Use a T5 Torx driver to remove the following screws:

    • Four 7.1 mm screws

    • Two 4.2 mm (Black) screws

  12. LRBTIUWAAAd5MYDb
    LRBTIUWAAAd5MYDb
    1MNWpqQIInecI2nx
    ymxpZtbLKoGo3mCc
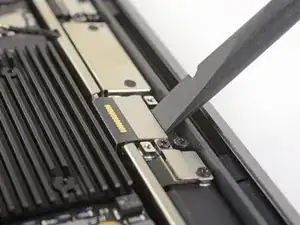
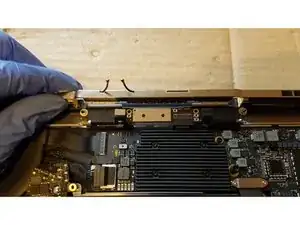
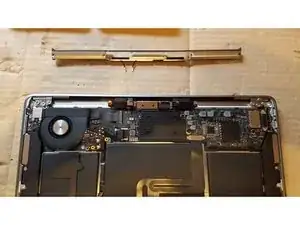
    • Lift the antenna bar straight up and out of the case. Take care not to snag the antenna bar on any cables or connectors.

    • You may encounter resistance from the clips in the middle of the antenna bar holding it in the case. You may pull hard without damaging anything as long as you pull straight up, perpendicular to the case.

    • Remove the antenna bar.

  13. OmYjhv3kyFxlUkNJ
    OmYjhv3kyFxlUkNJ
    TXTcrlX1ZCkE5u5y
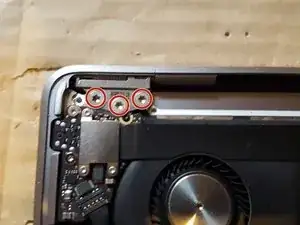
    • Use a T9 Torx driver to remove the six 4.7 mm screws securing the display hinges to the upper case.

  14. HACsgZMLWOjWLpMG
    HACsgZMLWOjWLpMG
    rbAiSqARsppp22bT
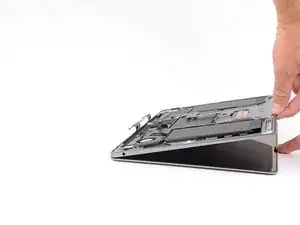
    • With the MacBook still screen-side down, carefully lift the upper case to open the MacBook as far as possible.

  15. YQbBUFtGHY6e1acH
    YQbBUFtGHY6e1acH
    HfgtwsllVQFBkgEW
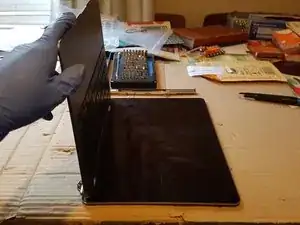
    • Carefully rotate the upper case to a 90 degree angle with the display.

    • The hinges should not move in relation to the display, and should rotate out of the case slightly.

    • Keeping the display flat, tilt the upper approx 5-10 degrees to the left. Move the upper case to the right, the hinges should easily slide out of the upper case.

  16. JyCUqlkQkTv3GVvL
    • Display should now be separate from the upper case.

Conclusion

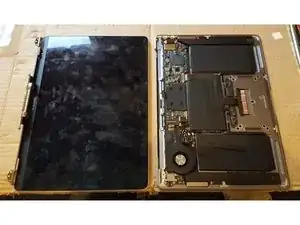
To reassemble your device, follow these instructions in reverse order.

David Fear

Member since: 08/09/11

4729 Reputation

2 comments

Great guide! Did you encounter any tamper-proof seals? Anything that would make it obvious that the MacBook was disassembled?

Yann Landry -

No tamper proof seals encountered. Didn’t find anything that would “make it obvious that the MacBook was disassembled”.

David Fear -