Introduction

The RAM is an essential component in a PC that determines how quickly your device will operate. A device will include two RAM sticks that can deteriorate due to age or usage. This can cause your device to slow down overtime and not operate as efficiently as it used to. This guide shows how to replace the RAM on your laptop to improve performance and provide the PC with more power.

  1. so4AypRJjiOa4Xar
    so4AypRJjiOa4Xar
    GFBwDBFTUMHaTYLF
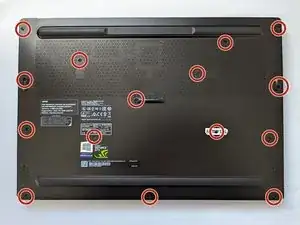
    • Remove the fifteen black 6.0 mm Phillips #00 screws from the back cover.

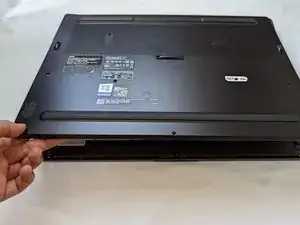
    • Carefully remove the back cover.

    • It may be easier to remove the back cover by starting at the ethernet port and running something thin along the sides until the panel pops off.

    • When reassembling the back cover, it should "click" into place.

  2. WkDAKZDVExfbN2MK
    WkDAKZDVExfbN2MK
    VOaFmiGHjCKNa2G4
    X3PHBZDOBWZNC1Wy
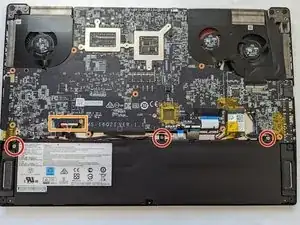
    • Remove the three silver 4.0 mm Phillips #00 battery screws.

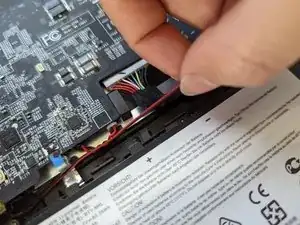
    • Separate the red wire running on top of the battery from the battery.

    • Lift the battery out slightly, then carefully wiggle and pull the battery connector cable out.

    • Be sure not to pull excessively on the battery when it is still connected to the motherboard.

  3. nBB2DhNtSCfZENrK
    nBB2DhNtSCfZENrK
    yCGUy11tRXlvexDa
    2hStDnlAYJ1JxQNL
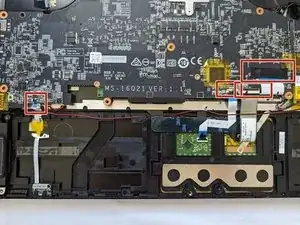
    • Gently unclasp and unplug the four connectors by first lifting the black locking bars of the ZIF connectors.

    • The black locking tables can be lifted by using something small such as a fingernail.

    • There may be black tape covering the ribbon cables that need to be removed.

    • Be gentle while dealing with ribbon connectors since if damaged will cause malfunction.

    • When reassembling, make sure that each ribbon connector is completely inserted before lowering the black tab.

  4. xsn4Sr6eBIkwF4cs
    xsn4Sr6eBIkwF4cs
    sD2L3aAONrCWKy6v
    QFPBxcqwHs4HqS4L
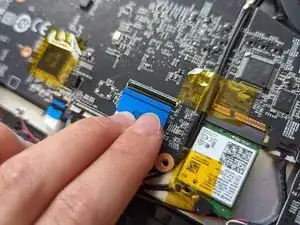
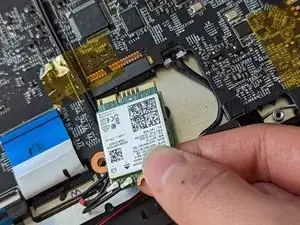
    • Unscrew the single 4 mm Phillips #00 screw securing the Wi-Fi card.

    • Remove the Wi-Fi card and the cable located next to it.

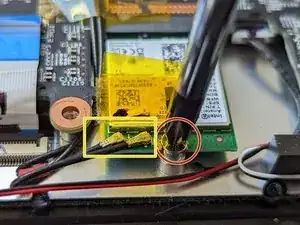
    • Be careful to not unplug the two wires next to the screw.

    • There will be a yellow tape covering the WiFi card that will need to be removed.

    • Make sure to keep the yellow tape to reapply on the Wi-Fi card when reassembling.

  5. HZM5HgNsueIYaZGo
    HZM5HgNsueIYaZGo
    ANeotkTyvwGhv2TE
    IfZt5H6E6Xp6NCpo
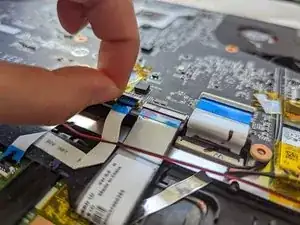
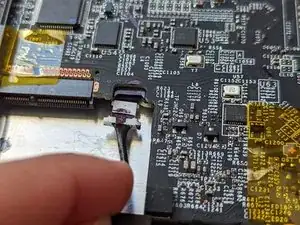
    • Remove the last two ZIF ribbon connectors.

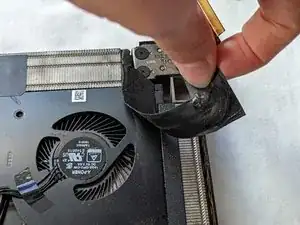
    • Slowly unpeel the black ribbon connector from the fan.

    • When reassembling, make sure to adhere the black ribbon to the motherboard in a way that does not cover the fan.

  6. oL6DnvGBLOHKyAFn
    oL6DnvGBLOHKyAFn
    RZN4DjxXfXepqTGc
    QELeIYXOaoAUPbZQ
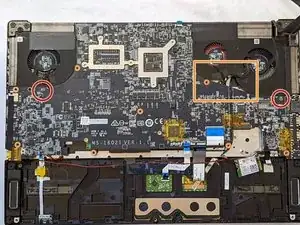
    • Unscrew the two black 6 mm Phillips #00 screws below each fan.

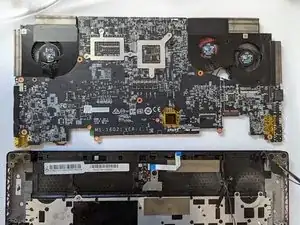
    • Slightly lift the motherboard.

    • While the motherboard is lifted, thread the Wi-Fi card through the hole as shown.
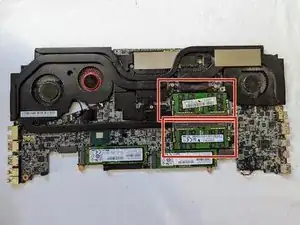
    • There may be a piece of yellow tape holding the WiFi card wires down that needs to be removed.

  7. HfEEbvvFot1lAcsJ
    HfEEbvvFot1lAcsJ
    lAMKJKvGFGsqMlvk
    • Double-check that everything connected to the motherboard as shown in the previous steps has been removed.

    • Carefully remove the motherboard and flip it over.

  8. fH3VBRHQrss1HDEw
    fH3VBRHQrss1HDEw
    oUV3XHsH3GHgWwWl
    U5NGTSXyxl4hOrNv
    • Locate the RAM.

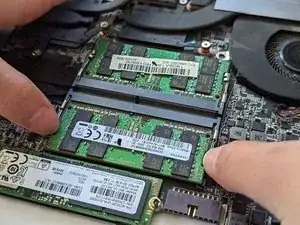
    • Carefully pull apart the silver arms holding the RAM down, and the RAM should pop up.

    • Pull the RAM out.

    • When inserting the new RAM, it will snap into place.

Conclusion

To reassemble your device, follow these instructions in reverse order.

Annie Lin

Member since: 23/08/22

265 Reputation

0 comments