Introduction
If you have a Logitech M220/M221 keyboard and mouse with nano receiver and the left mouse button is not responding properly, this may be a solution.
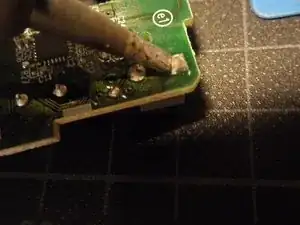
The cause of the problem is that the solder joint of the left mouse button (microswitch) is not making proper contact with the board on which it is soldered. By resoldering the solder joint, the button will work again like new.
Another cause is the microswitch is faulty and needs to be replaced. For this, you'll require a desoldering sucker & soldering iron to remove the solder, before unmounting the faulty microswitch.
-
-
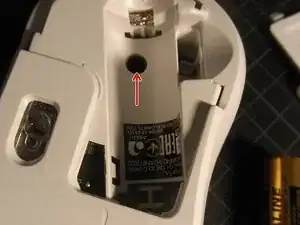
Remove battery cap and 1.5V AA battery on the underside of the mouse.
-
The black spot is a Phillips cheese head screw. Remove the screw (anti-clockwise).
-
Note: Do not lose the small screw.
-
-
-
Now turn over the mouse, and gently move the top-half of the mouse towards you, with a little wiggle.
-
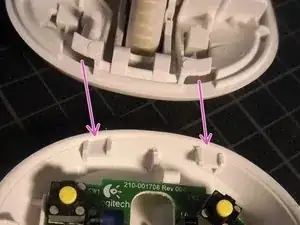
The result should be that the cover of the mouse gives room, and you can take off the cover of the mouse (with the wheel).
-
Here you can see the lips on the wheel side that should slide off the protrusions on the bottom side.
-
-
-
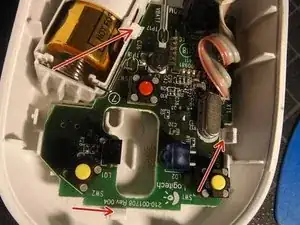
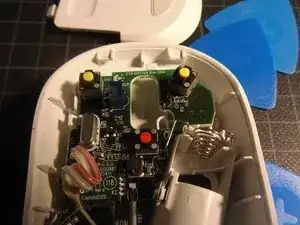
The PCB inside the mouse is held in place with 3 clips. The easiest way to hold these back is with a set of picks. I put a pick on the bottom and the right side and was able to wiggle the PCB out of its position, along with the two battery springs.
-
Be careful with the battery springs which are attached to the PCB. Make sure they do not get bent or are left in the bottom plastic housing.
-
With the mouse disassembled, you can clean the plastic mouse housing with 70% isopropyl alcohol or an alcohol wet wipe.
-
-
-
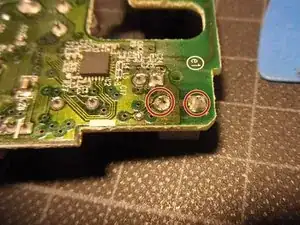
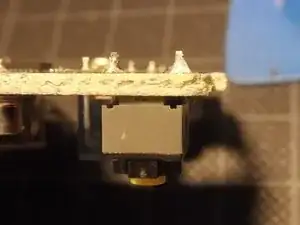
Now that the PCB is loose from the bottom plastic of the mouse, you can check the contacts of the microswitches.
-
I noticed discoloring of the solder, and the microswitch seemed to wiggle a bit.
-
-
-
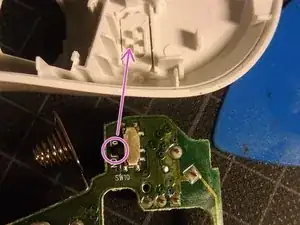
When pushing the PCB back into the bottom part of the mouse, make sure the plastic on/off slide button of the mouse is aligned with the tiny handle of the slide switch on PCB.
-
-
-
Now with the PCB reinserted in the bottom of the mouse, reinsert the battery before trying to push the cover on top, to make sure the mouse is in working order. You can press the switches and move the mouse to see if everything is OK.
-
To reassemble your device, follow these instructions in reverse order.

5 comments
I'm looking for replacement switches for pebble mice. I have 2 M355s with failing switches. Lube did not help and made 1 of the switches stop returning all the way from the down position. So I'd just like to replace the switches because they are otherwise great mice.
Ed Pike -
Try this: 6mm x 6mm x 4.3mm (height) 2-pin microswitch. Check Reviews section for photos.
I have had 3 M330 silent mouse with failing left switches. However, I was able to recover them by disassembly, cleaning with alcohol and adding a tiny bit of oil /wd40. This video demonstrates. It fixed 2 of the mice and improved the 3rd.
In my case the left click didn't work any more so I removed the left click switch and moved the richt click switch in its place to make it mostly usable until the replacement switch will arrive. In my case a right click can be had with a left click when also pressing a modifier key (ctrl in my case on MacOS). Thank you johan for the tutorial and Butterflybug for the link to the appropriate switches.
Fabian -