Introduction
Lenovo Yoga 710-11ISK Hinge Replacement Guide
The Lenovo Yoga 710-11ISK is a versatile 2-in-1 device, but over time, its hinges can wear out or become damaged, leading to issues with the screen's stability and movement. If you're experiencing a wobbly or broken hinge, this guide will walk you through the steps to replacing it and restoring the smooth functionality of your device.
Advanced skills like soldering are required for this repair, so, remember to wear gloves to protect yourself and work on the hinge replacement in a cleared/clean space.
With the right tools and a little patience, you can successfully replace the hinges and bring your Lenovo Yoga 710-11ISK back to perfect working order. Let’s get started!
-
-
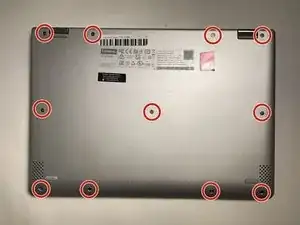
Insert an opening tool between the bottom panel and chassis, then pry around the entire perimeter until the five clips detach, releasing the bottom panel.
-
-
-
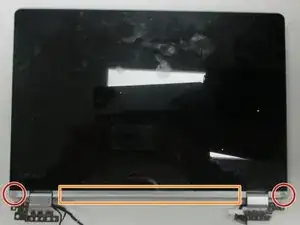
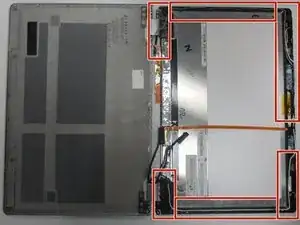
Wedge an opening tool between the display and display housing, then slide the opening tool around the perimeter of the display while gently prying until the display releases.
-
Remove the screw covers located near the hinges on the display side using an opening tool.
-
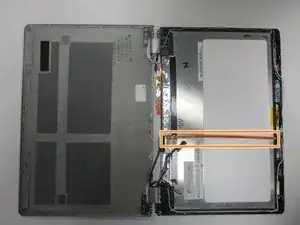
Remove the cover panel between the screw covers using an opening tool.
-
-
-
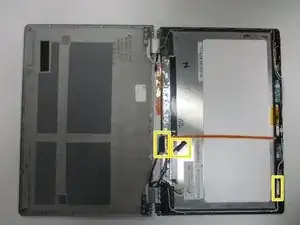
Remove the screws securing the hinge brackets with a Phillips #000 screwdriver.
-
Remove the plastic cover that holds the wires in place.
-
-
-
Disconnect the black and white wires from the sides of the display.
-
Disconnect the orange ribbon cable.
-
Remove the tape, covers, and stickers that hold in the components.
-
-
-
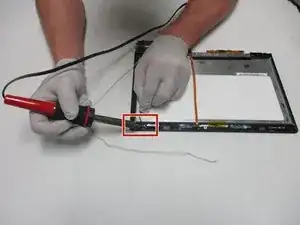
Use a soldering iron to disconnect the ends of both wires that are embedded into the display.
-
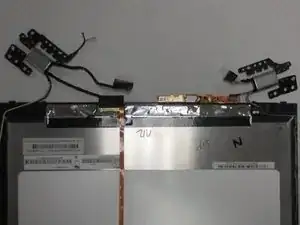
Remove the hinges and their components from the computer.
-


To reassemble your device, follow these instructions in reverse order.