Introduction

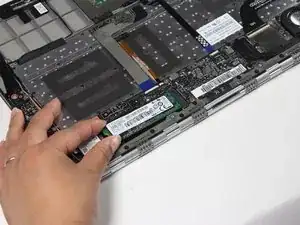
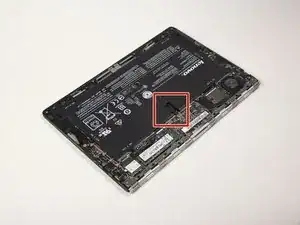
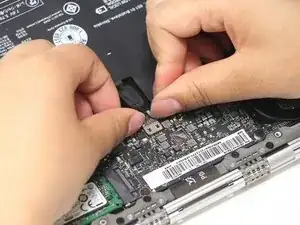
This guide will show you how to remove the SSD of the Lenovo Yoga 3 Pro. As an extra precaution, the battery should be removed first before proceeding with the rest of the device.

  1. eVaKTdXGITPDXfTY
    eVaKTdXGITPDXfTY
    yLD6nALJ5LiWJXYL
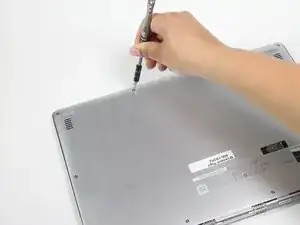
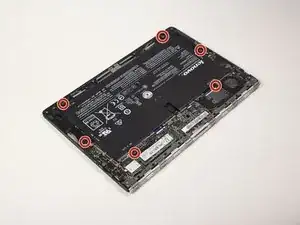
    • Flip the laptop so that the back panel is facing up.

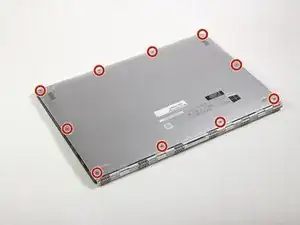
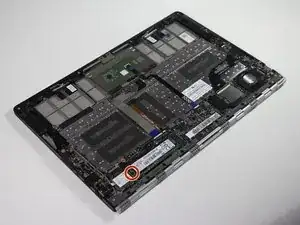
    • Remove the ten 4.0mm T6 Torx screws from the back of the laptop.

  2. J3VTIOT1vk5MoObo
    • Gently lift the back cover off of the laptop.

  3. RF1HvPGS1ljZncj1
    RF1HvPGS1ljZncj1
    lqdw3JaUeU1LAfWc
    • Push the black battery cable towards the battery to disconnect it.

  4. Wq2WfDWgOSHwMN1Y
    Wq2WfDWgOSHwMN1Y
    4Zk11VencFQOWo4M
    • Remove the six #0 3.8mm Phillips screws from the battery.

  5. lNfaglUE2Bu34Efb
    • Gently lift the battery out of the laptop chassis.

  6. nXTUPxpTyKVeMoCY
    nXTUPxpTyKVeMoCY
    EqmbeMAgeodjyJZ1
    • Remove the one #0 2.9mm Phillips screw from the SSD.

    This is not necessary just to replace the screen. None of this is - only the battery for safety, and the LCD cable.

    Debi Wray -

  7. XU6HQ1Tqwu2ESeIX
    • Gently lift and wiggle the SSD side to side to remove it from the laptop chassis.

Conclusion

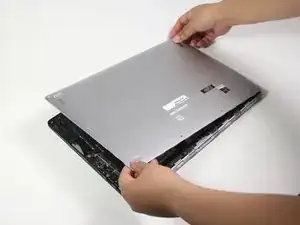
To reassemble your device, follow these instructions in reverse order.

Nathan Lui

Member since: 10/04/17

839 Reputation

3 comments

For my Yoga 900 I needed a T5 Torx screw driver. Otherwise spot on.

Dan Benze -

thanks for the info, what about the data from the original drive??

Jos Chan -

Why did you remove the battery? Was it necessary?

Chris Horsfall -