Introduction
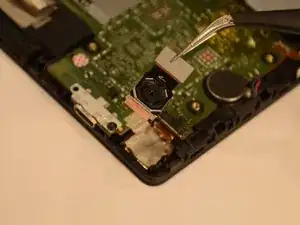
If the rear camera is resulting in poor-quality images or isn't capturing pictures correctly, it may be time to replace it. This guide will be useful for the replacement of the rear camera on a Lenovo Tab 4 TB8504F.
The rear camera is used to capture photos and videos in incredible quality and detail. A rear camera that needs to be replaced will produce blurry, low-quality, or blacked-out images/videos.
Before using this guide, be sure your camera lens is clean and attempt to take a picture. If the picture is still blurry, low-quality, or blacked out, the camera may not be working properly.
In a few simple steps, the rear camera can easily be replaced so your pictures and videos can be clear and high quality once again. Be sure to have the proper tools that are listed in this guide, follow the steps directly, and take your time.
Before you begin, your device will need to be powered off and disconnected from any cords (like chargers and headphones).
Step 4 requires you to be gentle with the battery. If at any point the battery is damaged, your tablet will cease to turn on.
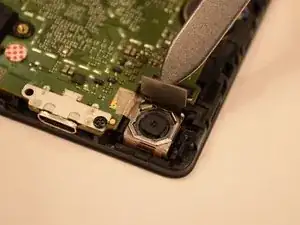
After Step 5, you will place the new rear camera in and follow the steps in reverse starting from Step 5 to reassemble your device.
-
-
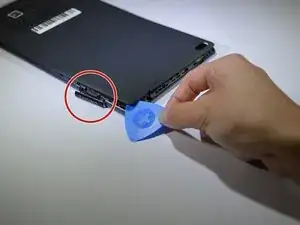
Start at the microSD slot.
-
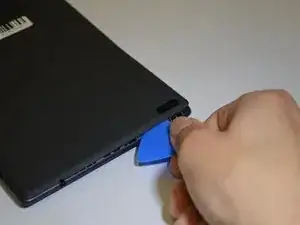
Use the opening pick to slide underneath the back cover of the tablet.
-
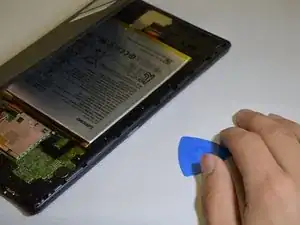
Slide the opening pick around the tablet until the back cover is off.
-
-
-
Remove yellow tape.
-
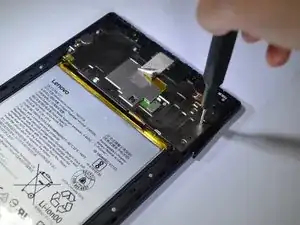
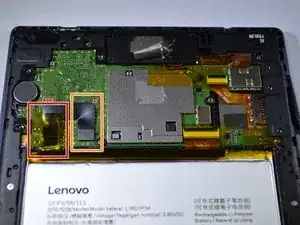
Use a spudger or plastic opening tool to remove the battery's ribbon cable from the motherboard.
-
-
-
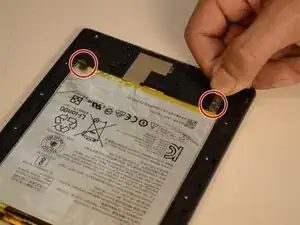
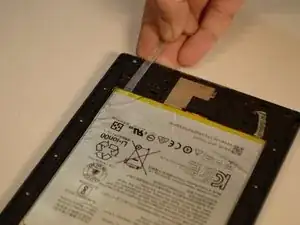
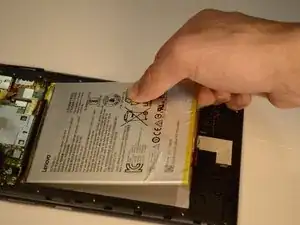
Gently pull on the two stretch release adhesive strips. Do not pull up, pull away from battery.
-
Once the tabs are off, lift the battery up from the frame.
-


To reassemble your device, follow these instructions in reverse order.
