Introduction
In today’s standards, 8GB of RAM is starting to feel limited, especially when it comes to handling multiple tasks or keeping all those Google Chrome tabs open. Many new computers still come with only 8GB by default, and in some cases, you may even have to pay a premium to upgrade to 16 or 32 GB straight from the factory.
However, with the current prices of RAM, you may be inclined to buy and do it yourself to save up some cash and add that special touch to your device.
In this guide, you'll (hopefully) learn how to do exactly that.
-
-
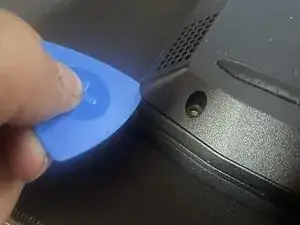
Using an openning pick or just any credit card or something like it try to open get an openning. In this case going at an almost 45º angle on the corners or the back side proved the easiest for me.
-
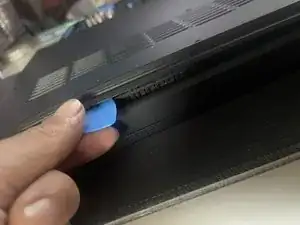
After you have an openning using another openning pick or the same slide along the borders until the back pannel is loose and then remove it
-
-
-
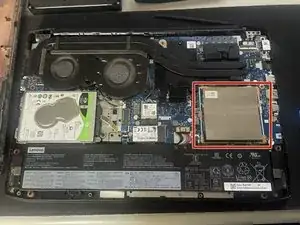
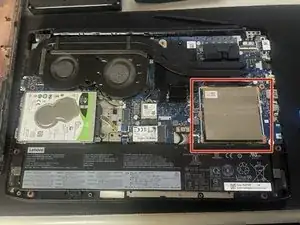
When you open the laptop you'll be able to see what makes all the magic possible and also a grey square where the RAM sticks hide.
-
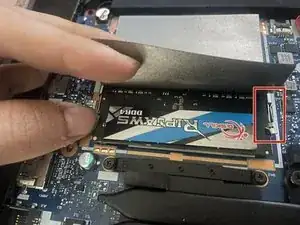
Pull the tape up, without using much force, and you'll have access to the RAM sticks. If you are upgrading and you only have 1 stick, perfect move on to step 5 otherwise on to the next step you go.
-
-
-
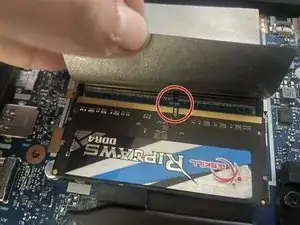
To remove the RAM you'll have to open the retaining latches. Using your finger just push it to the side and after you do it on both sides the ram just pops up and you can remove it.
-
-
-
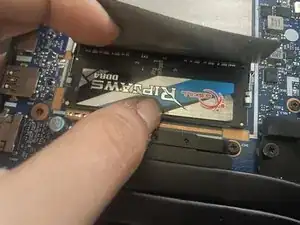
To add a new RAM stick you have to first align the notch on the RAM with the one on the slot on the motherboard. After that insert it at an angle like it was when the other one popped up and just push it down nice and easy as well as the tape
-


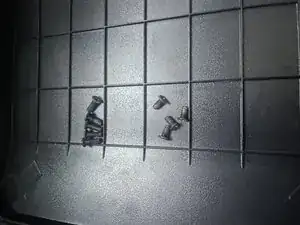


To finish it all off put the cover on, making sure you push it down so it clicks and is properly closed, add the screws again and you're done.