Introduction
These days, aside from high-end models, most computers come with relatively low storage capacity (typically 256GB or 512GB) which can quickly fill up due to the large space requirements of modern programs and games. While SSDs are getting cheaper and offer faster performance, sometimes an HDD can still be a practical choice for additional storage, especially if you have one available already. Although some newer laptops no longer support HDDs, the IdeaPad Gaming 3 15ARH-334 still has space for one and even includes the necessary adapter.
In this guide, you'll (hopefully) learn how to add an HDD step-by-step.
-
-
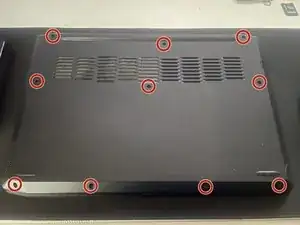
Using an openning pick or just any credit card or something like it try to open get an openning. In this case going at an almost 45º angle on the corners or the back side proved the easiest for me.
-
After you have an openning using another openning pick or the same slide along the borders until the back pannel is loose and then remove it
-
-
-
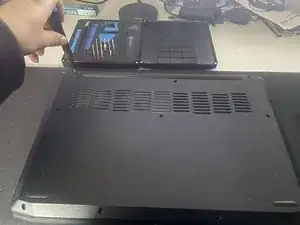
When you open the laptop you'll be able to see an empty section on the left side, that is where you are gonna put your new HDD. If you bought the laptop new you should have the adapter of the second photo.
-
-
-
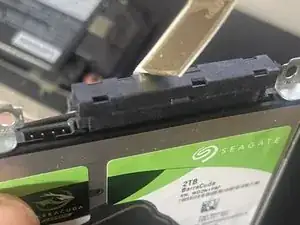
Screw the HDD into the adapter case using the screws provided with the adapter making sure the disk faces the right way or else you may just find yourself looking for the ports that are nowhere to be seen.
-
Align the connectors on the adapter to the ones on the disk
-
-
-
Align the holes on the adapter with the ones in the picture and the disk should fall right into his place allowing you to mount the disk and not have to worry about it dancing inside the laptop later on.
-
-
-
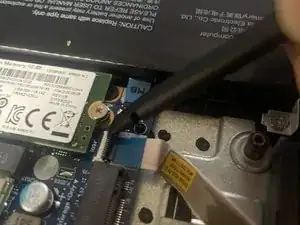
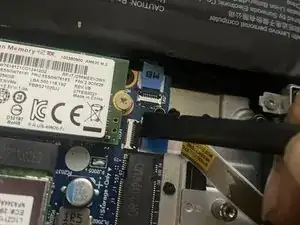
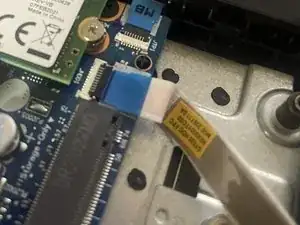
Using the spudger open the clip and put the tape connector inside. When you close it double check that it is still in place or it may not connect.
-


To finish it all off put the cover on, making sure you push it down so it clicks and is properly closed, add the screws again and you're done.