
Introduction
The Wi-Fi card, or wireless module, is what makes the laptop connect to a wireless network connection. A faulty Wi-Fi card can cause a unstable internet connection which means it needs to be replaced. Following this guide will show you how to replace a faulty Wi-Fi card (or upgrade to a newer one). In this guide you will be needing a Phillips #0 screwdriver, a plastic pick and a spudger.
This will take only a few minutes to complete and make sure to save any unfinished work as you will need to power down the laptop before you can begin.
Parts
-
-
Place the device on a flat surface with the lower case facing up.
-
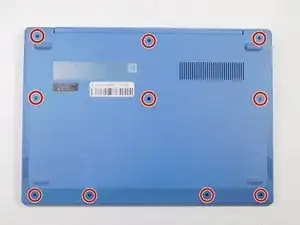
Use a Phillips #0 screwdriver to remove the ten 3 mm Phillip screws that secure the lower case.
-
-
-
Insert an opening tool in the gap between the lower case and chassis.
-
Pry around the entire perimeter of the lower case until it fully releases.
-
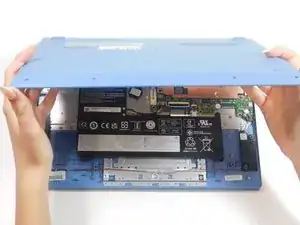
Remove the lower case.
-
-
-
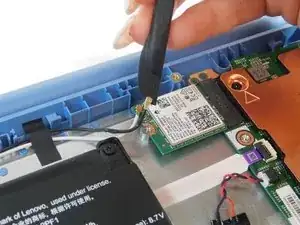
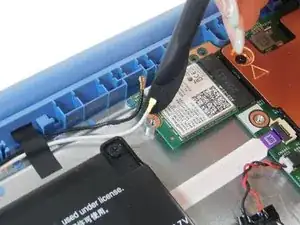
Use a plastic spudger to gently lift and disconnect the two antenna cables.
-
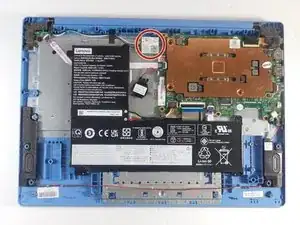
Grip the left edge of the card and pull it directly out of its socket.
-


To reassemble your device, follow the above steps in reverse order.
Take your e-waste to an R2 or e-Stewards certified recycler.