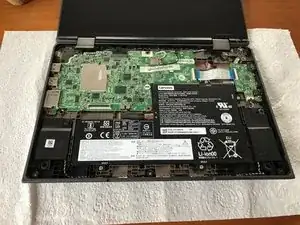
Introduction

  1. VWlApZAAOVumRwnM
    VWlApZAAOVumRwnM
    BF2ttTUrPvoBKhQF
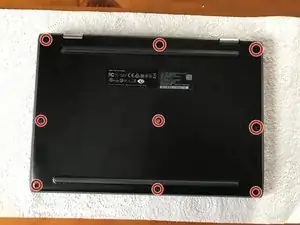
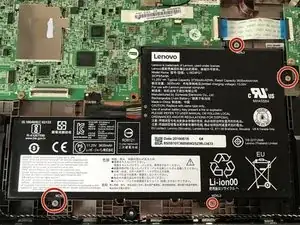
    • Start by removing the 9 bottom screws using a Philips #1 screwdriver and set the screws aside.

  2. JbYvNwRZhU2SXahj
    JbYvNwRZhU2SXahj
    642ugl2CI5UeMqIT
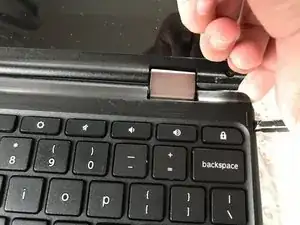
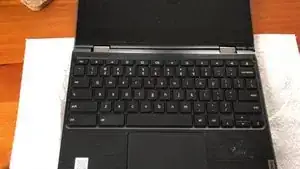
    • Start by lifting the black from the grey with your flathead/Jimmy an lift up. You can then put a opening pick in there to keep it from snapping in again.

    • Now insert your spudger about 1cm in and slide it around all edges of the keyboard listening for the snap of a clip.

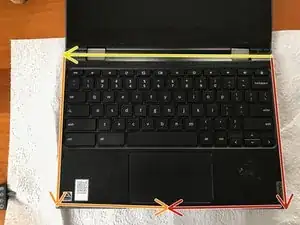
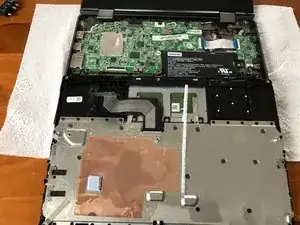
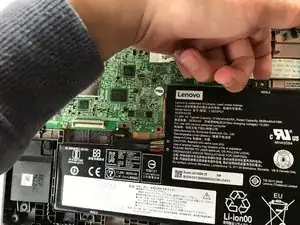
    • You can follow the diagram on the second photo casue that is how i did it but you can do it any way you like.

  3. Now lift the keyboard in the way that is shown in the video and lay it down
    • Now lift the keyboard in the way that is shown in the video and lay it down

    • Be very careful when doing this as there is a risk at ripping the flex cables.

  4. vkkPqEnlJOQUOsZW
    vkkPqEnlJOQUOsZW
    fEP5Y21KZqjFvGMm
    VnSCBEdCZMiVXi32
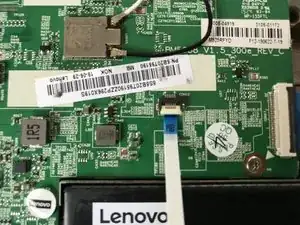
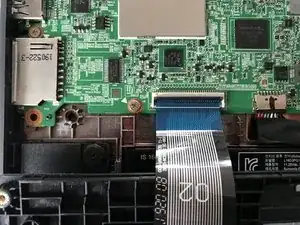
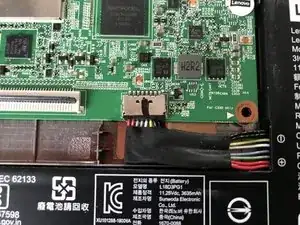
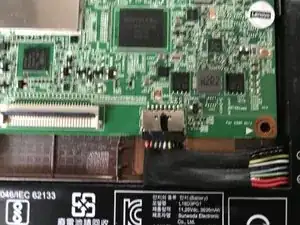
    • Find the white flex cable that runs from the trackpad to the mainboard.

    • Find where the connector is on the mainboard and use your finger to lift up the retention clip.

    • If your fingers are to big to lift up a tiny connector you can try to use a spudger instead.

    • Then pull out the cable.

  5. mpy5vPnkDylc5UPe
    mpy5vPnkDylc5UPe
    Aj1sCKHCBrMgtvin
    Kr5GfQE2OyvrswWr
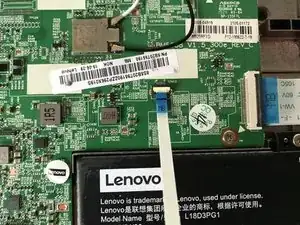
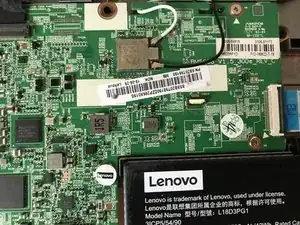
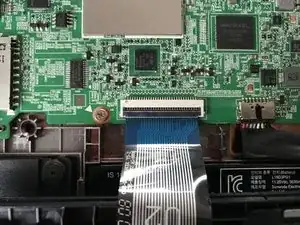
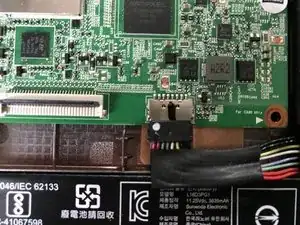
    • Find the larger flex cable that runs from the keyboard to the mainboard.

    • Find where the connector is on the mainboard and use your finger to lift up the retention clip.

    • If your fingers are to big to lift up a tiny connector you can try to use a spudger instead.

    • Then pull out the cable

  6. yWQ4cI6qB1iWvYmN
    yWQ4cI6qB1iWvYmN
    aBH5BEQ1gfgPSxE3
    qrOGs6tibCsONcxX
    • Move the keyboard/trackpad aside

  7. ASnZXVwNcKUGJB5a
    ASnZXVwNcKUGJB5a
    QKWZFPPBE4qMtp4y
    KKqgUBwYOY6Ee4XD
    • Use your fingers or pliers to pull out the battery connector.

    • Do this slowly to avoid breaking the connector or hitting the battery

  8. vcloFACh1NtsgYCR
    vcloFACh1NtsgYCR
    MHKcbNsBSgEjeDN3
    • Undo the 4 battery screws holding the battery in with your Phillips #1 screwdriver.

  9. 21IDVfRYGbEP1cWG
    21IDVfRYGbEP1cWG
    cRB4vxIdPDpAsM1p
    BBRnkSaBnQgmptFT
    • Lift out the battery from the top

  10. PHmetTAllwG5KpbY
    • Boom! Here is your battery.

Conclusion

To reassemble your device, follow these instructions in reverse order.

BeijingCorn

Member since: 25/09/23

206 Reputation

0 comments