
Introduction
Use this guide to replace the control panel in your LG WM3050CW Washing Machine.
The control panel contains the buttons, dials, and control knob to adjust the wash settings. If you have a broken control knob or button, you can access it by following this guide.
Parts
-
-
Turn off the main water supply
-
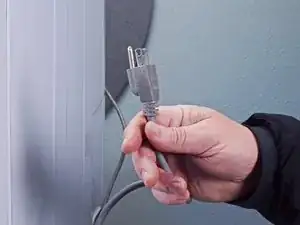
Unplug your washer
-
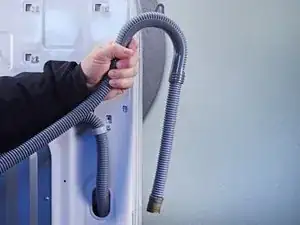
Disconnect all water connections at the rear of your washer
-
-
-
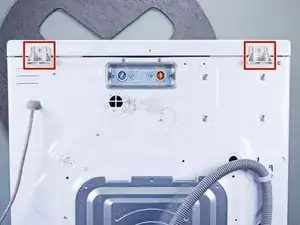
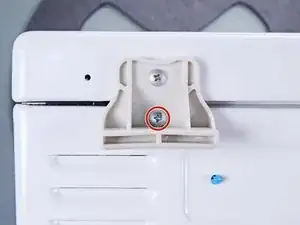
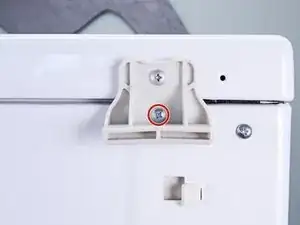
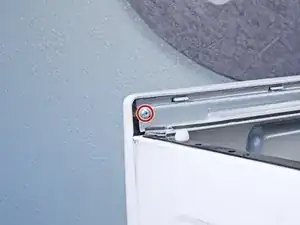
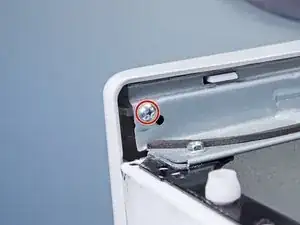
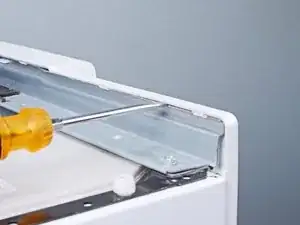
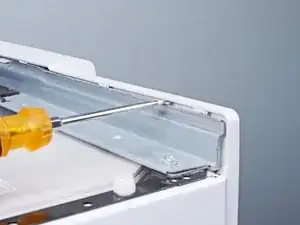
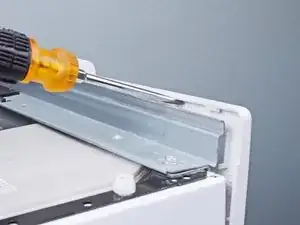
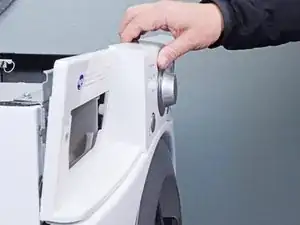
Use a Phillips driver to remove the two bottom 16.5 mm-long screws securing the top panel brackets.
-
-
-
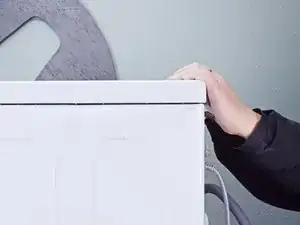
Tilt the top panel upward to completely disconnect it from the chassis.
-
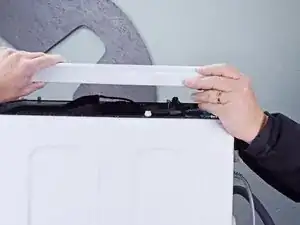
Remove the top panel.
-
-
-
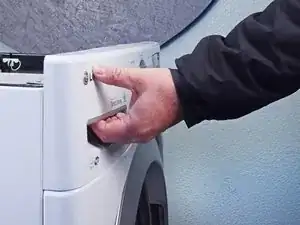
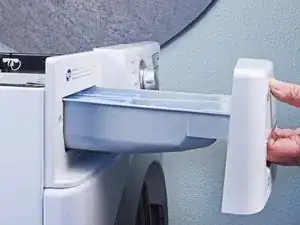
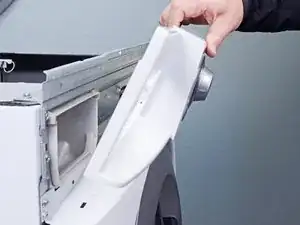
Press down on the "Push" button to disengage the clips securing the detergent drawer.
-
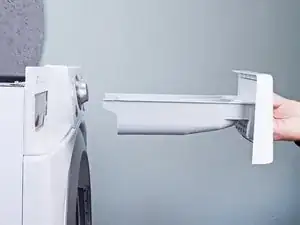
Pull the drawer out of its slot on the chassis and remove it.
-
-
-
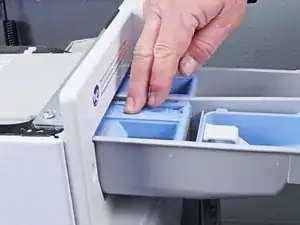
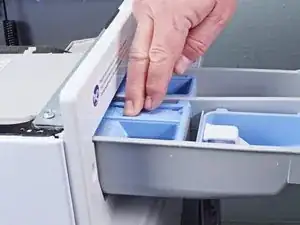
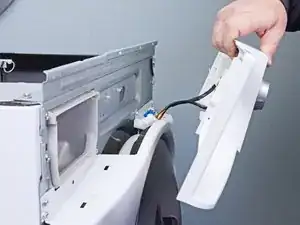
Use a Phillips driver to remove the two 26.3 mm‑long screws securing the detergent dispenser.
-
-
-
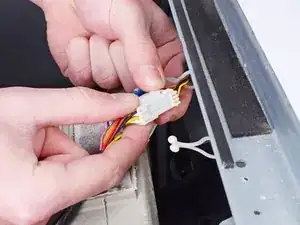
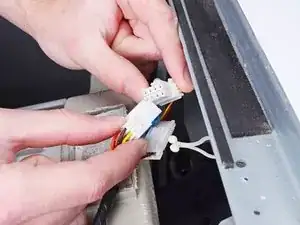
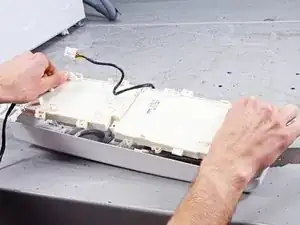
Lift the control panel upward to completely separate it from the chassis.
-
Pull the control panel away from the chassis, making sure to thread the cables through its slot in the chassis.
-
Remove the control panel.
-
-
-
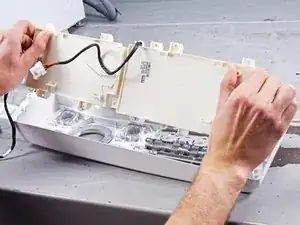
Flip the control panel over.
-
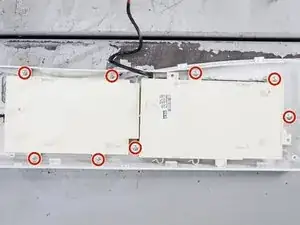
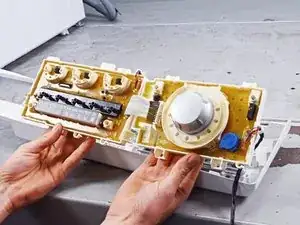
Use a Phillips driver to remove the seven 16.4 mm-long screws securing the control panel board cover.
-


To reassemble your device, follow these instructions in reverse order.
Take your e-waste to an R2 or e-Stewards certified recycler.
Repair didn’t go as planned? Ask our Answers community for help.

2 comments
Thanks for this guide, it looks very easy to follow. I am thinking about replacing my control panel, it works fine except for one annoying problem, the ‘Start’ button is working intermittently. I need to push Start 2 or 3 times before the washer starts. Has anyone seen this? I may just disassemble the washer and see if I can blow out any debris.
Jimjar -
Hello Jimjar! You can take a shot at blowing stuff out, It is probably the switch on the control panel board that is failing. especially if you don't have trouble with any of the other control buttons. So you might want to start by blowing out the start switch if you have a source of compressed air. While you handle these parts especially blowing air on them, make sure to handle them by the edges, and keep yourself grounded or at least touching something that is grounded frequently. Since the boards are encapsulated (note the honey colored material covering the board) to protect against corrosion, replacing components becomes a chore. So your next step will probably be a replacement control panel board if the cleaning doesn't help. There are services that will repair the board as well; haven't looked into relative cost. You can fix it, and that's a lot better than having to spend for another appliance.