
Introduction
LG Neon GT 365 Screen Replacement Guide
Is your LG Neon GT 365 screen cracked, unresponsive, or displaying glitches? If so, you’re not alone. Screen damage is one of the most common phone issues, often caused by accidental drops or impact. This guide is here to help you fix these problems on your own, saving time and money on professional repairs.
By replacing the screen, you'll likely resolve issues such as touch sensitivity problems, display glitches, dead pixels, or complete unresponsiveness. This repair doesn’t require any advanced technical skills like soldering, but you will need basic tools like a small screwdriver, a plastic pry tool, and a replacement screen.
While this repair is straightforward, it’s important to be patient and work carefully to avoid damaging internal components. On average, the process can take around 30 minutes to 1 hour, depending on your experience with phone repairs. Whether you're a first-timer or a seasoned DIY enthusiast, this guide will walk you through each step to ensure a smooth screen replacement. Let's dive in!
-
-
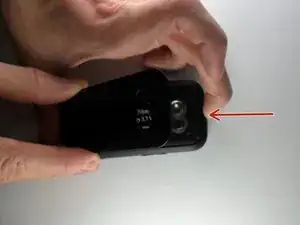
With one hand stabilizing the phone, the other pushes the rectangular button located on the back topside of the phone.
-
-
-
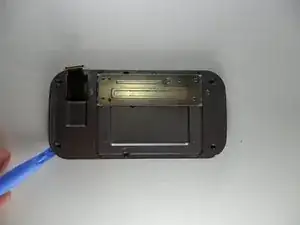
Using the appropriate bit from your 64 bit kit unscrew the yellow circled small black screws securing the back cover and internal components.
-
A screw may be covered by the slide spring. If so, move the slide spring to the side to access the screw.
-
-
-
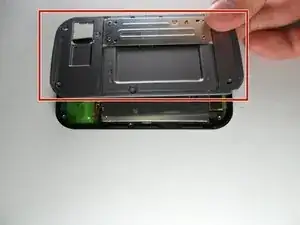
Use the popping iFixit opening tool to go around the seam of the phone and slowly pull off the slide panel, making sure the ribbon connector does not get caught.
-
-
-
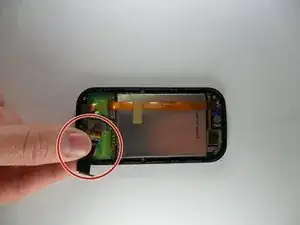
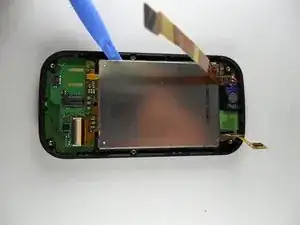
After removing the slide panel the back of the screen will be visible. First, remove the connector ribbon attached near the bottom of the phone. Just like disconnecting the first end of it this end is also removed by popping it off.
-
-
-
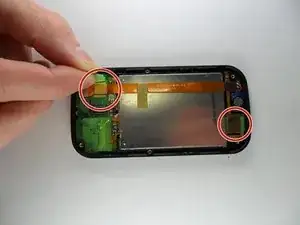
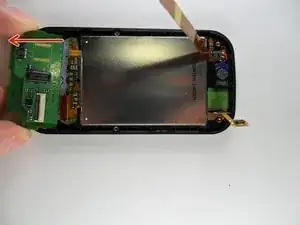
Carefully peel the three pieces of tape of the phone. The first two pieces of tape are green located at the bottom left and bottom right of the phone.
-
-
-
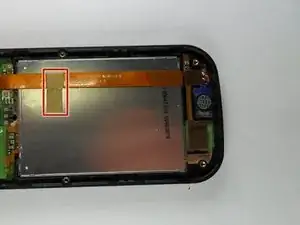
Hold the horizontal copper ribbon down with 2 fingers on each side of the tape.
-
Lastly, carefully peel off the golden piece of tape circled, without ripping or damaging the copper ribbon and across the silver LCD.
-
-
-
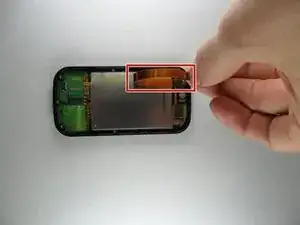
Now, disconnect the copper-colored ribbon. Pop off the ribbon and if it is still attached at the top that's ok.
-
-
-
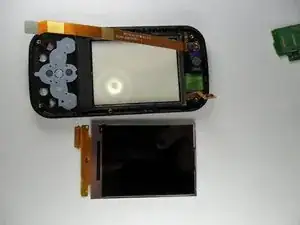
Once the silver LCD has been lifted up slightly slide the bottom half of the green circuit board off the phone by pulling down on it.
-
After the green circuit board is removed you will be able to pop the screen out. Grab a new screen and slide it in to replace it!
-
Follow the instructions in reverse to reassemble the phone with your new screen.
-

To reassemble your device, follow these instructions in reverse.